Sage Intacct
Configuration Guide
Setup time: 10 minutes
Requirements:
- Active Sage Intacct Account
- Active Toric subscription
- Web browser (Chrome, Safari, etc…)
1. Collect Pre-requisite Information from Sage Intacct
1.1 Login to your Sage Intacct application:
1.2 Finding your Company ID:
1.3 Create a Web Services User
- While logged into your Sage Intacct Application, double check the entity level you would like to be linked is selected.
- Navigate to Company > Admin > Web Service Users.
- Click “Add” to create a new Web Services User on the top right of the screen

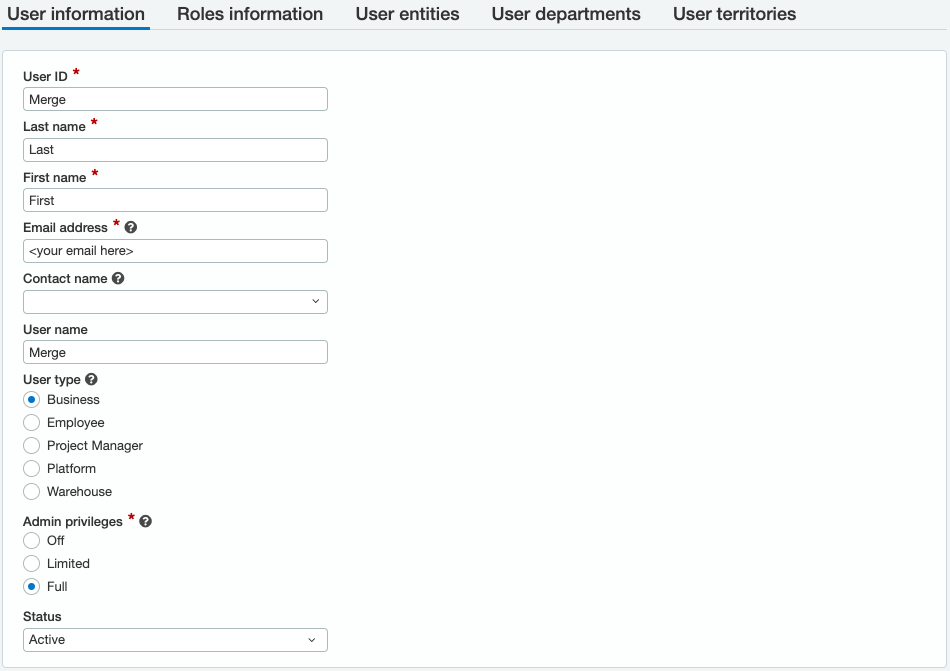
- Populate the User Information form with the below details.
- User ID, First name, and Last name
- These values are important and should be saved remembered for future steps.
- Email address
- Use the email address of the person managing the integration. You will have to access the email address in a later step.
- User type
- Select Business
- Admin privileges
- Select Full
- User ID, First name, and Last name
- Once filled out, click “Save” to finish adding the Web Service User on the top right of the screen
- Please ignore the “charge” warning because it does not apply to the newly created user.
- If at any point, you are prompted to Verify your Identity, please enter your password into the pop-up.
- You will receive a password from the email address entered from Sage Intacct. Please save this password securely for future use.
1.4 Assign Permissions & Role to the Web Services User
- If your Sage Intacct application is a multi-entity organization, ensure the entity you would like to link is selected.
- Navigate to Company > Admin > Roles.
- Select the “Edit” button next to the Web Services User created in "Step 1.3", from above.
- Begin adding a new Role by clicking the "Add" button in the top right of the screen
- Populate a name and description for the Role and click "Save" in the top right of the screen

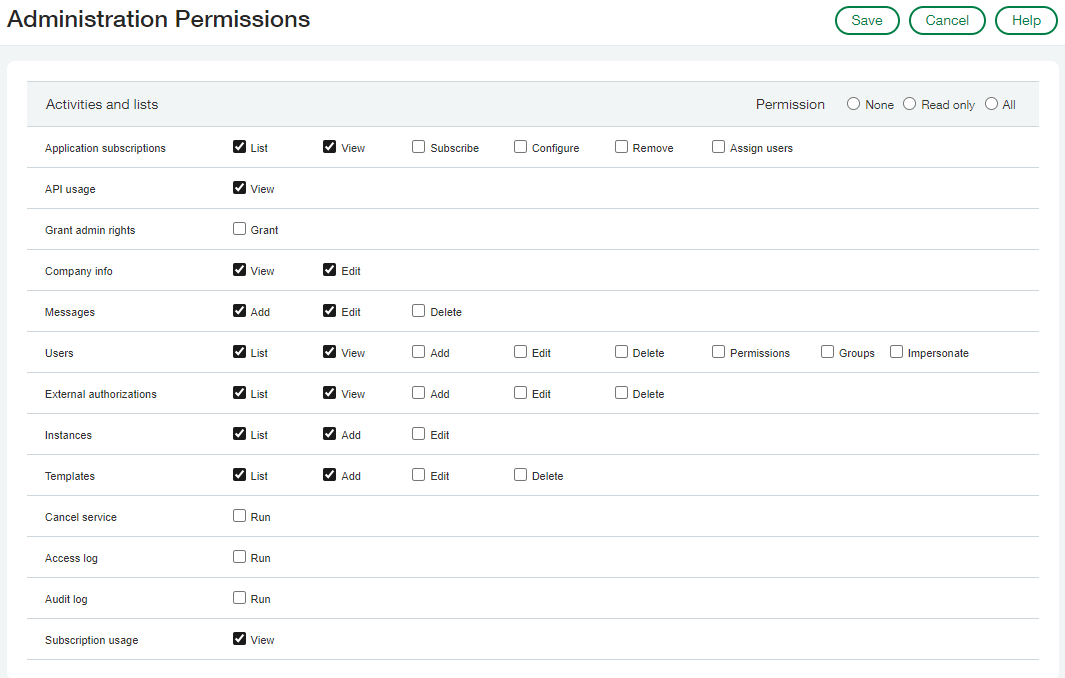
- Once saved, the “Roles Subscriptions” page will appear as shown
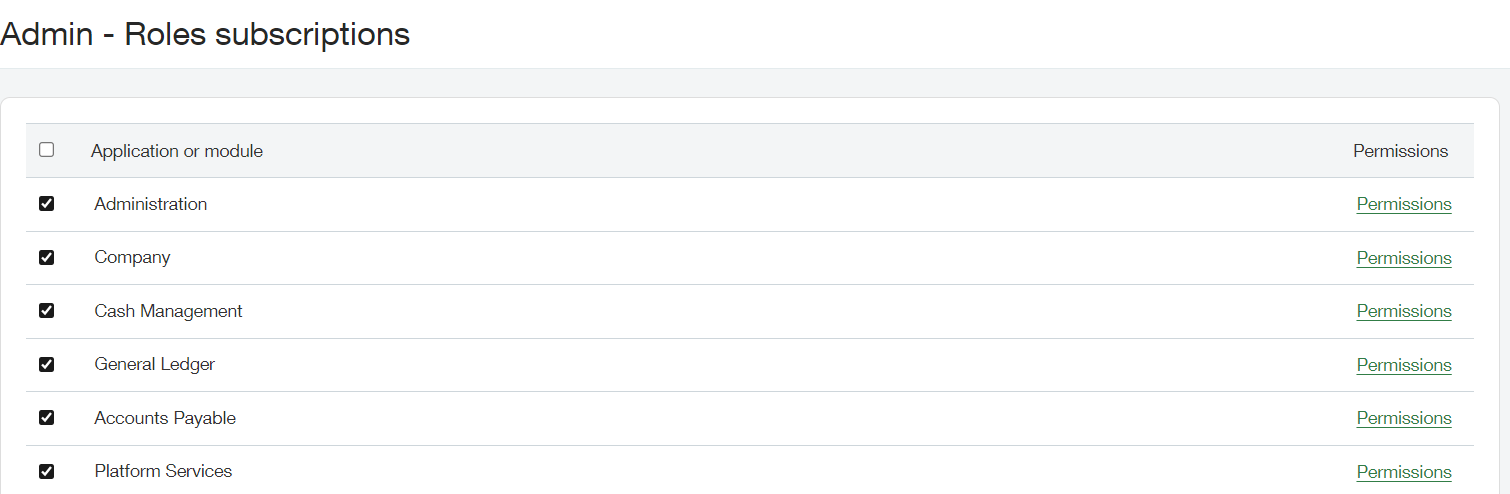
- Click into each Application you’d like to extract data from, and ensure that the “Permissions” is set to “List” or “View”. More details on the data accessible via our Sage Intacct connector can be found in the below Data Access chart below. Please ensure you have the correct permissions set up for the endpoints you need, example below.
- Once all Permissions are set, ensure you click “Save” on the top right hand of the screen.
- Navigate to Company > Admin > Web Services Users.
- Click “Edit” next to the Web Services User created in "Step 1.3", above.
- Under the "Roles Information" tab, add the created Role to the recently created Web Service User.
1.5 Add Toric to Web Services Authorization
- If your Sage Intacct is a multi-entity organization, ensure the “Top-Level” entity is selected like in “Step 1.1”.
- Navigate to Company > Setup > Company.
- Click the “Security” tab and select “Edit” on the top right of the screen.
- Scroll down to “Web Services Authorizations” and select “Add”
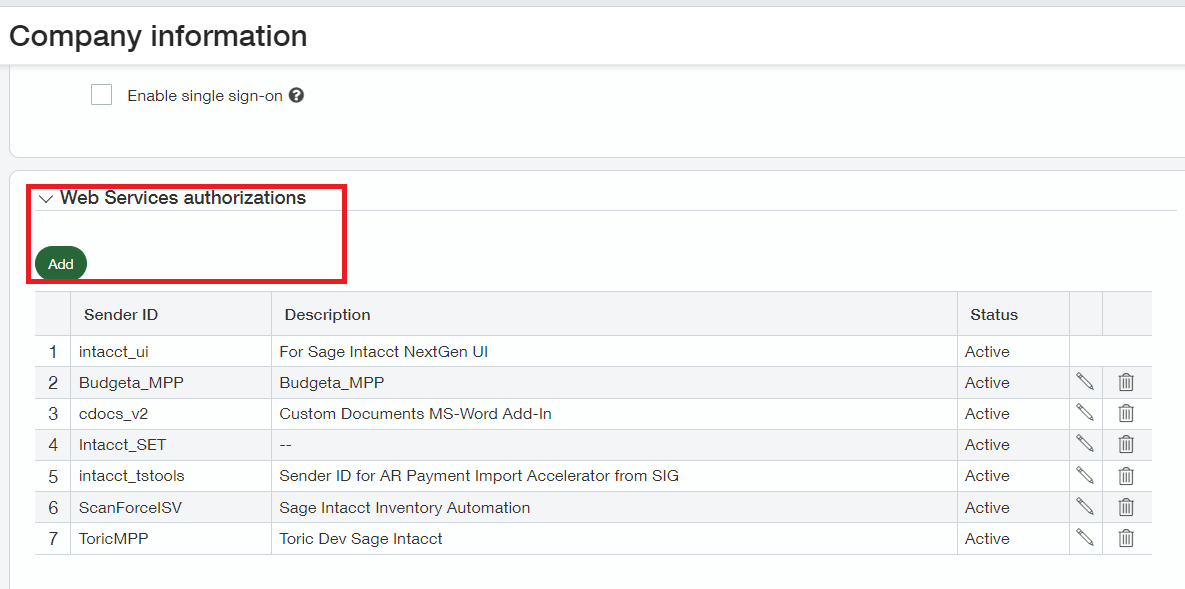
- In the “Web Services Sender Information” pop-up, populate the “Sender ID” with “ToricMPP” with a capital “T” and ensure you click “Save”.
- You should now have all the information and set up required to configure Sage Intacct in Toric.
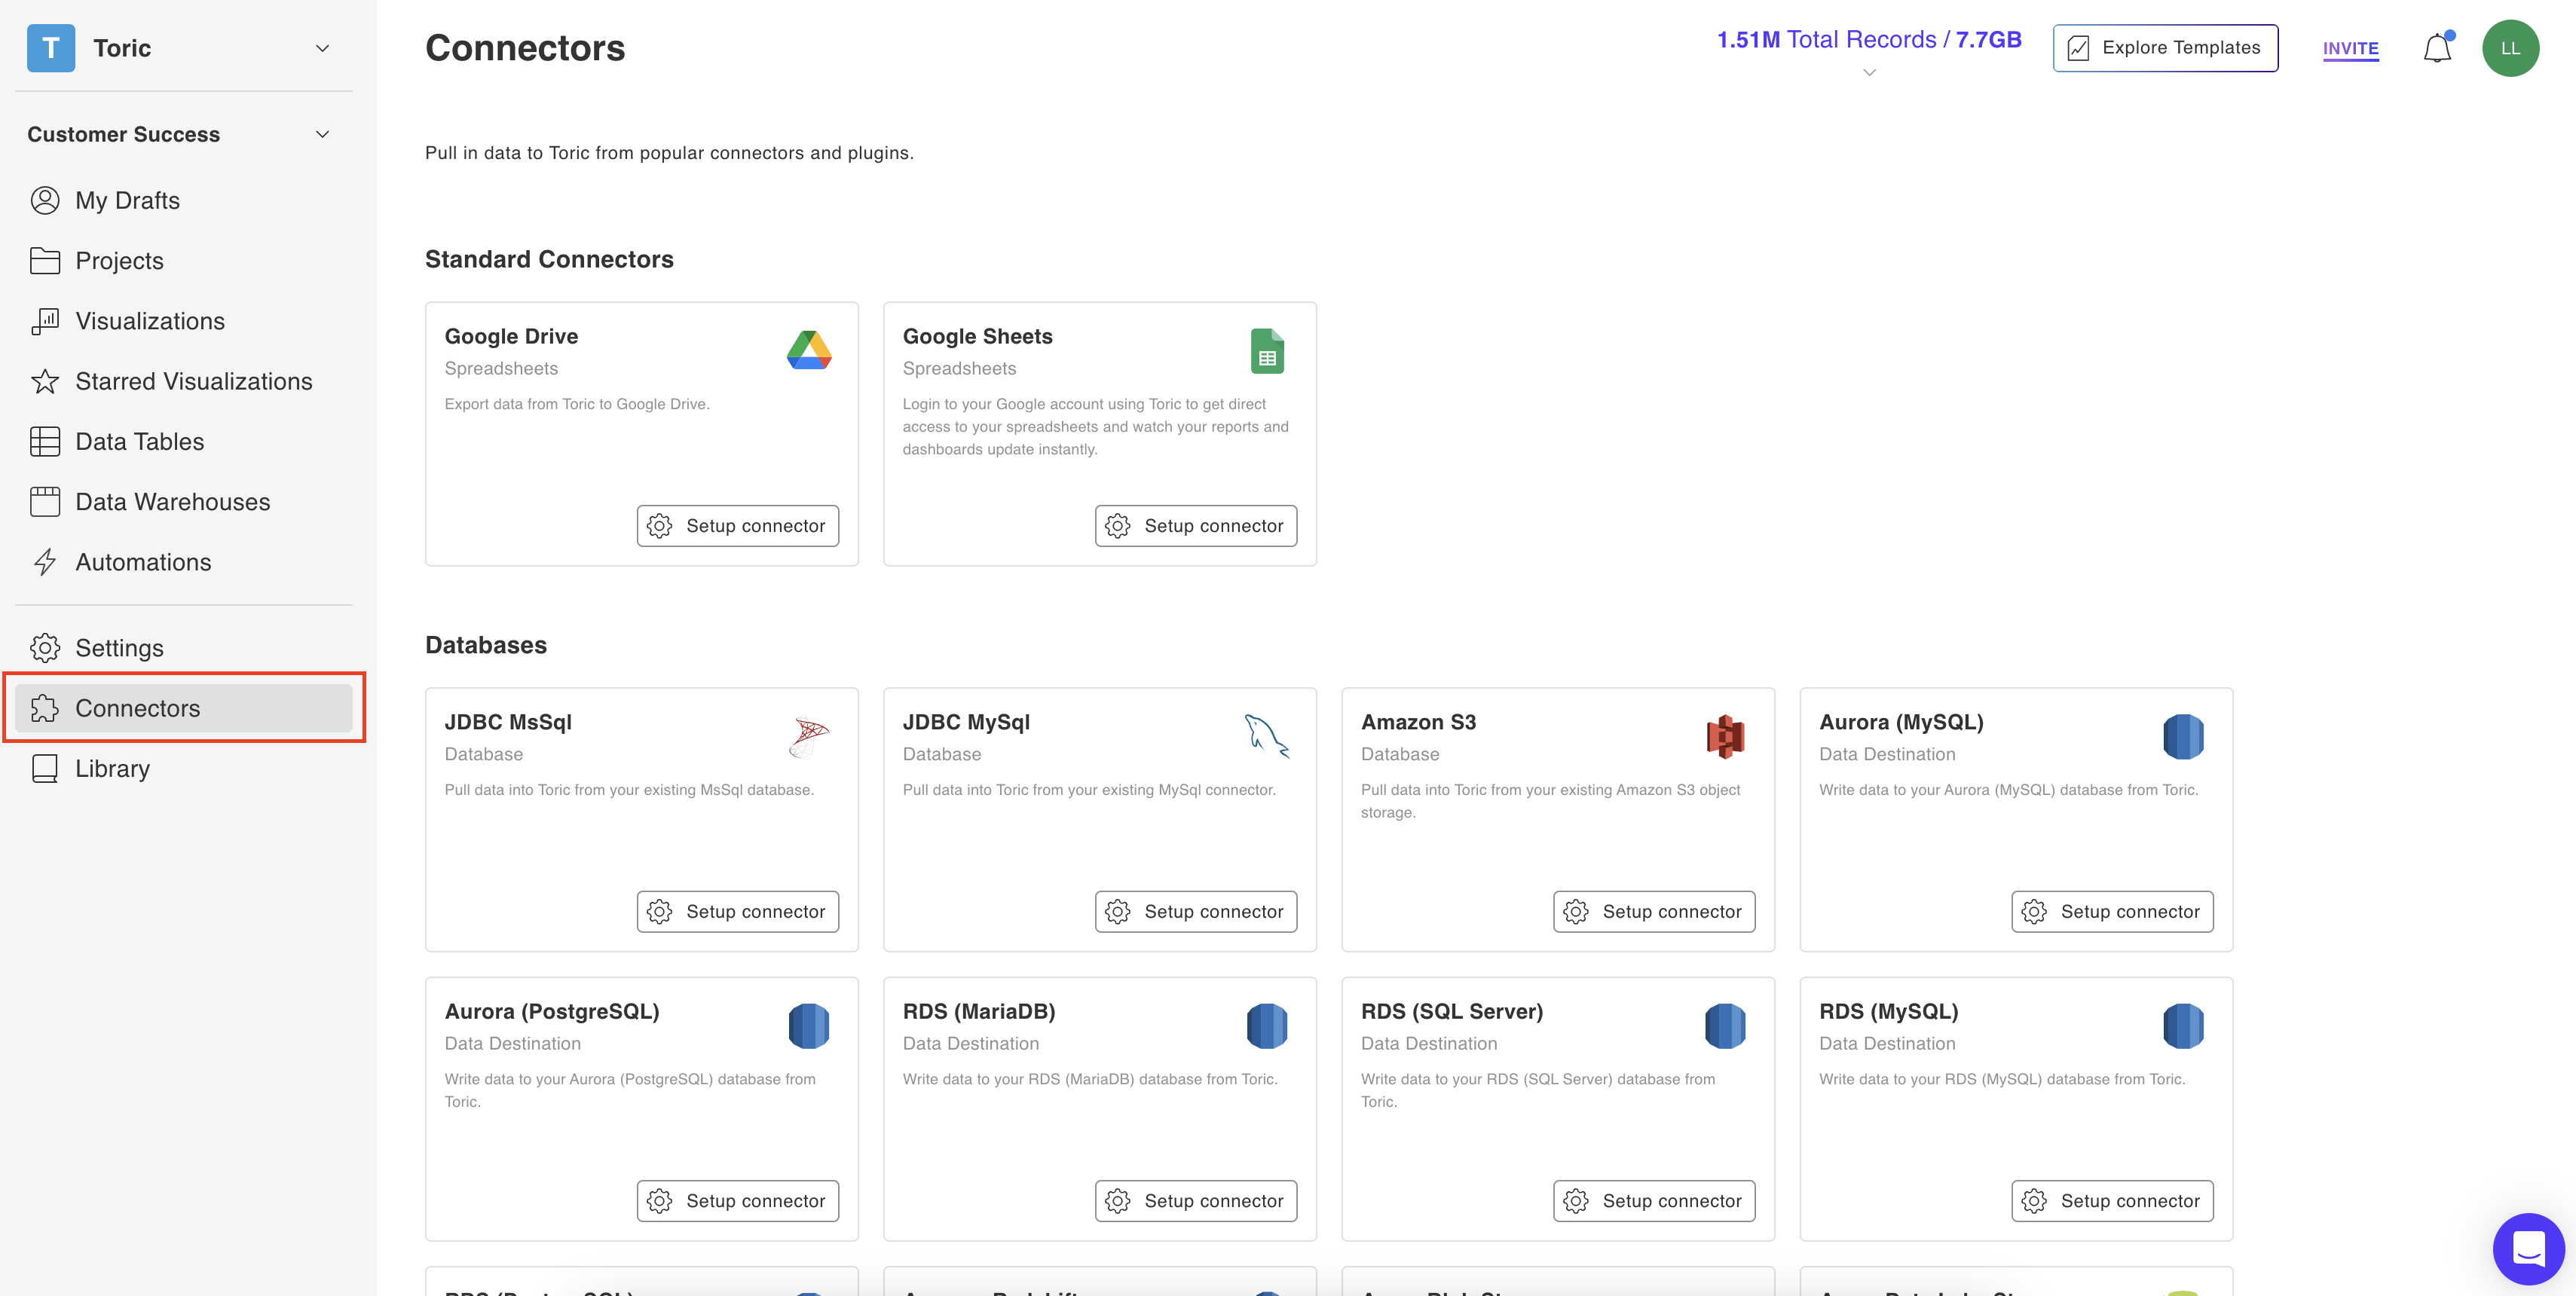
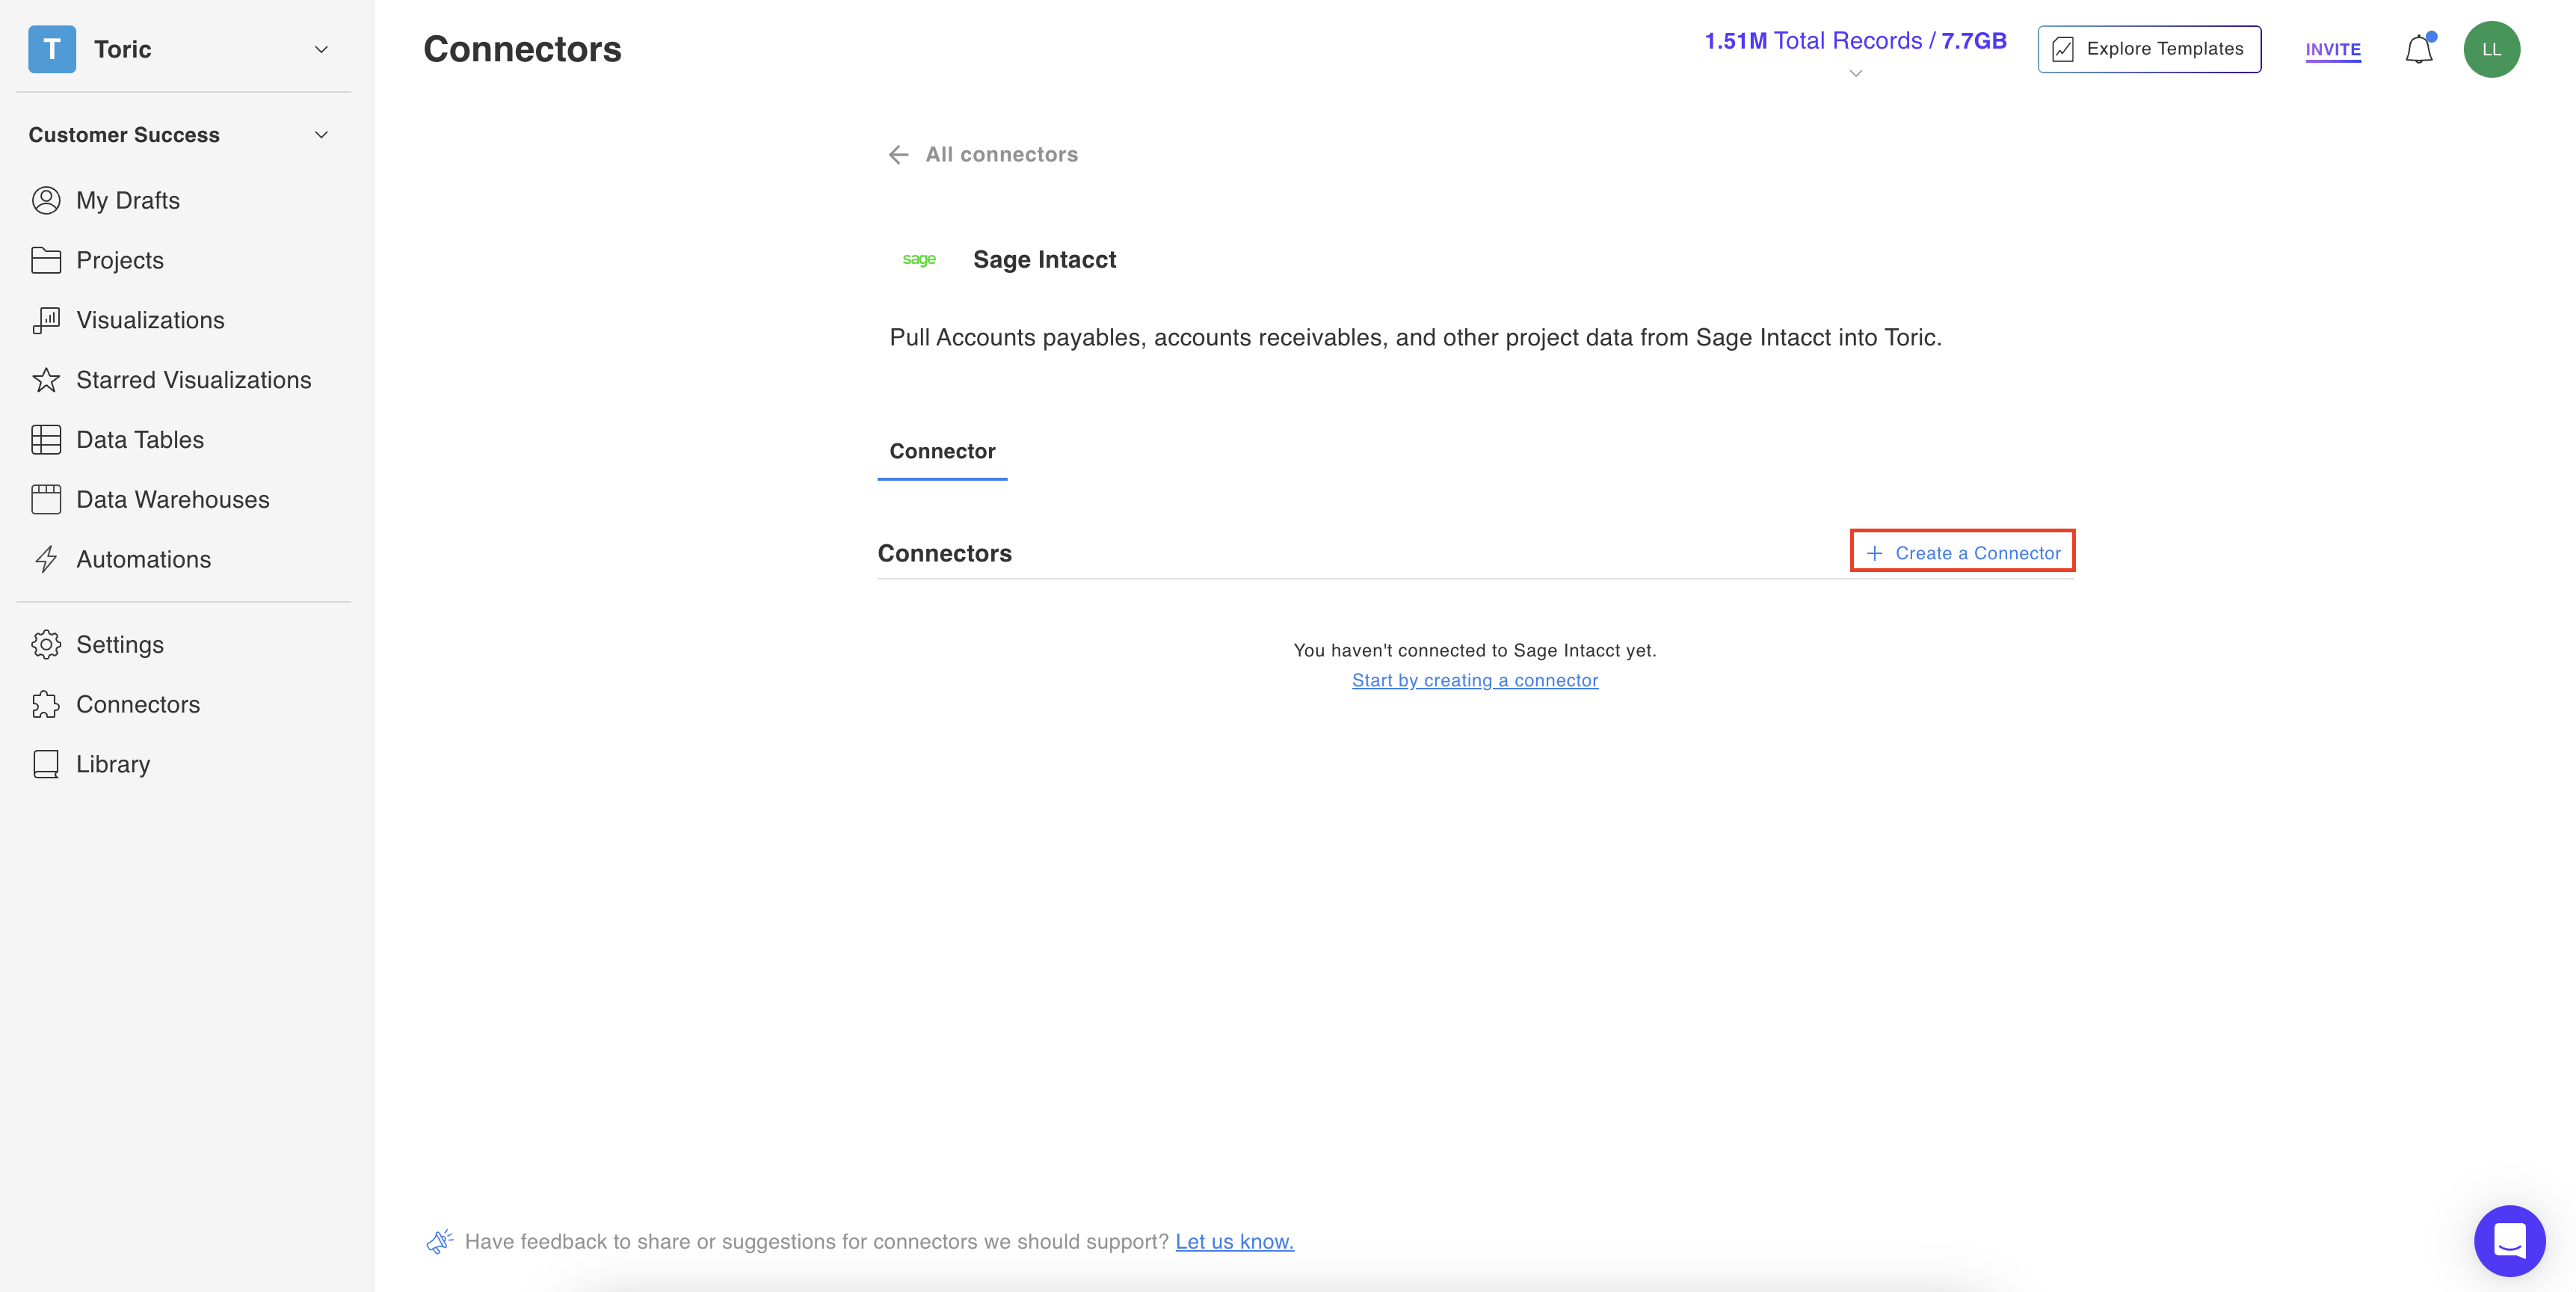
2. Navigate to the Connectors in Toric
2.1 To find connectors in Toric, you must be signed in to your account. On the left side panel of your Workflow, click on "Connectors".
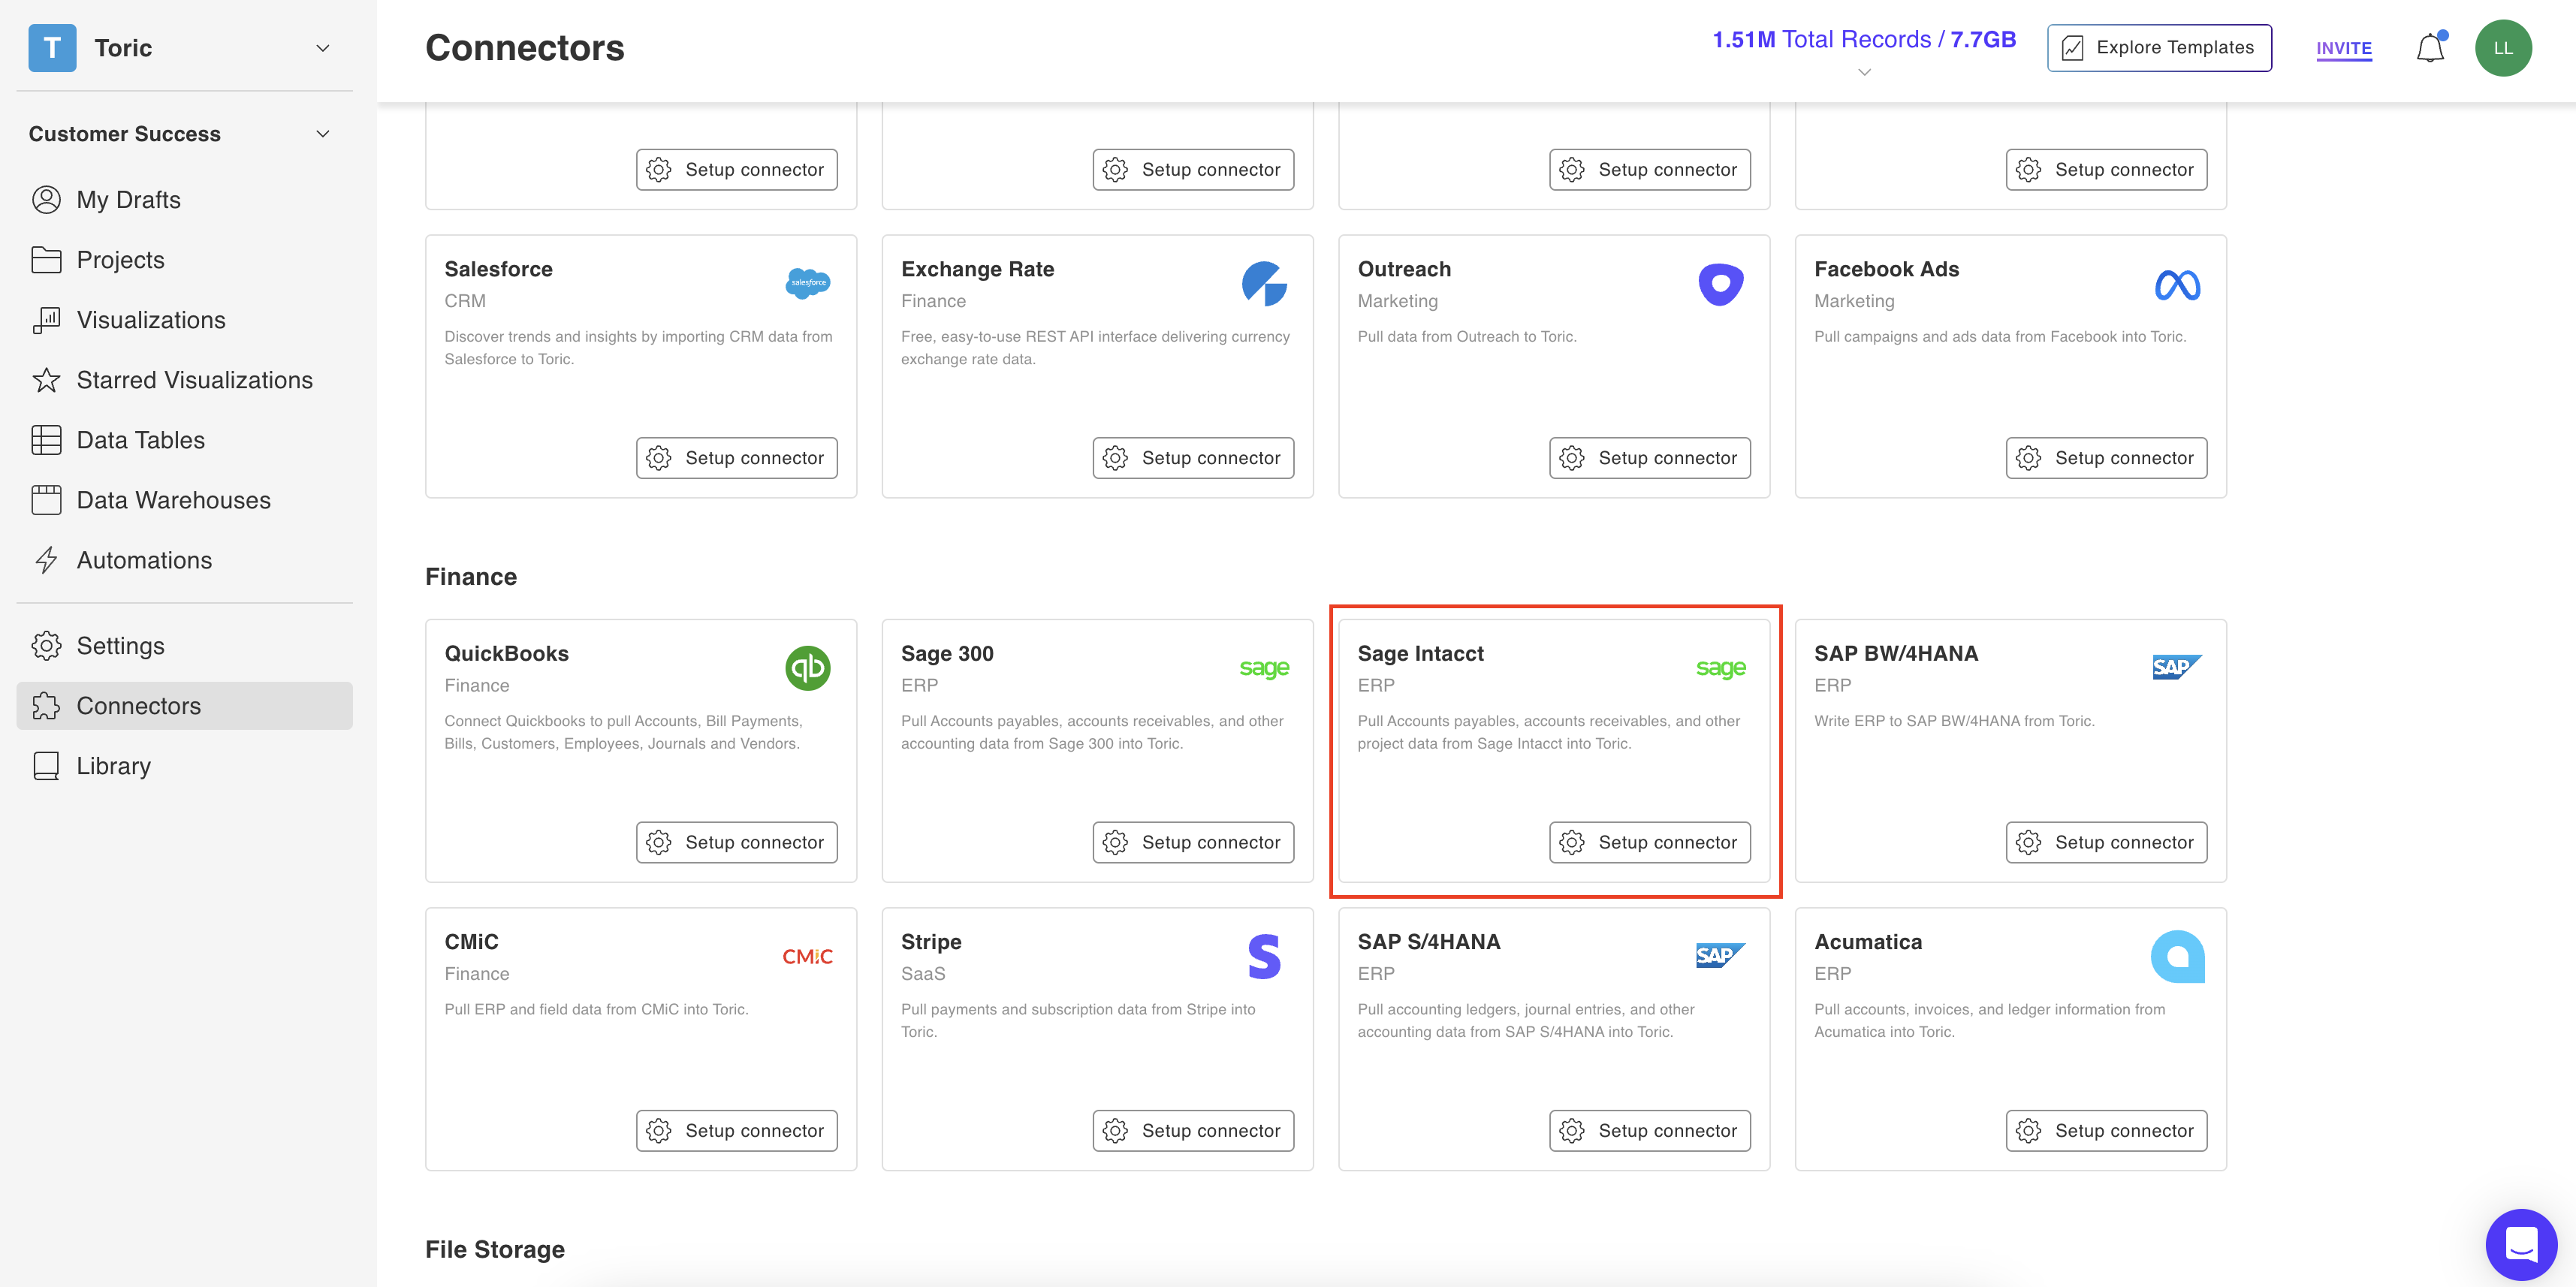
3. Select the Sage Intacct Connector
Under the ‘Finance’ header, navigate to the ‘Sage Intacct’ thumbnail and click on ‘Setup Connector.’
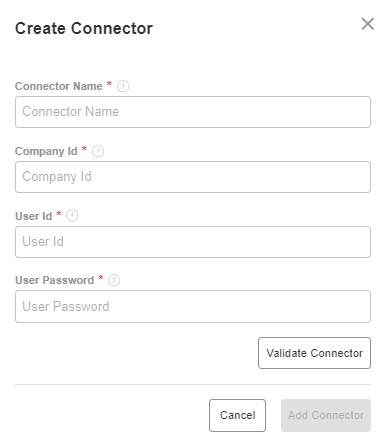
4. Click on ‘Create a Connection’
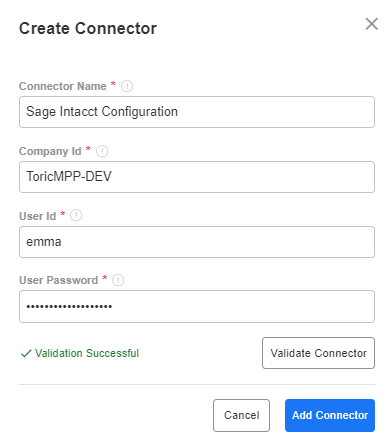
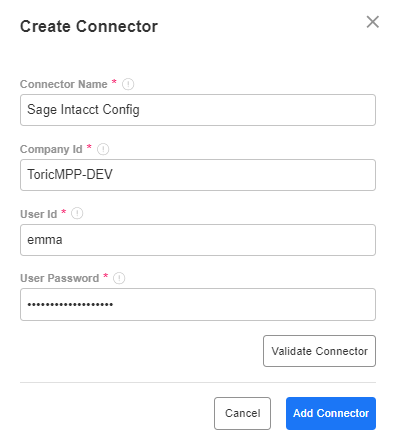
5. Fill in the Credentials
Enter the following information:
- Connector Name - please use a relevant name to your project.
- Company id - this is the ID found in Step 1.2.
- User ID - this is the ID of the Web Services User created in Step 1.3.
- User Password - this is the password Sage Intacct emailed you for creating the Web Services User in Step 1.3.
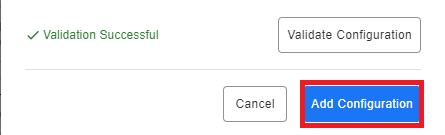
5. Click on Validate Configuration
Now that you have all Configuration details filled in, click on Validate Configuration.
If the information entered is valid, a Validation Successful message will appear.
⇒ Invalid fields will be highlighted in red and a successful validation will show in green.
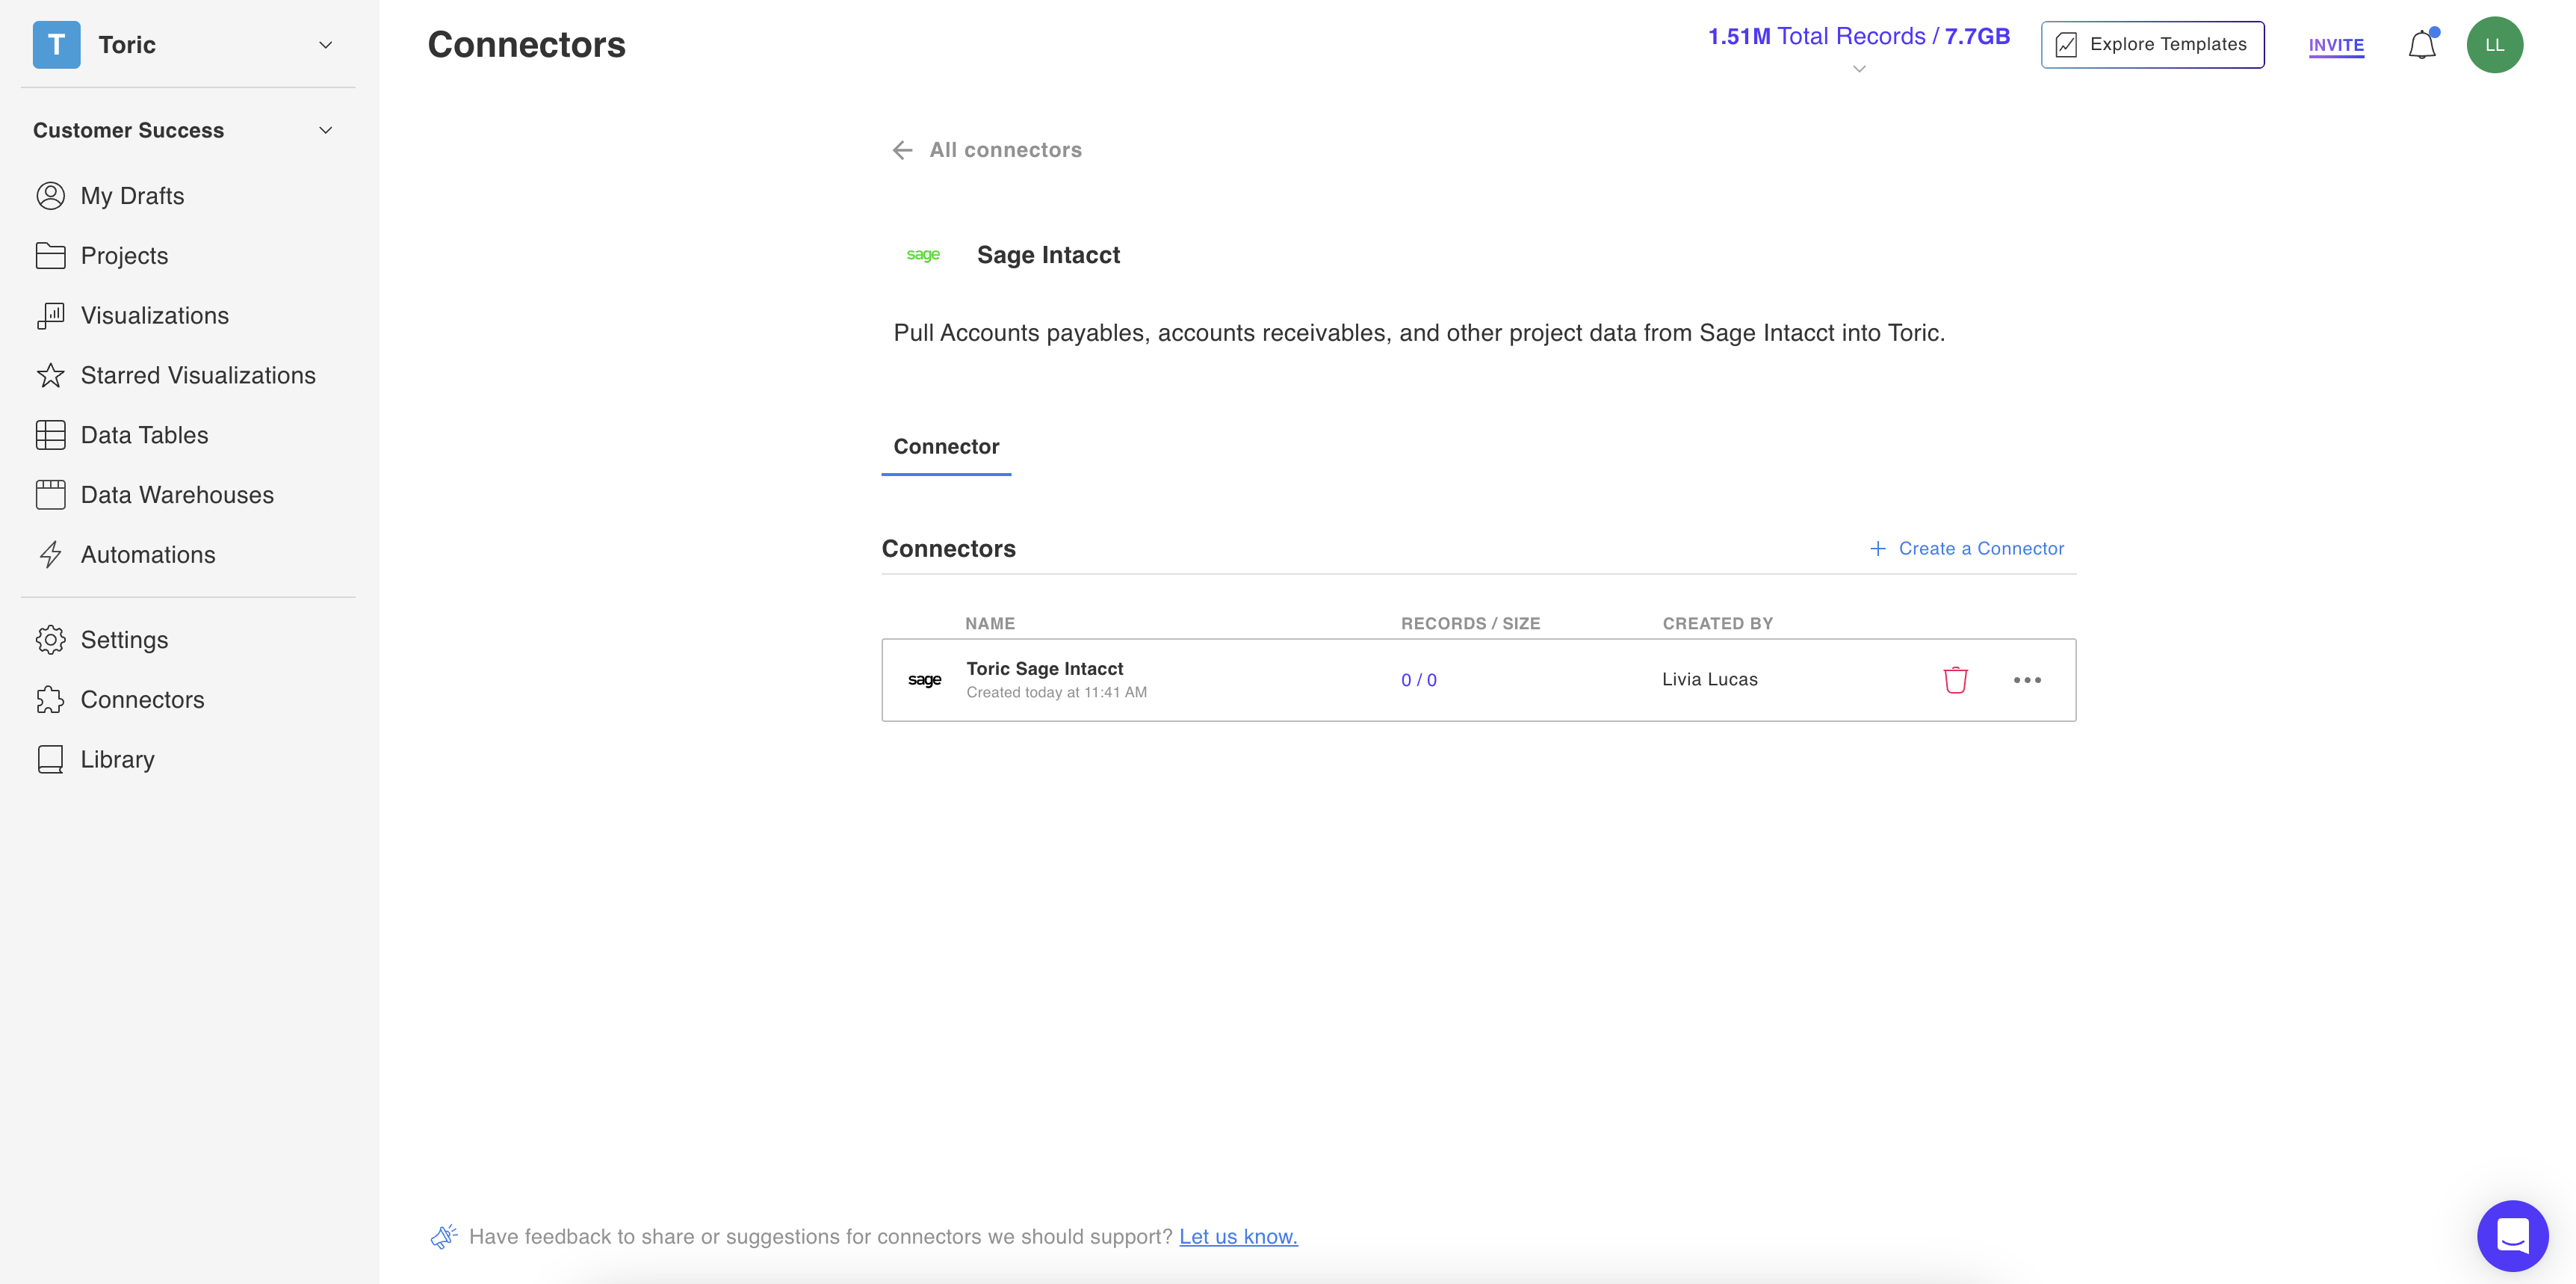
6. Click ‘Add Configuration’ to finalize your configuration
You can now see your configuration under the list of Connectors
Data Access
| Endpoint | Category | Incremental Ingestion |
|---|---|---|
| Account Balances | General Ledger API | Available |
| Accounts | General Ledger API | Available |
| Budgets | General Ledger API | Available |
| General Ledger Details | General Ledger API | Available |
| Journal Entries | General Ledger API | Available |
| Trial Balances | General Ledger API | Available |
| AP Payments | Accounts Payable | Available |
| Bills | Accounts Payable | Available |
| Vendors | Accounts Payable | Available |
| AR Advances | Accounts Receivable | Available |
| AR Aging | Accounts Receivable | Available |
| AR Payments | Accounts Receivable | Available |
| Customers | Accounts Receivable | Available |
| Invoices | Accounts Receivable | Available |
| Purchasing Transactions | Purchasing | Available |
| Accumulation Types | Construction API | Available |
| AP Retainage Releases | Construction API | Available |
| Change Request Status | Construction API | Available |
| Change Requests | Construction API | Available |
| Cost Types | Construction API | Available |
| Tasks | Construction API | Available |
| Labor Class, Shift, and Union | Construction API | Available |
| Project Change Orders | Construction API | Available |
| Project Contracts | Construction API | Available |
| Project Estimates | Construction API | Available |
Don't see the endpoints you are looking for? We're always happy to make new endpoints available. Request an endpoint here!