Procore
Procore is an all-in-one construction management software designed to connect all stakeholders throughout the construction lifecycle. With the Procore connector, Toric users can seamlessly connect, transform, and analyze Procore data without having to manually export, transform, and load it. With the Procore connector, Toric users can:
- Access project data for no-code transformation and visualization
- Automatically extract and load data from Procore to provide real-time insights
- Ingest 100+ endpoints, including RFIs, Budget Items, Logs, and more
- Join Procore data with other sources to create meaningful insights
- Embed analytics back into Procore to share with stakeholders
Configuration guide
Setup Time: 4-5 minutes
Requirements:
- Active Procore account(s)
- Set permissions for your Procore account in order to access your data
- Configuration details:
- Configuration Name
- Procore API Endpoint
- Procore Admin credentials
- Company ID
To successfully configure the Procore connector, you will need to following the guides below:
- Step one: Install the Toric Application from the Procore Marketplace
- Step two: Configure Procore DMSA Connector in Toric
Full process video - Connecting Toric to your Procore
If you prefer reading, our tutorial is outlined below.
1. Install the Toric Application from the Procore Marketplace
A user with Procore administrator privileges will need to install the Toric application from the Procore marketplace. During installation you can select the specific projects Toric can access. This can be modified post installation.
Before you start
If you have multiple Procore accounts, you will need to Install Toric in each account. This means you will need to log into each account and follow steps 1 through 3. Make sure you are working in one Procore account at a time. If you have multiple Procore accounts installed across browser windows, sign out of all accounts but one.
Install App
- Find the Toric application in the Procore marketplace.
- Login and Install the app.
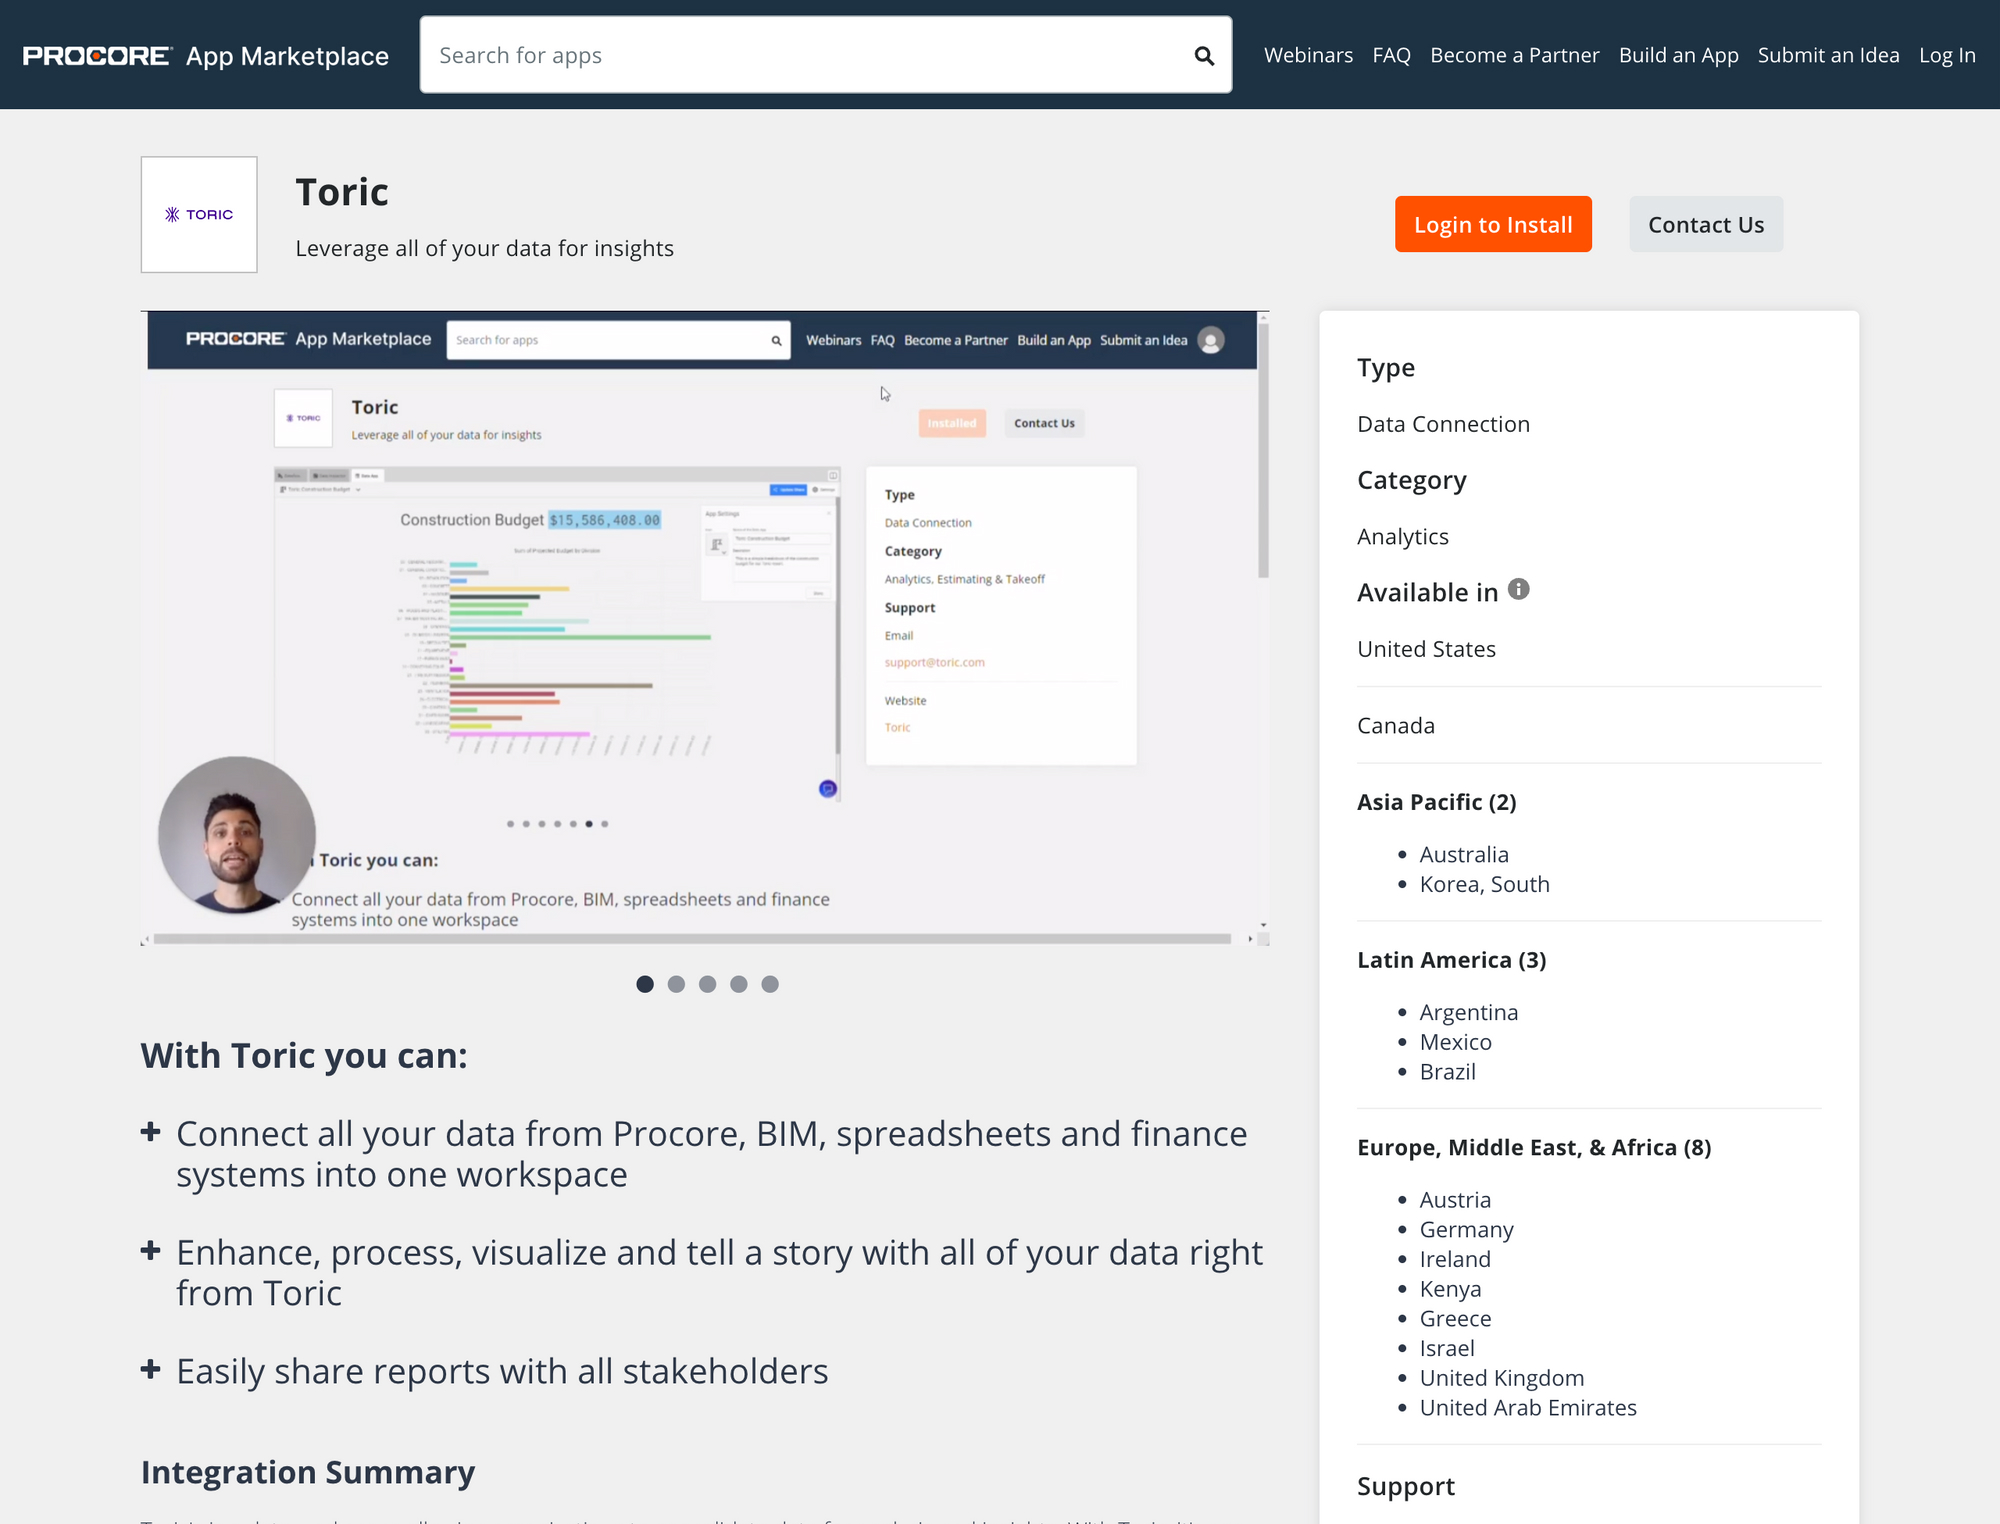
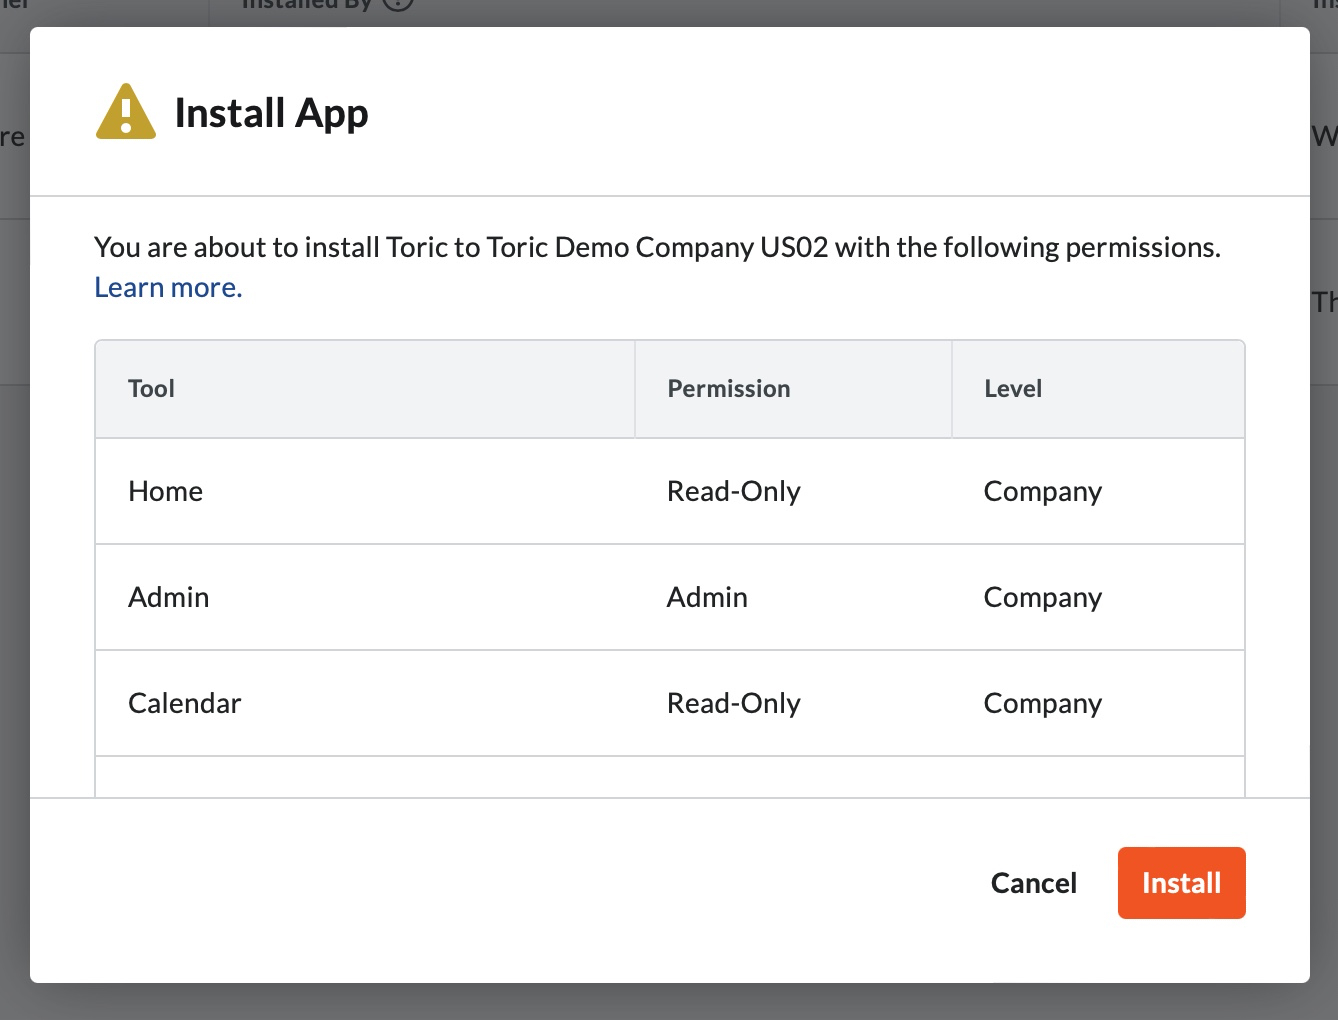
After installing the Toric app, Procore will show a dialog with the current permissions. The Toric app will be installed in your company's account, with the permission level described in the dialog's content.
- Click on the Install button to continue the installation.
Configure Projects Permissions
In the next steps, we will configure the project permissions levels. The following steps will allow the Toric connector to have its full functionality.
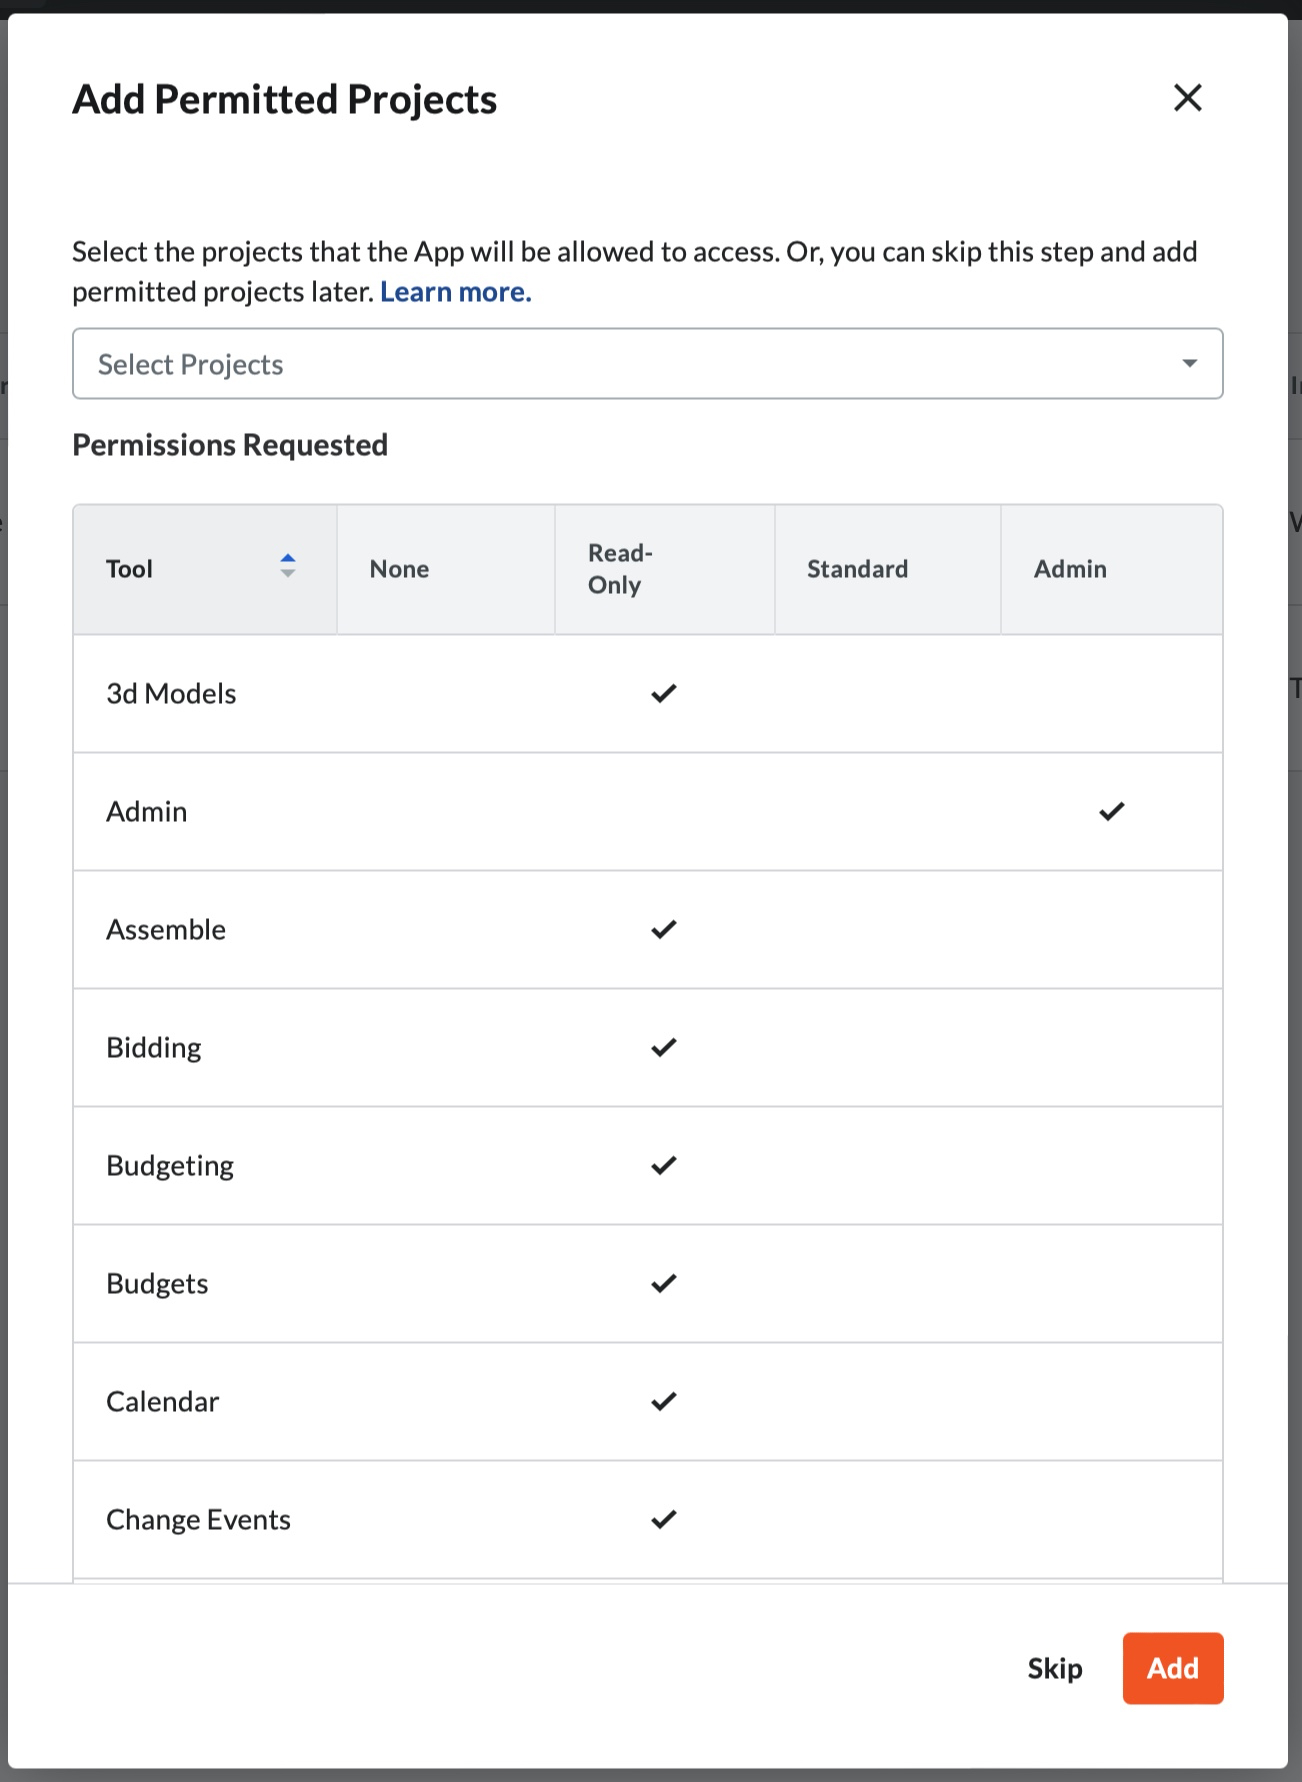
After exiting this screen, Procore will show an Add Permitted Projects dialog.
- Select the projects to use with Toric
Manage or Add More Projects
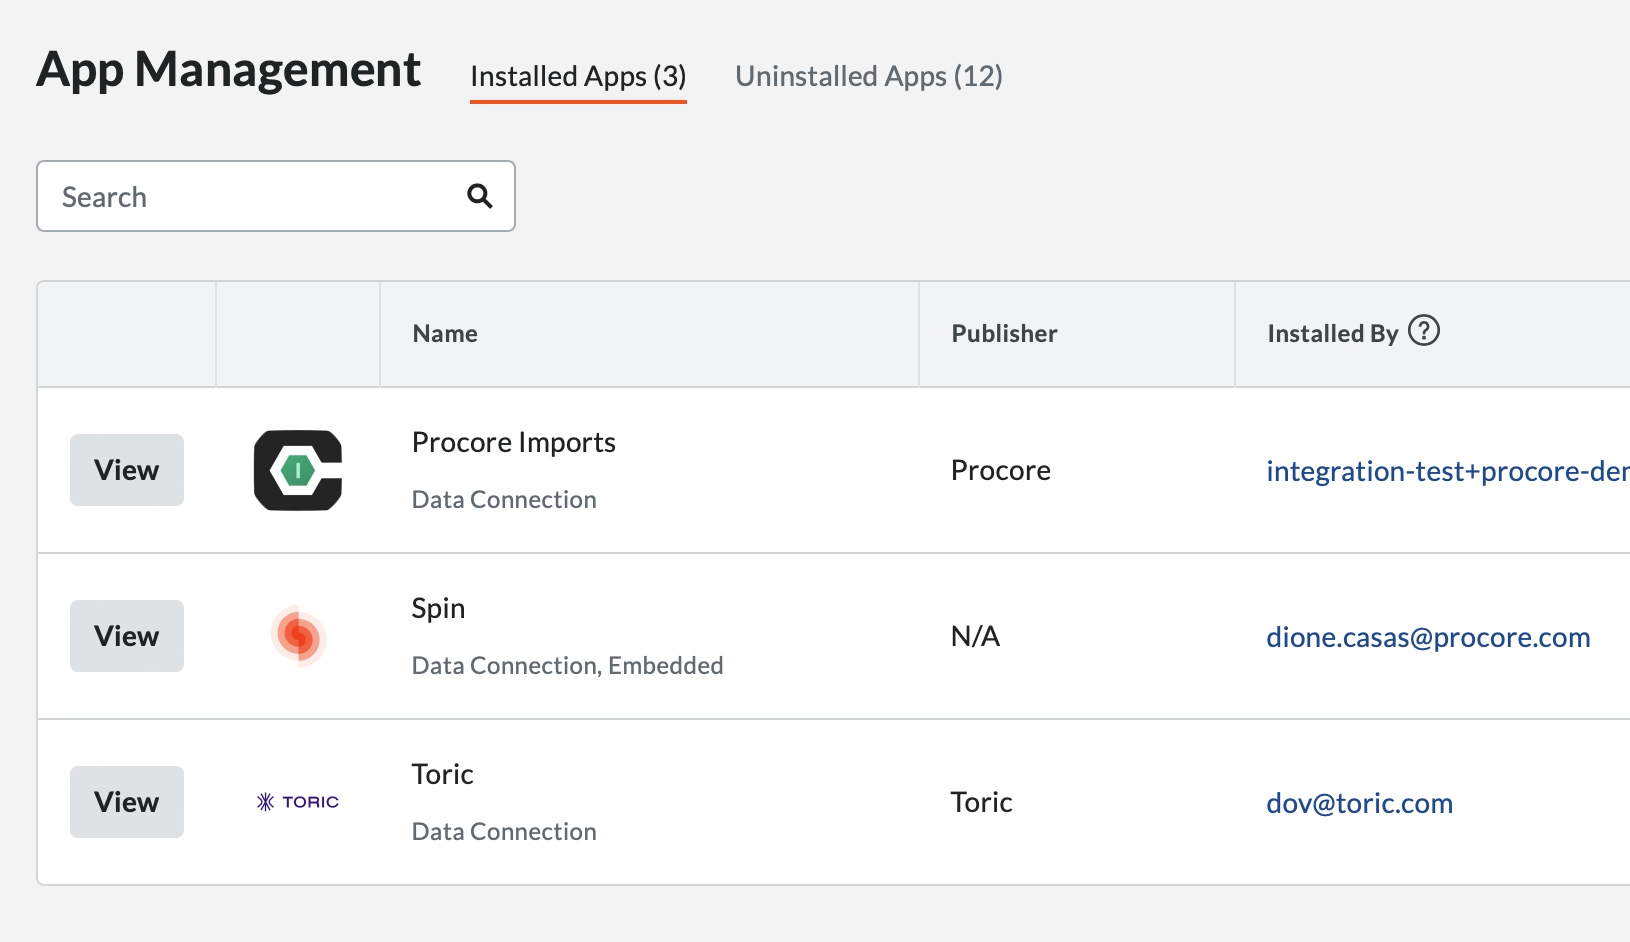
If you need to remove or add more projects, you can access the previous preference anytime via the App Management page or the Company Directory.
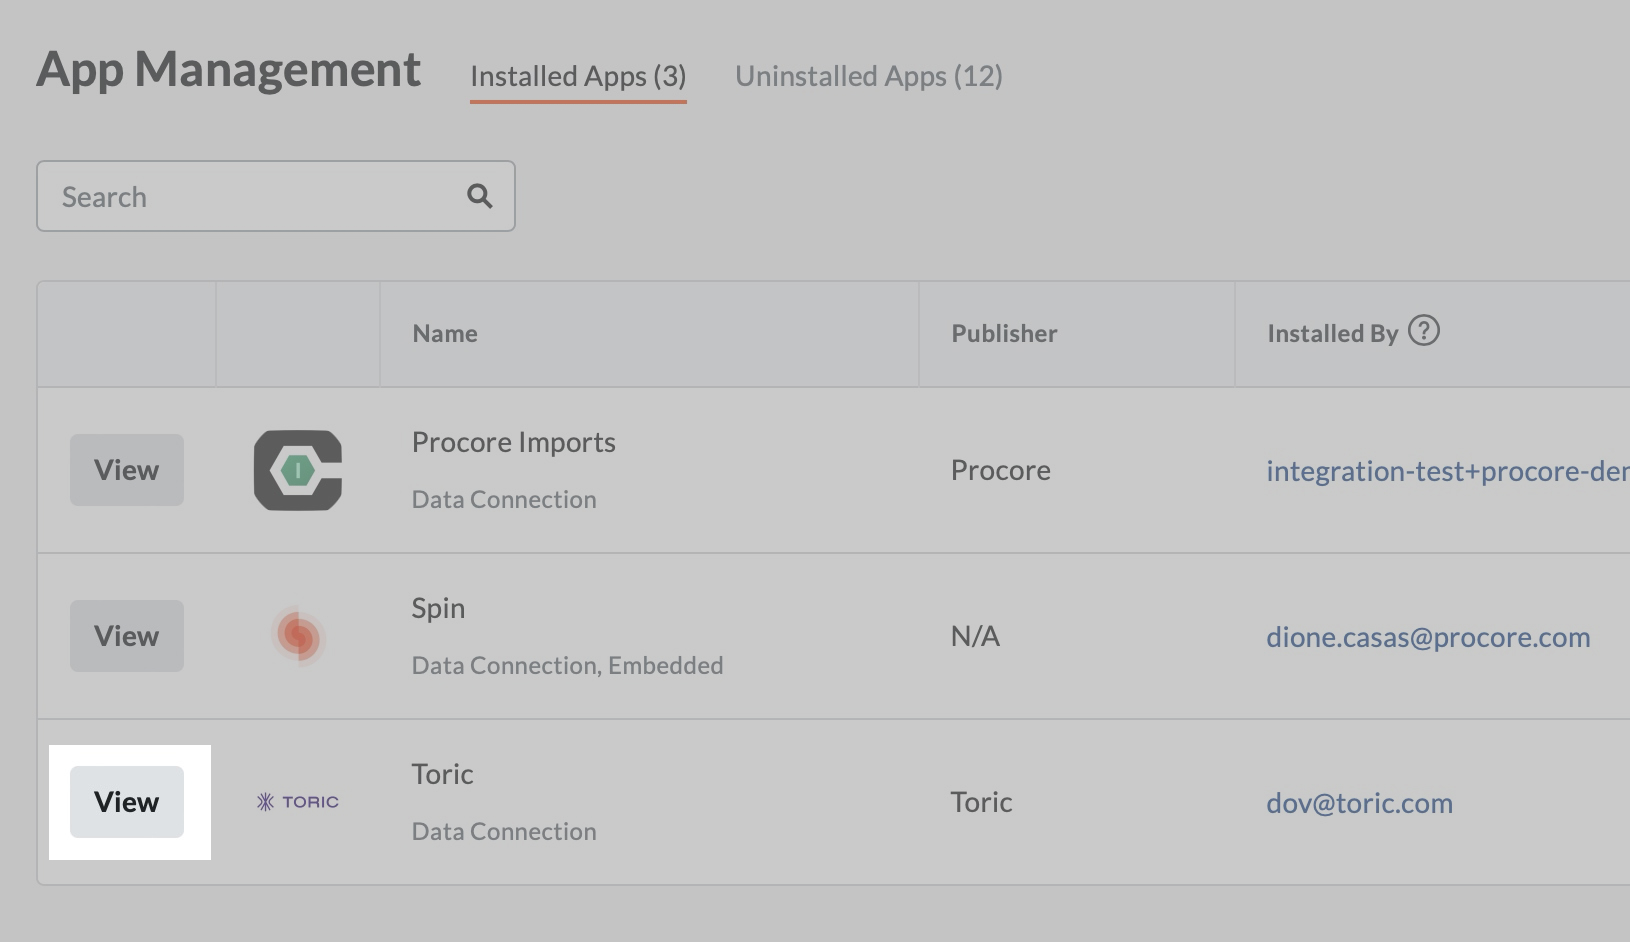
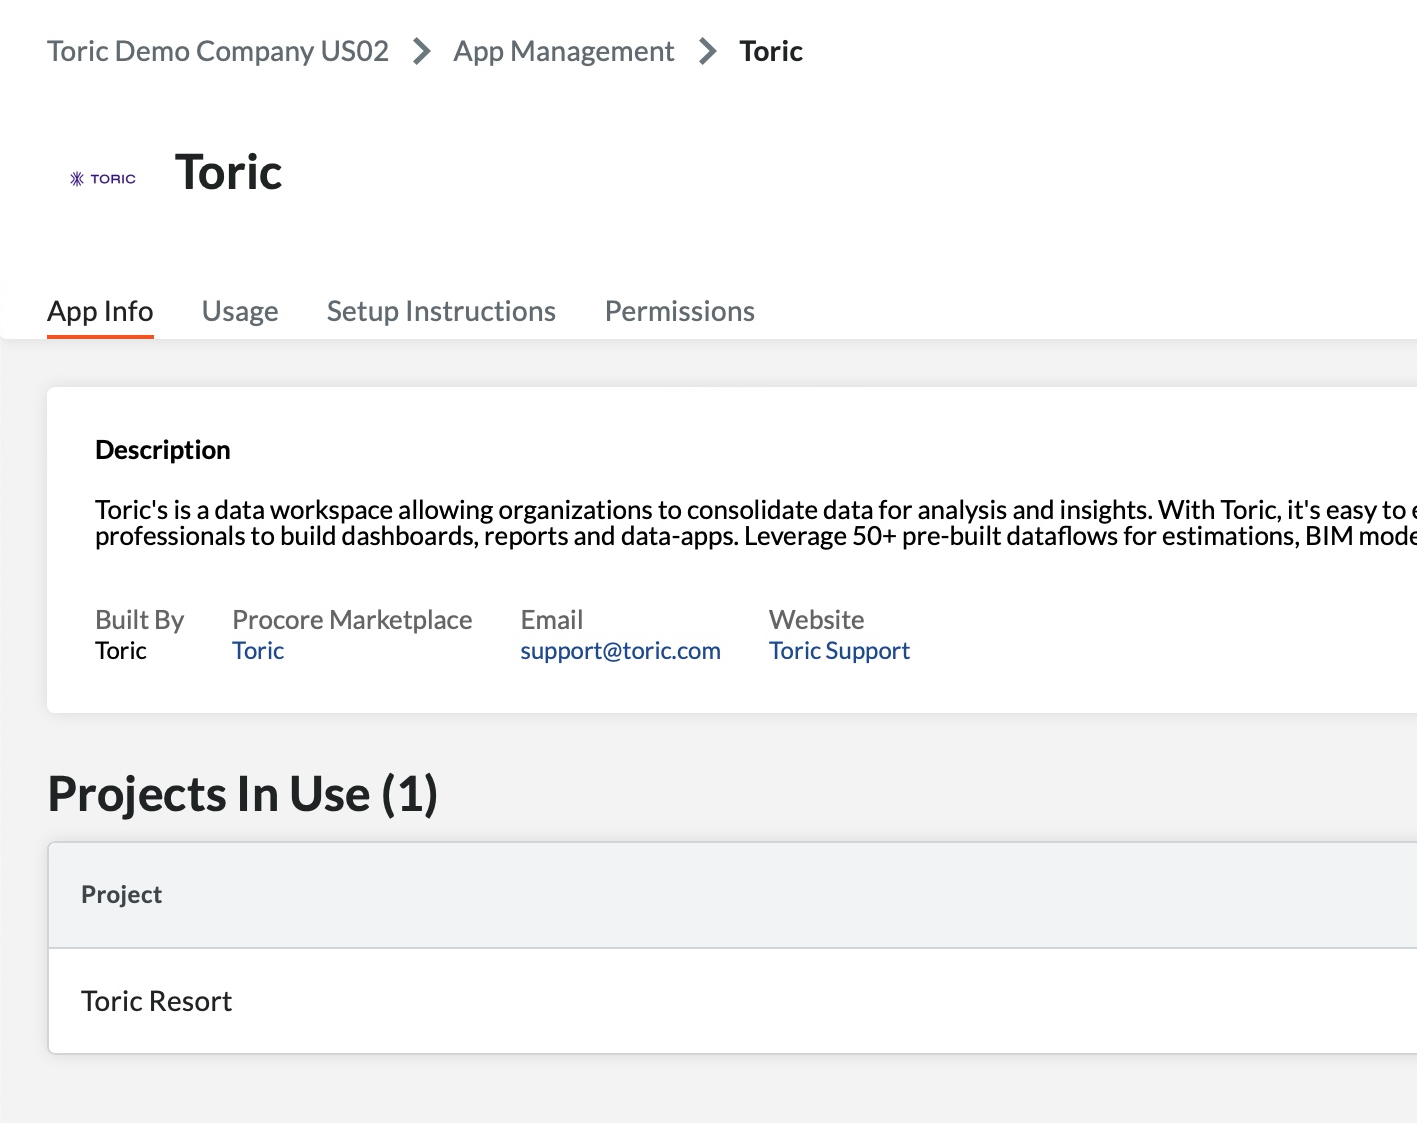
App Management Page
Within the App Management page:
1. Find Toric.
2. Click on the View button.
3. Go to the Permission tab.
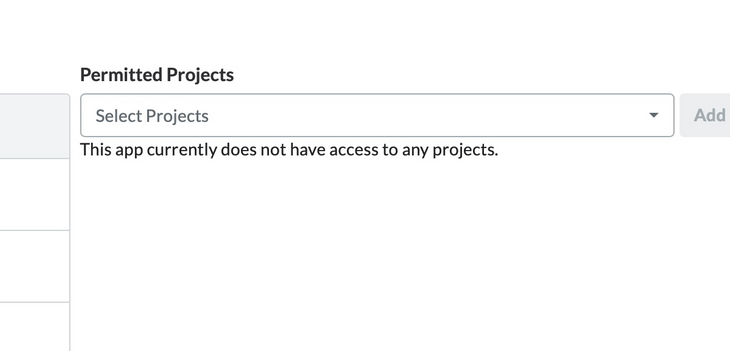
4. Add one or more Projects in the dropdown selector. The project is set with default permissions Toric requests and provides a project selection dialog.
1. Find Toric
2. Click on the View button
3. Go to the Permission tab
Add one or more projects in the dropdown selector.
Note: The project is set with default permissions Toric requests and provides a project selection dialog.
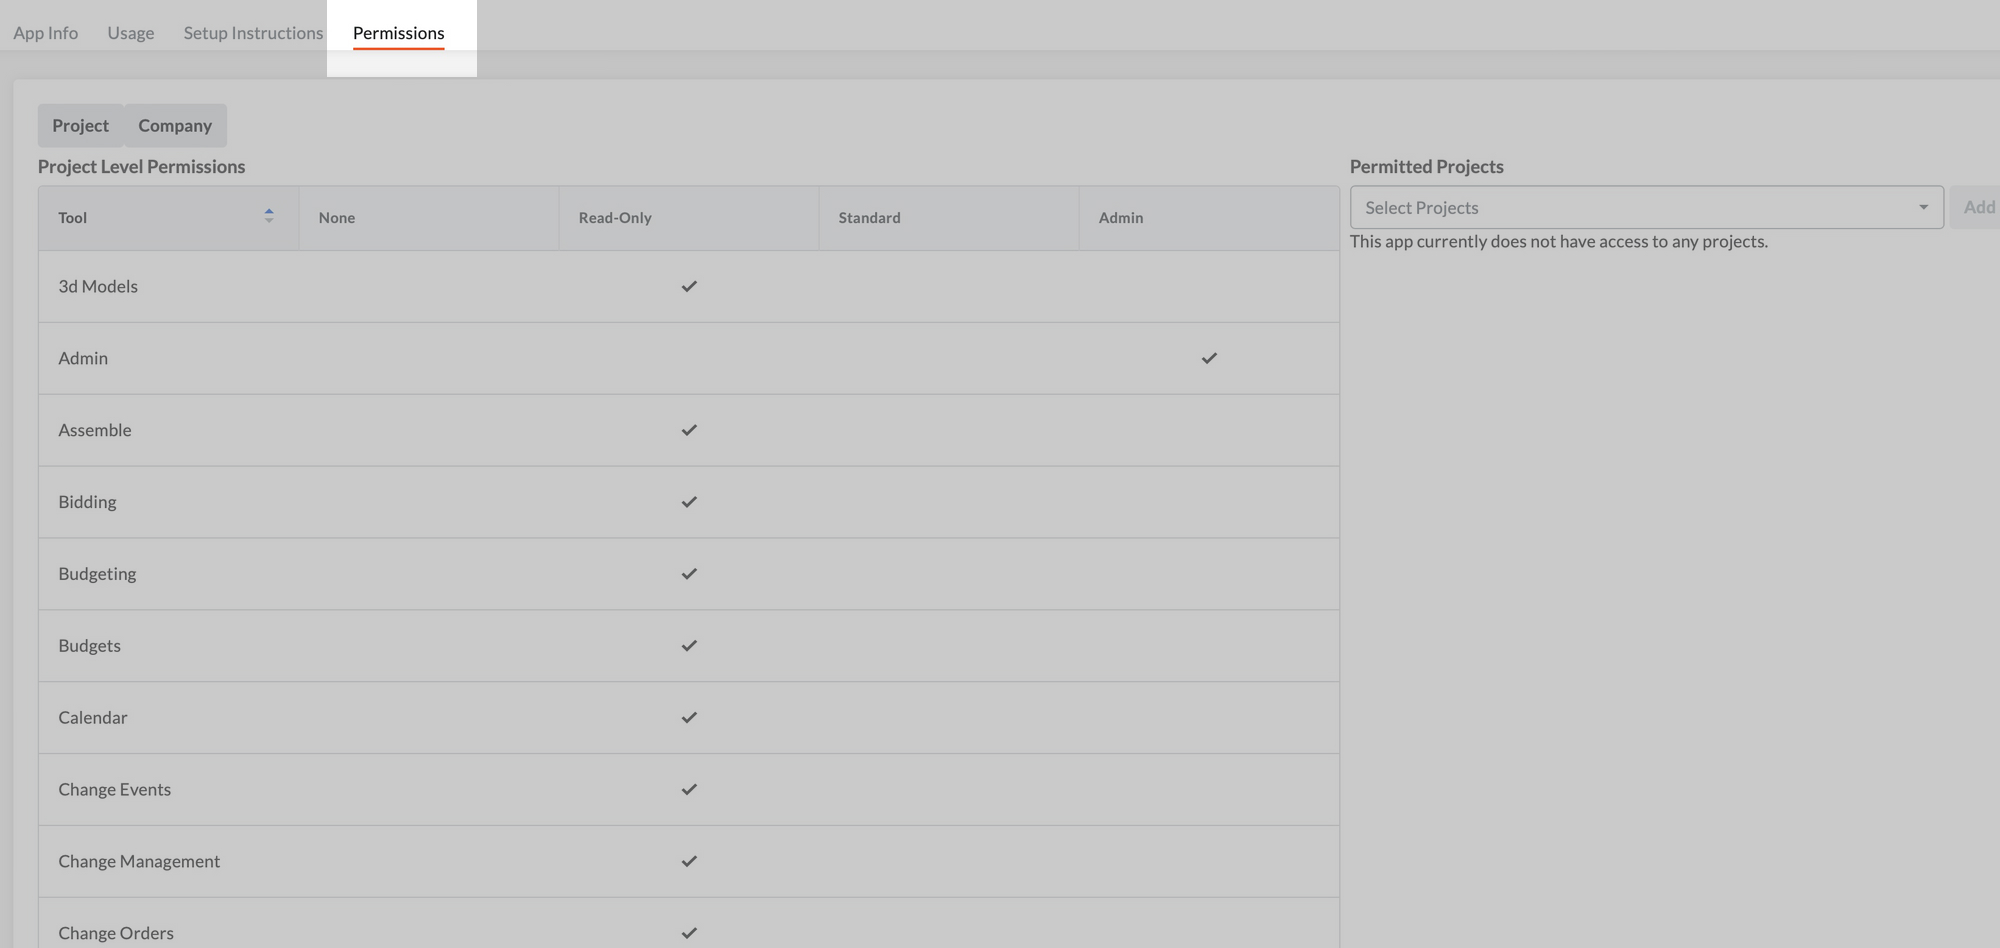
4. Add one or more Projects in the dropdown selector.
Company Directory Page
This approach allows you to manage and add permissions for many projects at once. This approach works best when managing more than 10 projects in the Users tab.
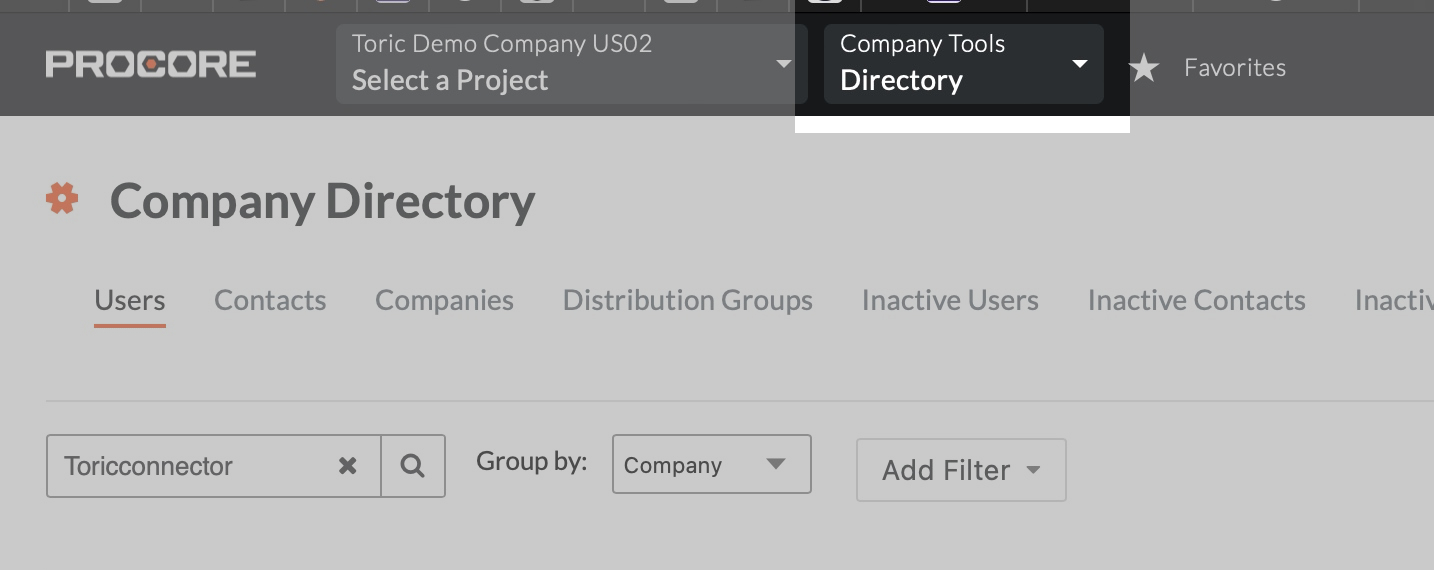
1. Go to the Company Directory in the Company Tools dropdown.
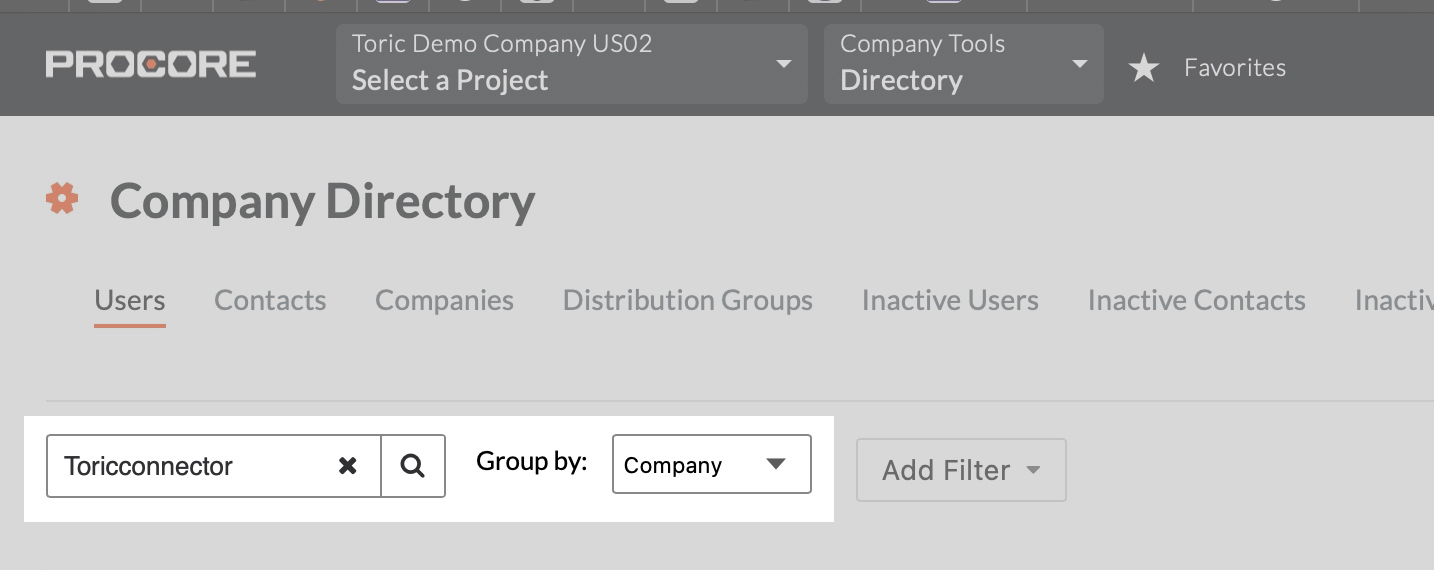
2. Type the Company name. Search for Toricconnector in the search box.
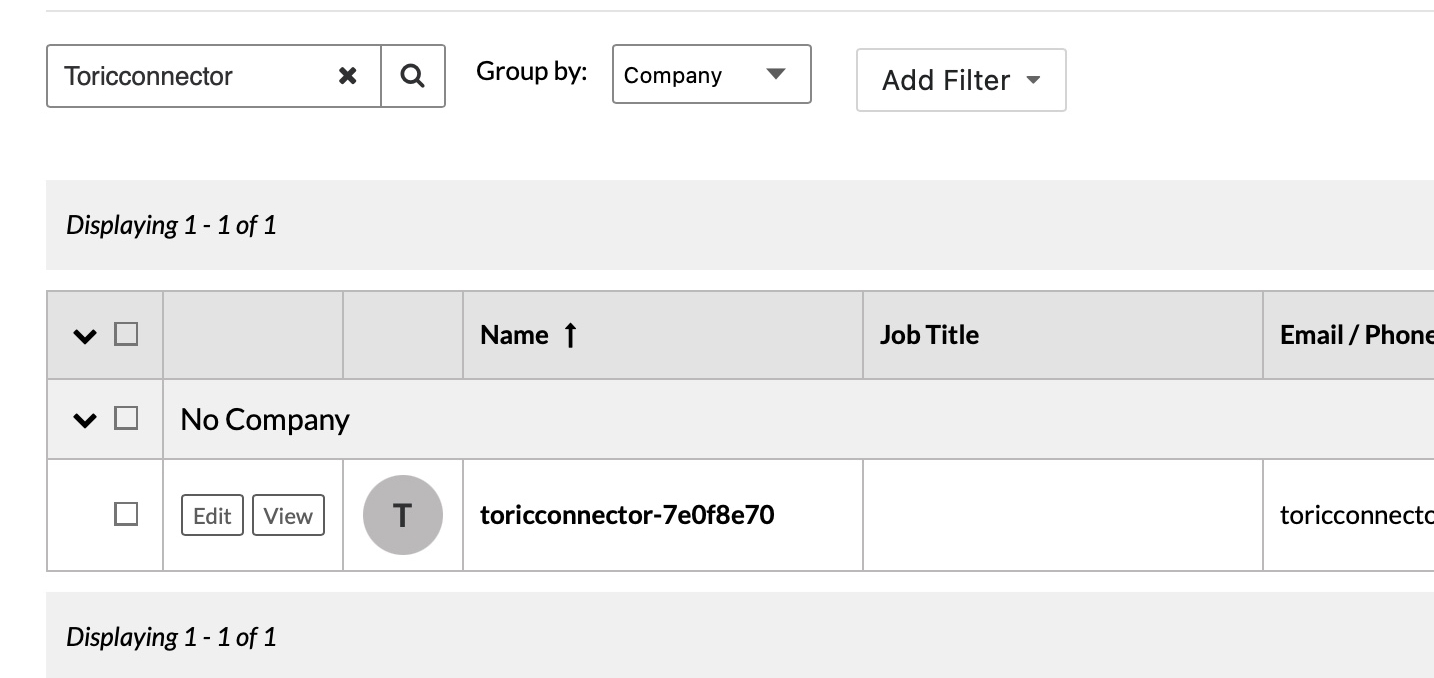
3. Click on the Edit button in one of the items in the search results.
4. Scroll down to Project Settings.
1. Go to the Company Directory in the Company Tools dropdown.
2. Type the Company name.
And, search for Toricconnector in the search box.
3. Click on the Edit button in one of the items in the search results.
4. Scroll down to Project Settings right after.
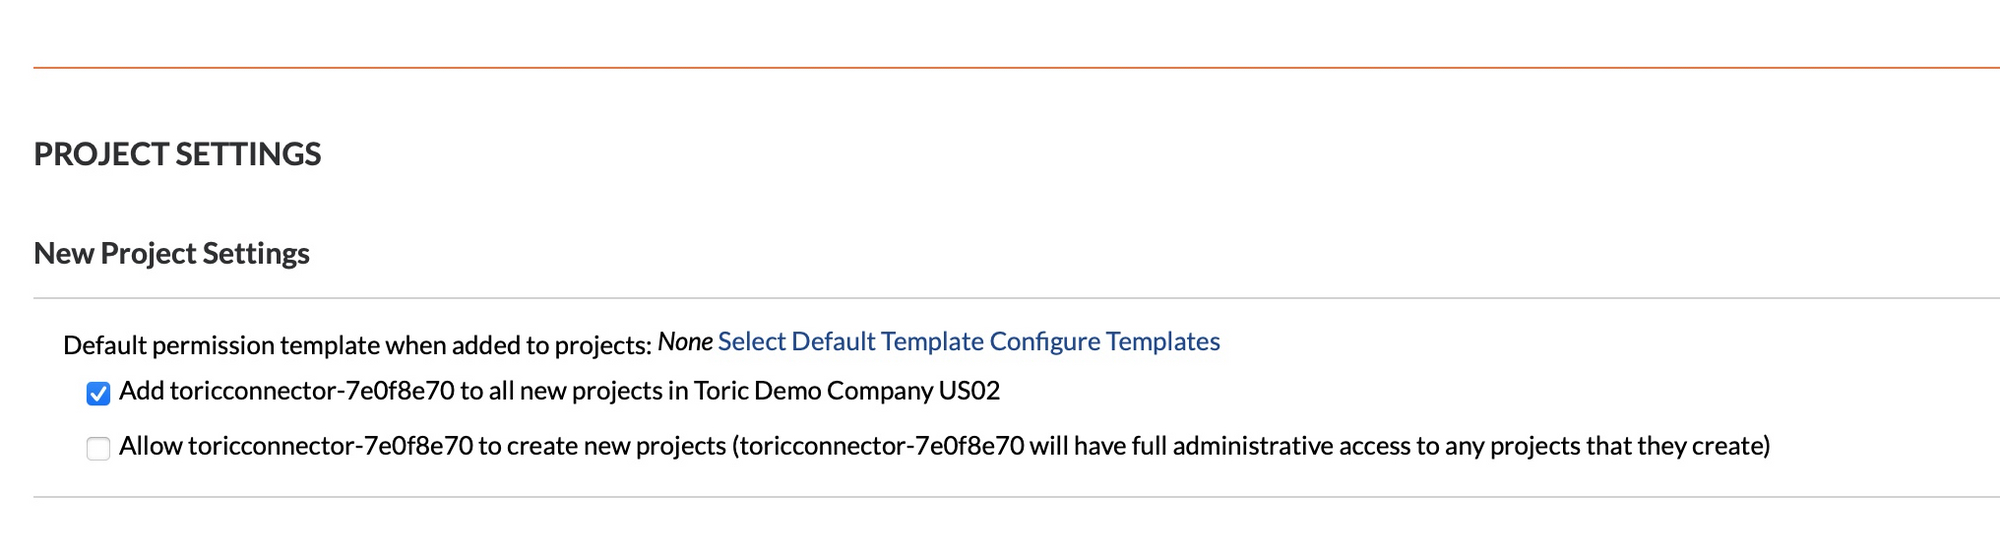
Note: Check the second box if you want to allow Toricconnector to create new projects in Procore.
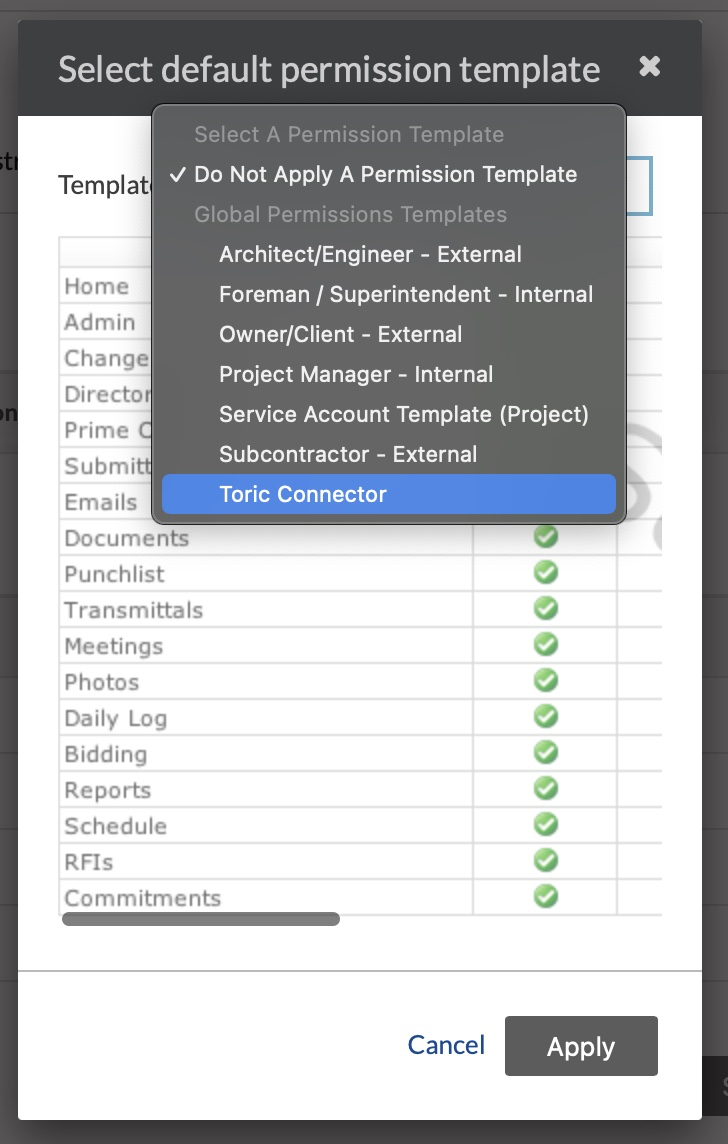
Global Permissions Templates
You’ll notice that there is no project permissions template for Toric Connector. You can use an existing template or create a new one for Toric.
1. Create Project Permissions Template
2. Use Project Permissions Template
Create Project Permissions Template
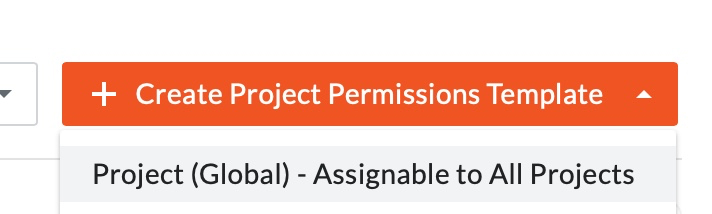
1.1. Navigate to the Company, Project Permissions Templates.
1.2. Select Create Project Permissions Template → Project (Global) - Assignable to All Projects
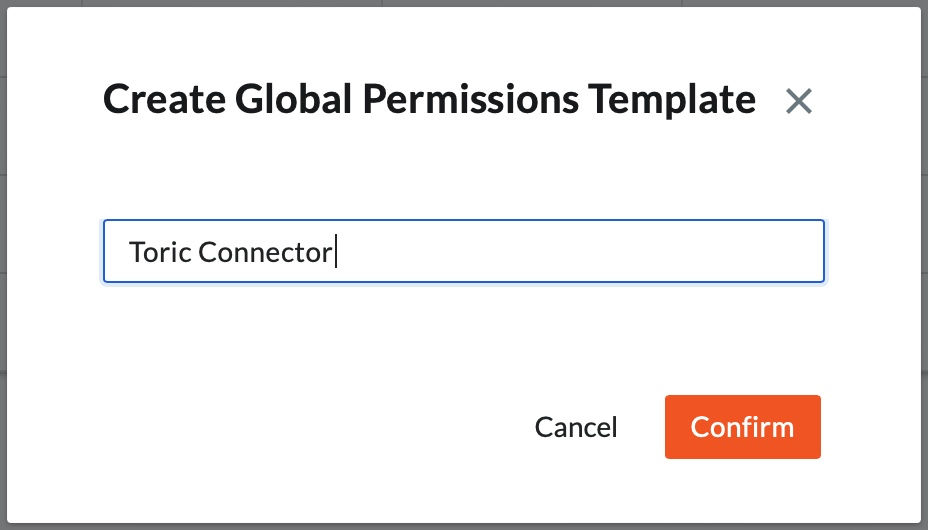
1.3. Enter the name of the permission template and confirm.
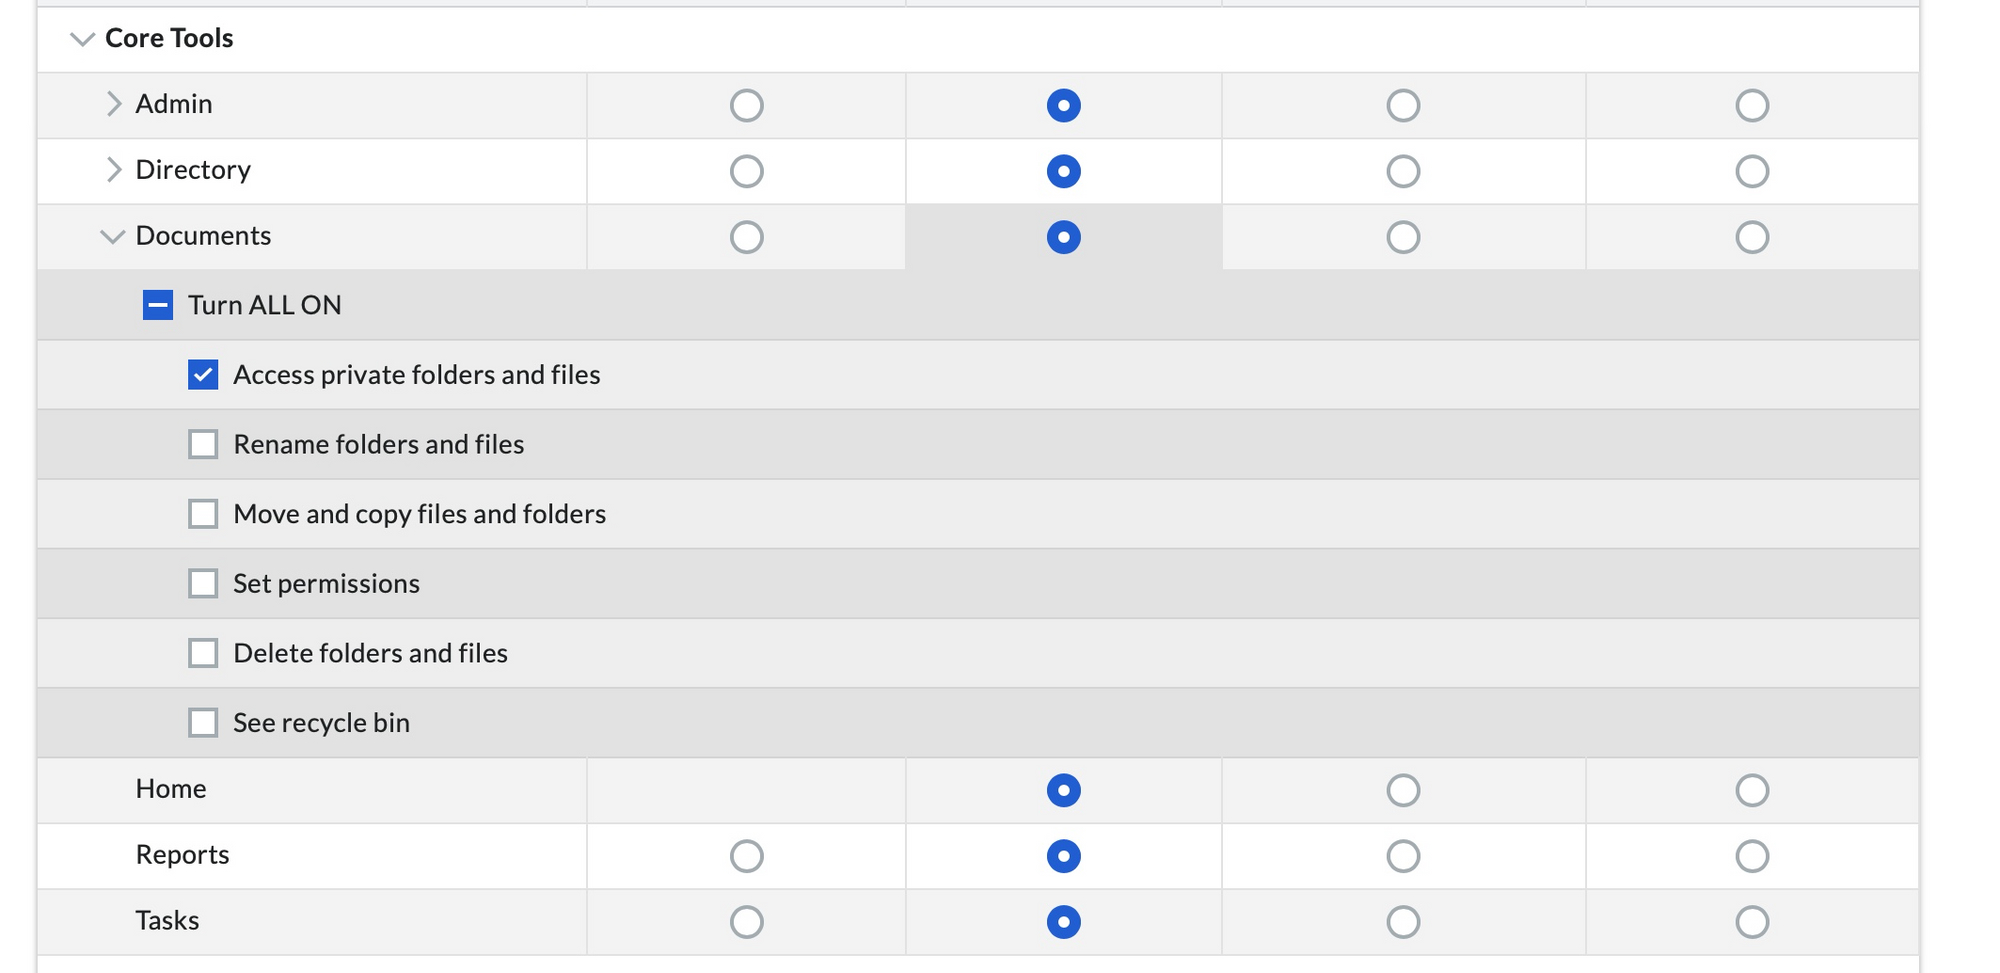
1.4. Configure permissions
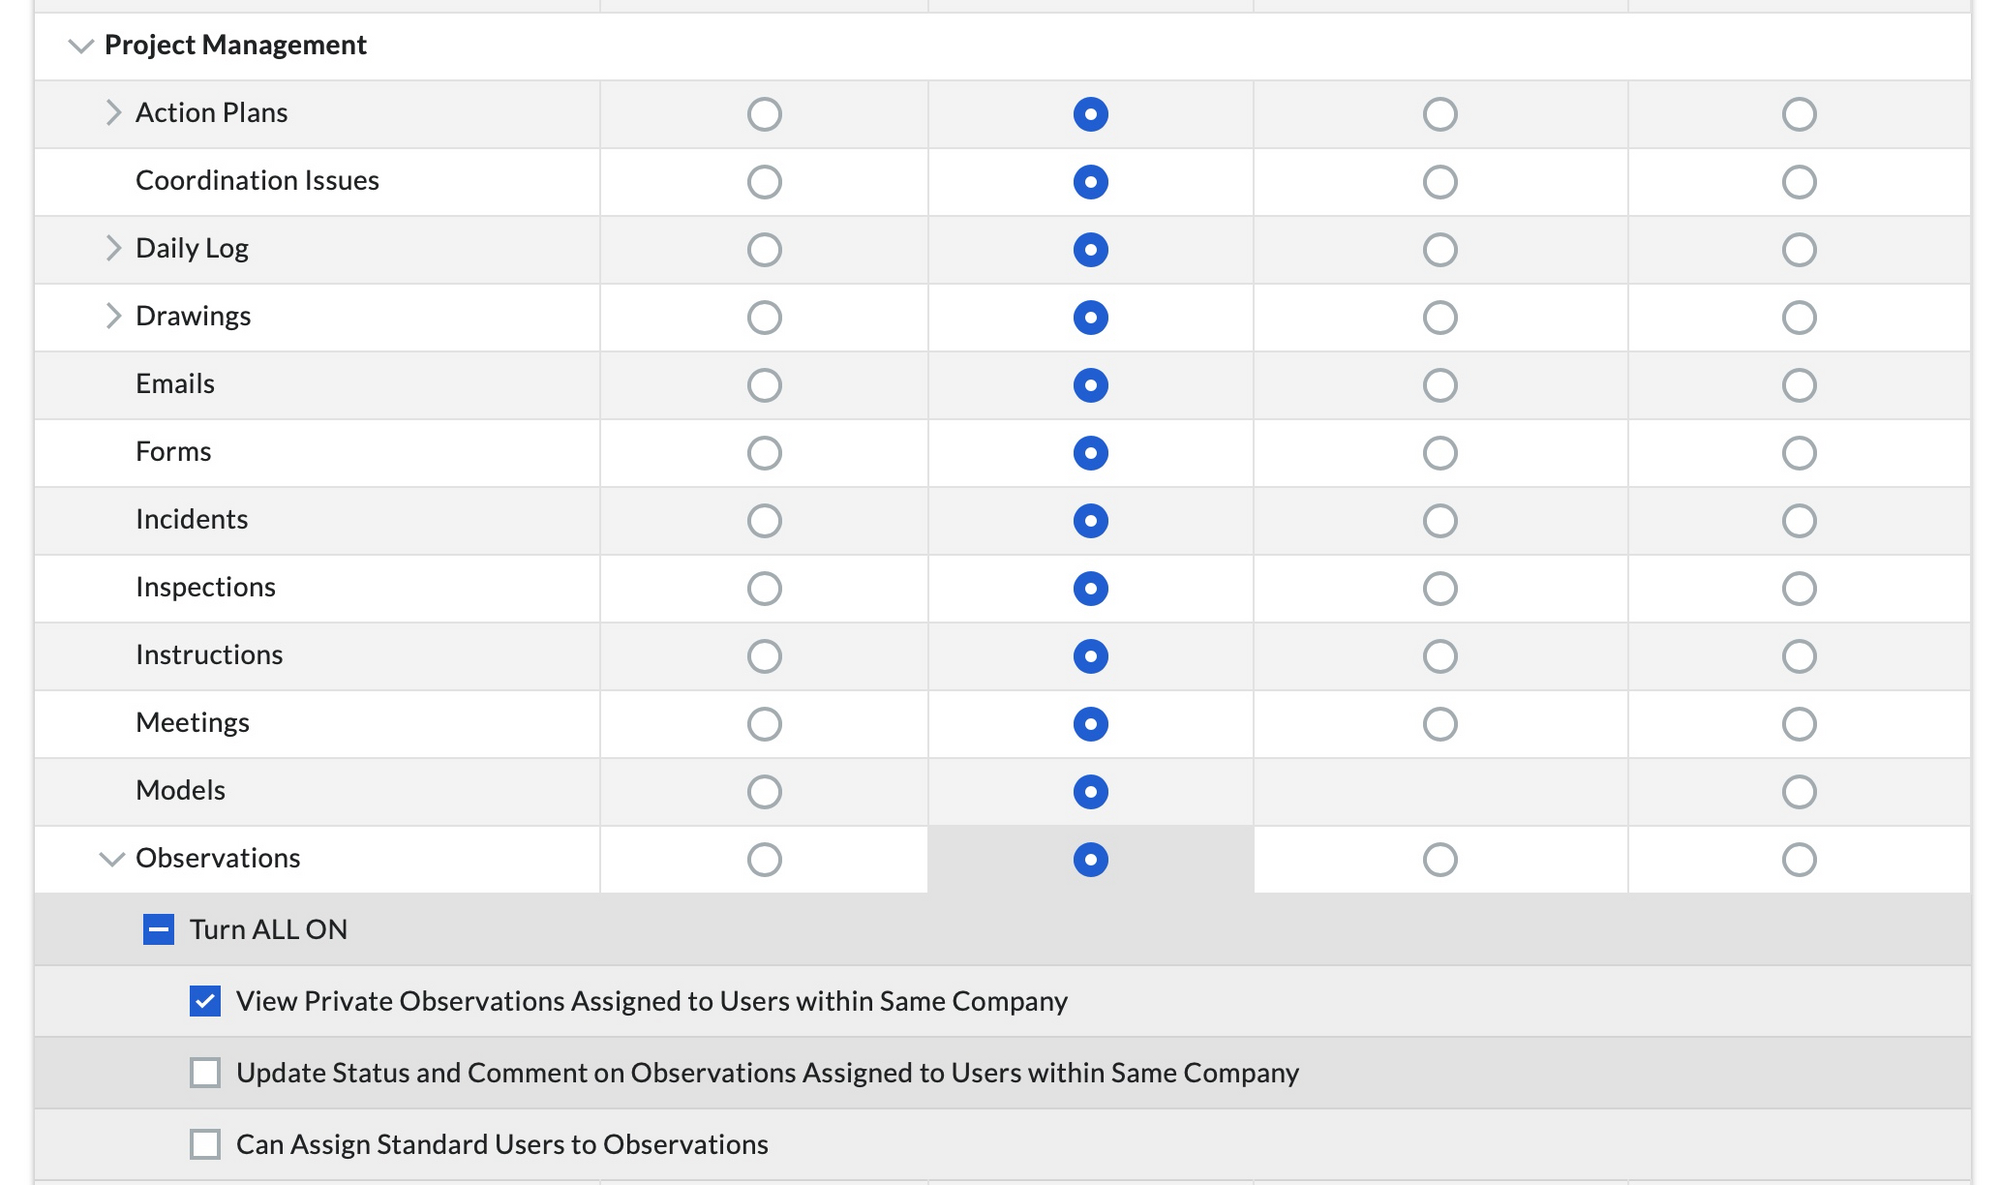
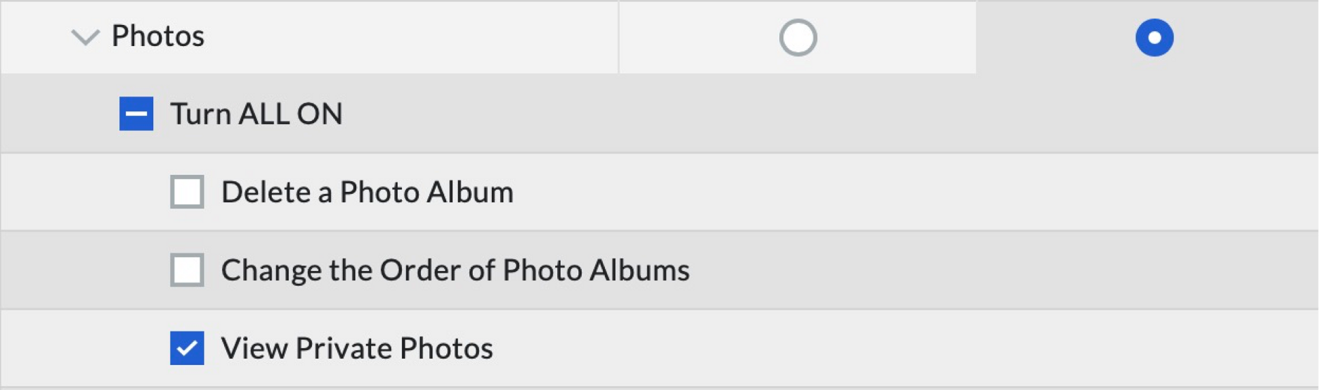
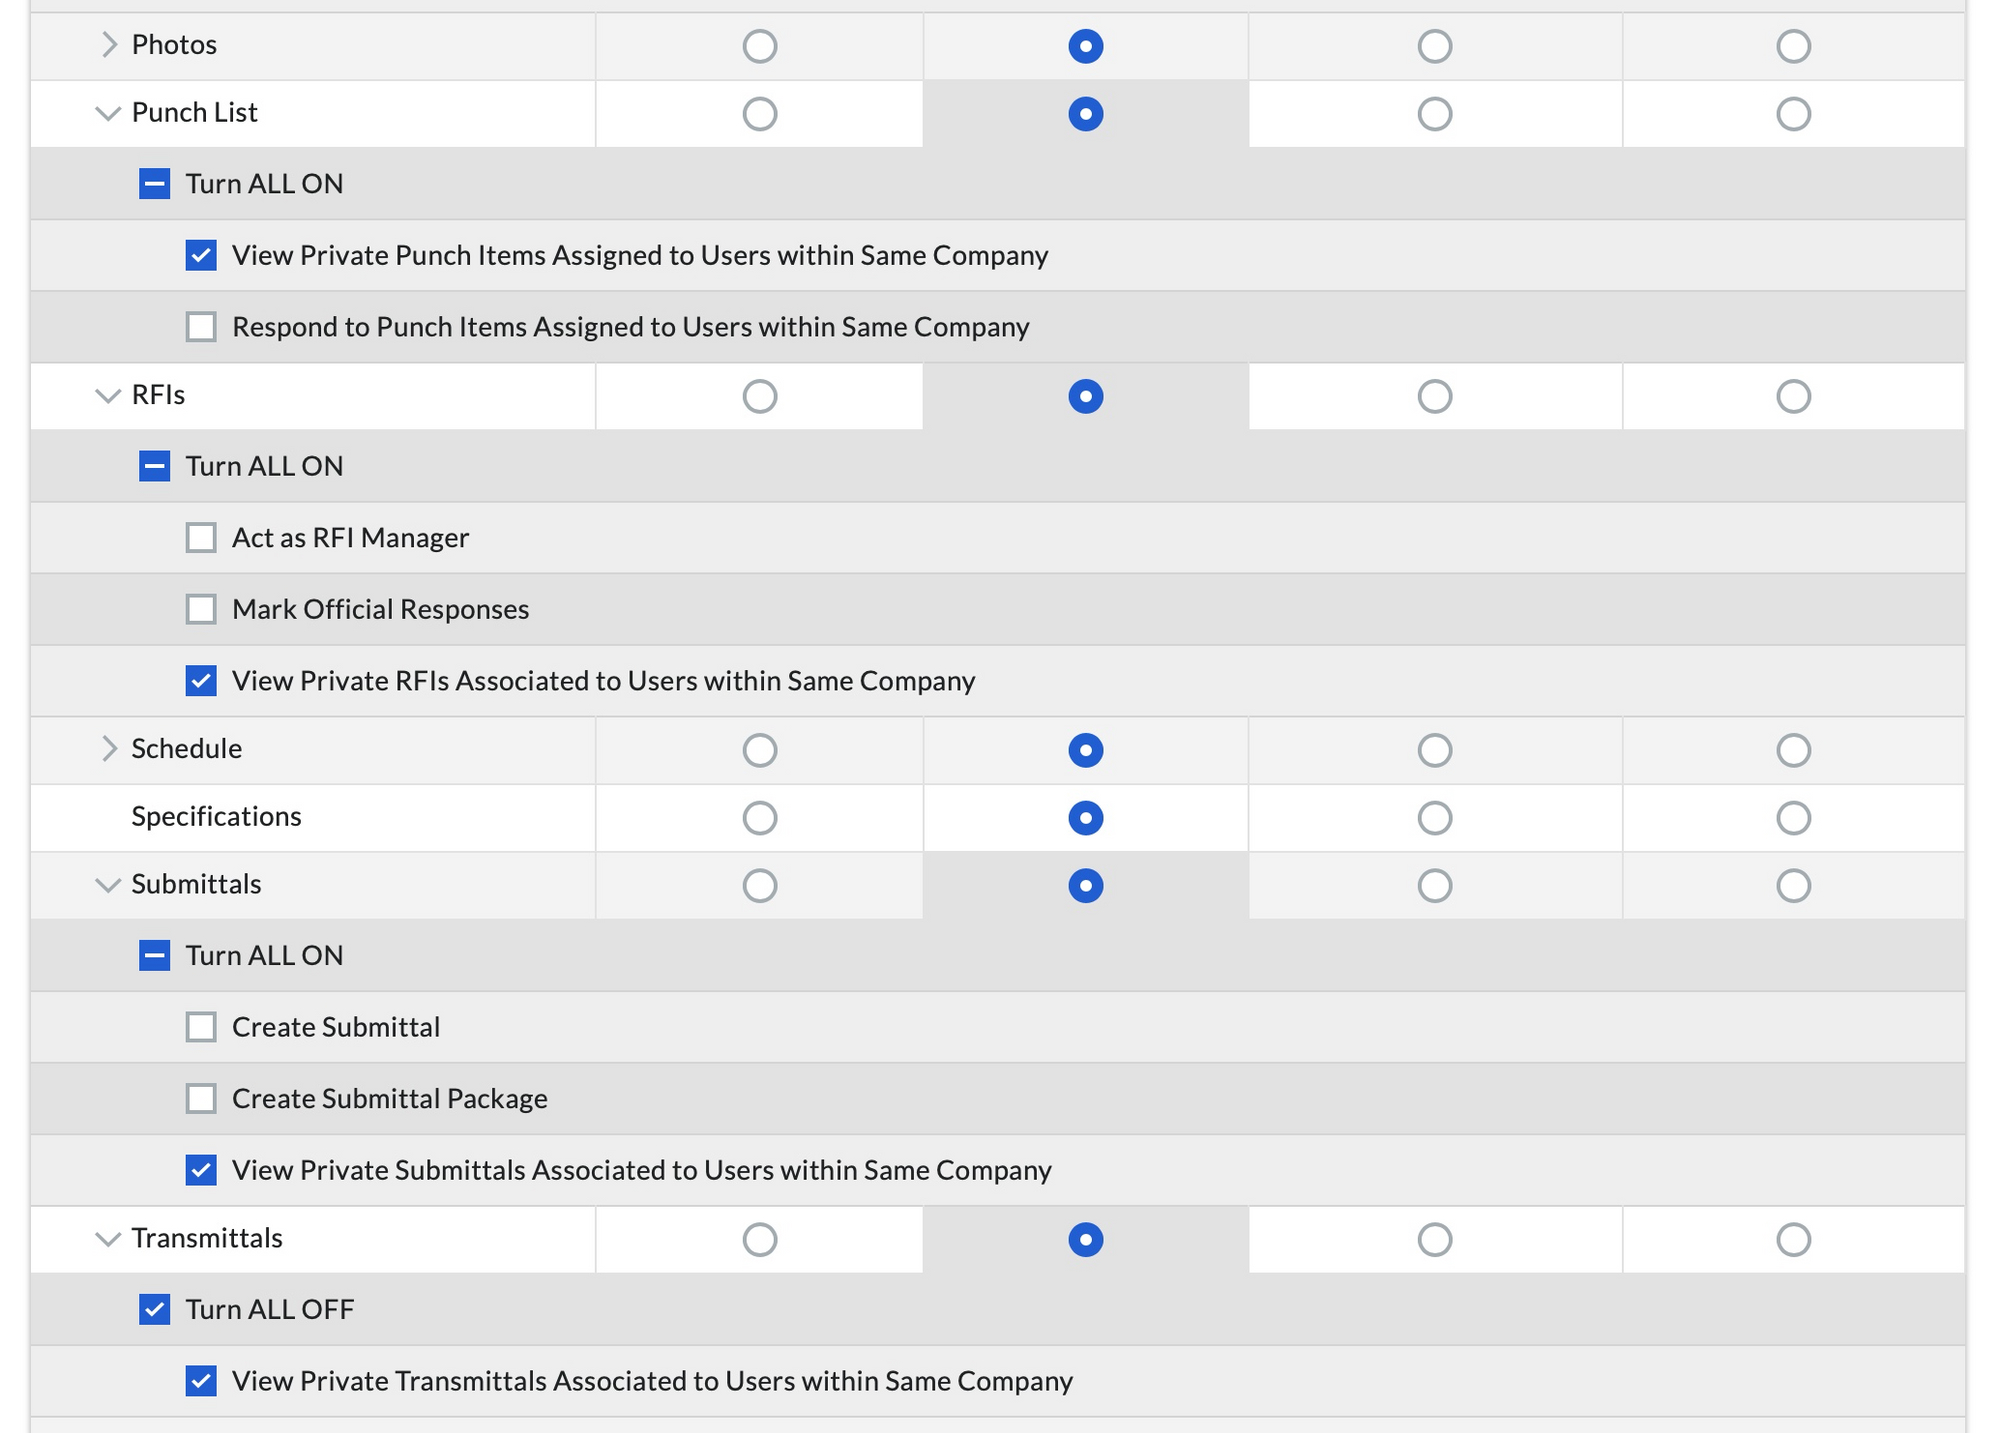
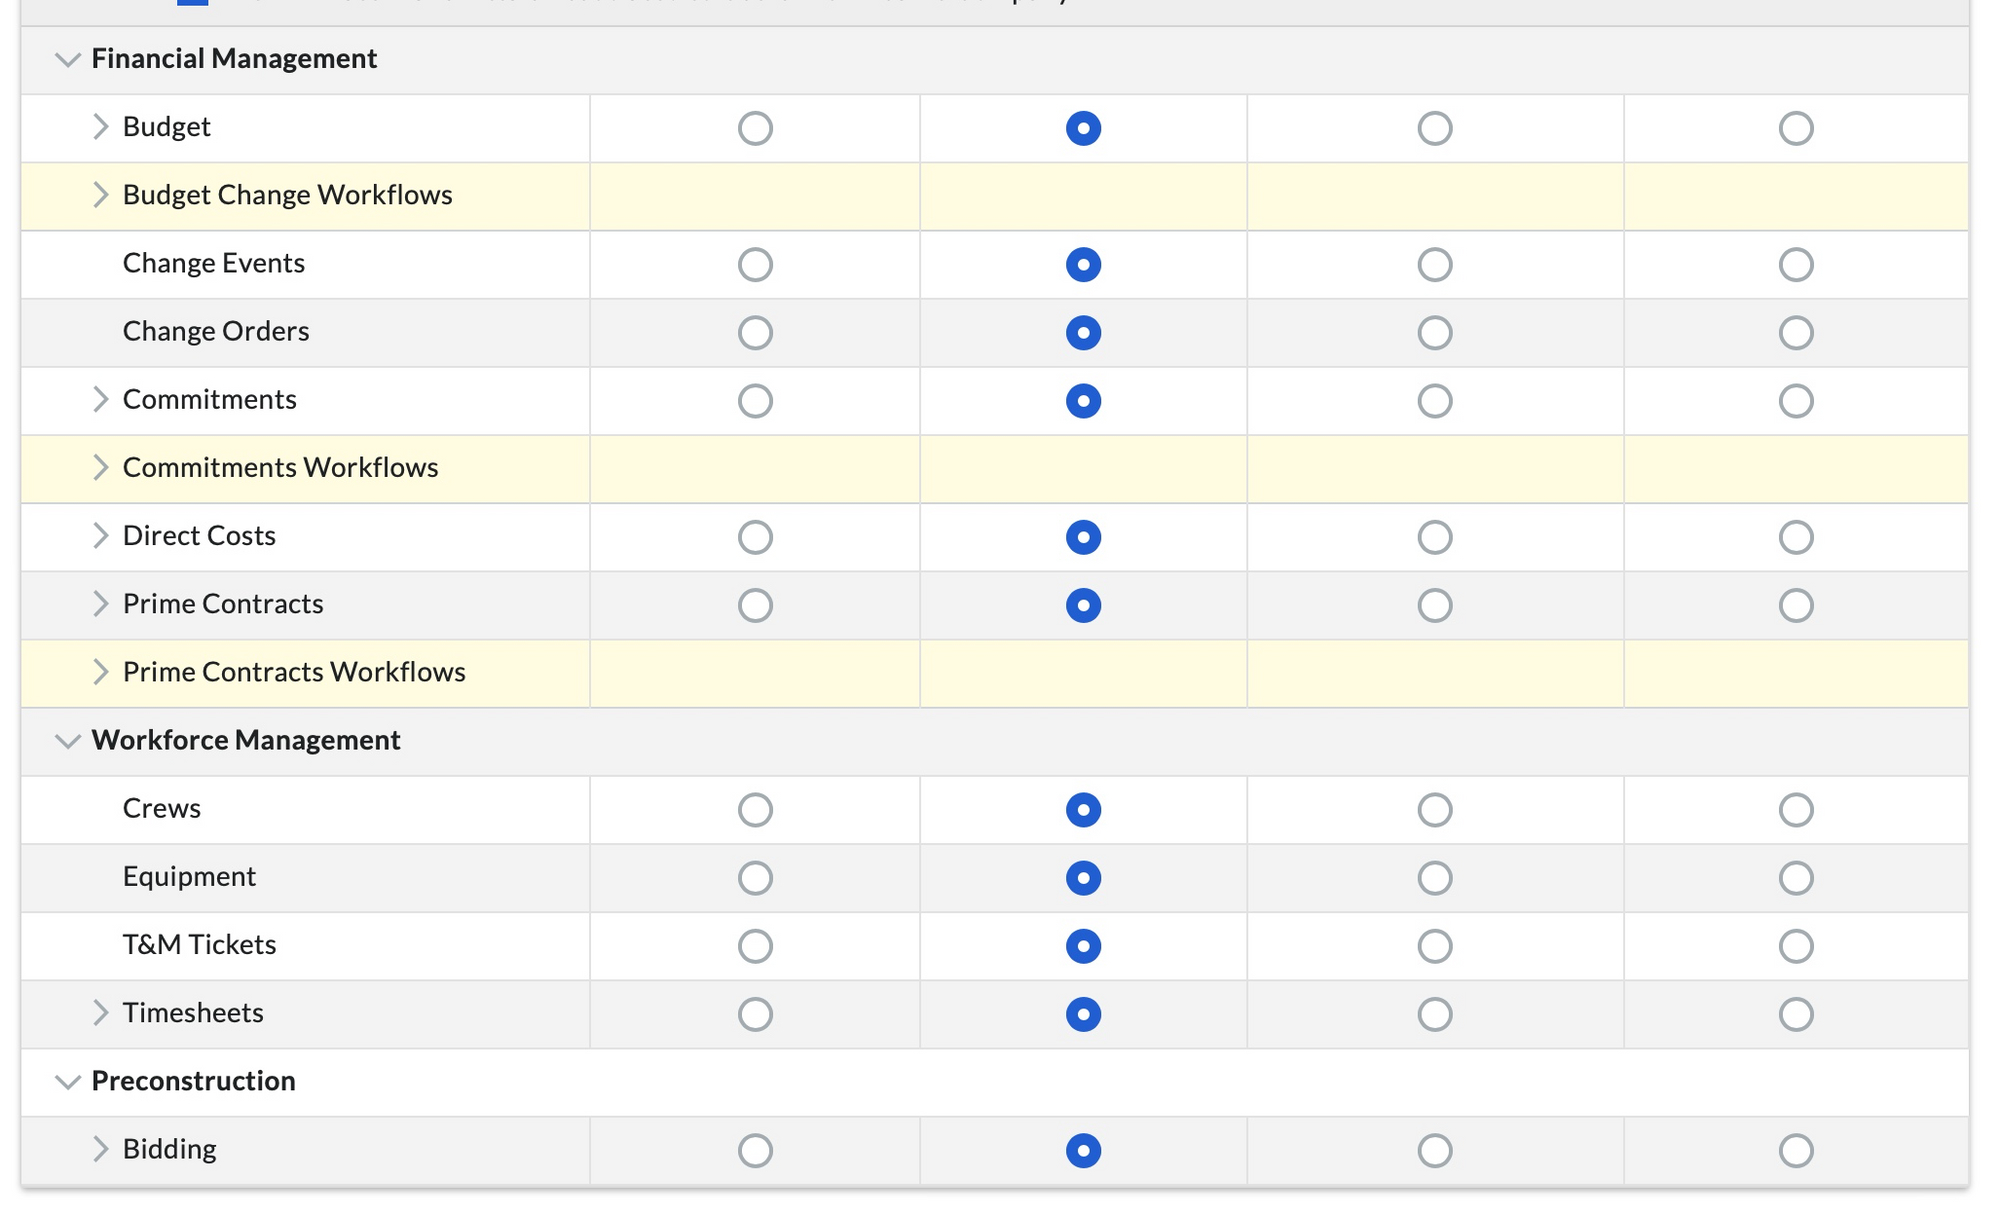
To consistently provide Toric's full functionalities to your projects, you can create a template with the following permissions. However, feel free to restrict or limit the permissions as needed by your corporate policy.
For most APIs, Toric requires read-only access. Within Core Tools, Admin access is required for Toric to manage webhook registration. We recommend selecting the options as they appear below to update company or project data automatically.
Note: Only cases which deviate from the default have been expanded.
Expand Documents and replicate the checked boxes:
Expand Observations and replicate the checked boxes:
Expand Photos and replicate the checked boxes:
Expand the following and replicate the checked boxes:
- Punch List
- RFIs
- Submittals
- Transmittals
Expand Commitments and replicate the checked boxes:
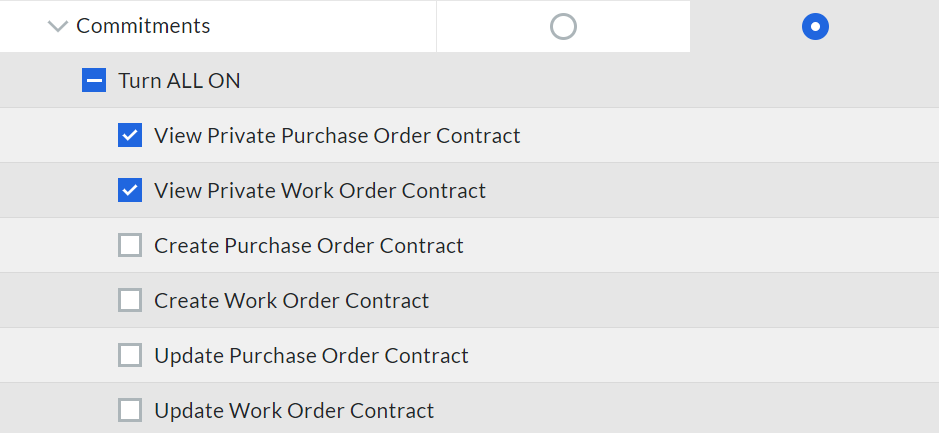
Just ensure the bottom of the permissions list matches the image below:
Use Project Permission Template
After saving the template, please return to the Company Directory and ToricConnector user and under PROJECT SETTINGS, change the Default Template to one of the permission templates you created.

You can now add the ToricConnector to all projects with the correct permission template applied.
In order to apply your permissions template to all existing projects, click the “Add All” button under the “Projects toricconnector Does Not Belong To” menu.

Now Procore should be ready for Toric to pull data from it. Keep reading to set up the Procore integration inside of Toric.
2. Configure Procore DMSA Connector in Toric
Setup time: 42 seconds
What is a Developer Managed Service Account?
Procore Developer Managed Service Account, or DMSA is method which allows Procore Administrators to install third party apps in order to access Procore data. For more on this topic please read the following support article.
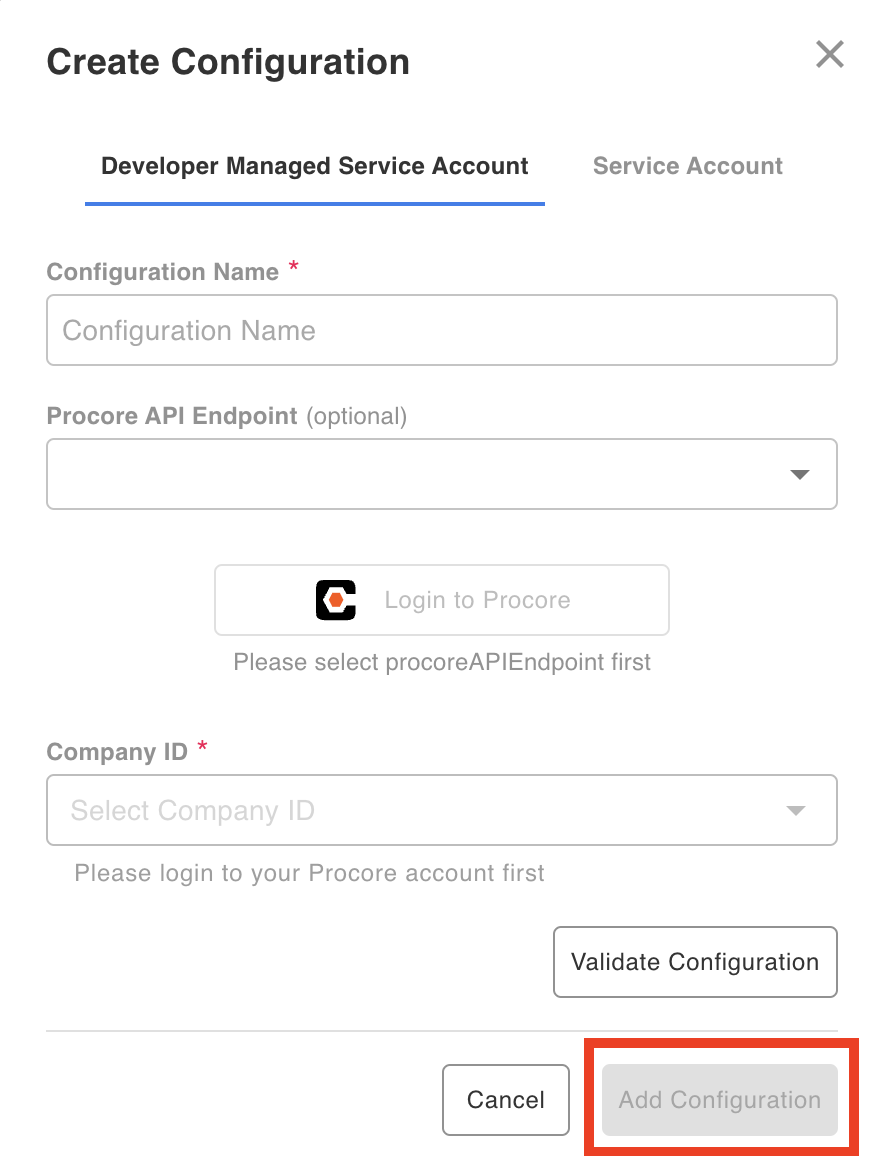
Login to Toric and follow these steps to setup a Procore Connector:
- Enter a Configuration Name
- Select a Procore API Endpoint
- Login to with Procore Admin credentials
- Select a Company ID
- Validate Your Configuration
1. Navigate to the Connectors
To find connectors in Toric, you must be signed in to your account. On the left side panel of your Workflow, click on "Integrations".
2. Select the Procore Connector
Under Construction & BIM connectors, find the “Procore” connector and click on “Setup Integration”

3. Click on Create a Connection
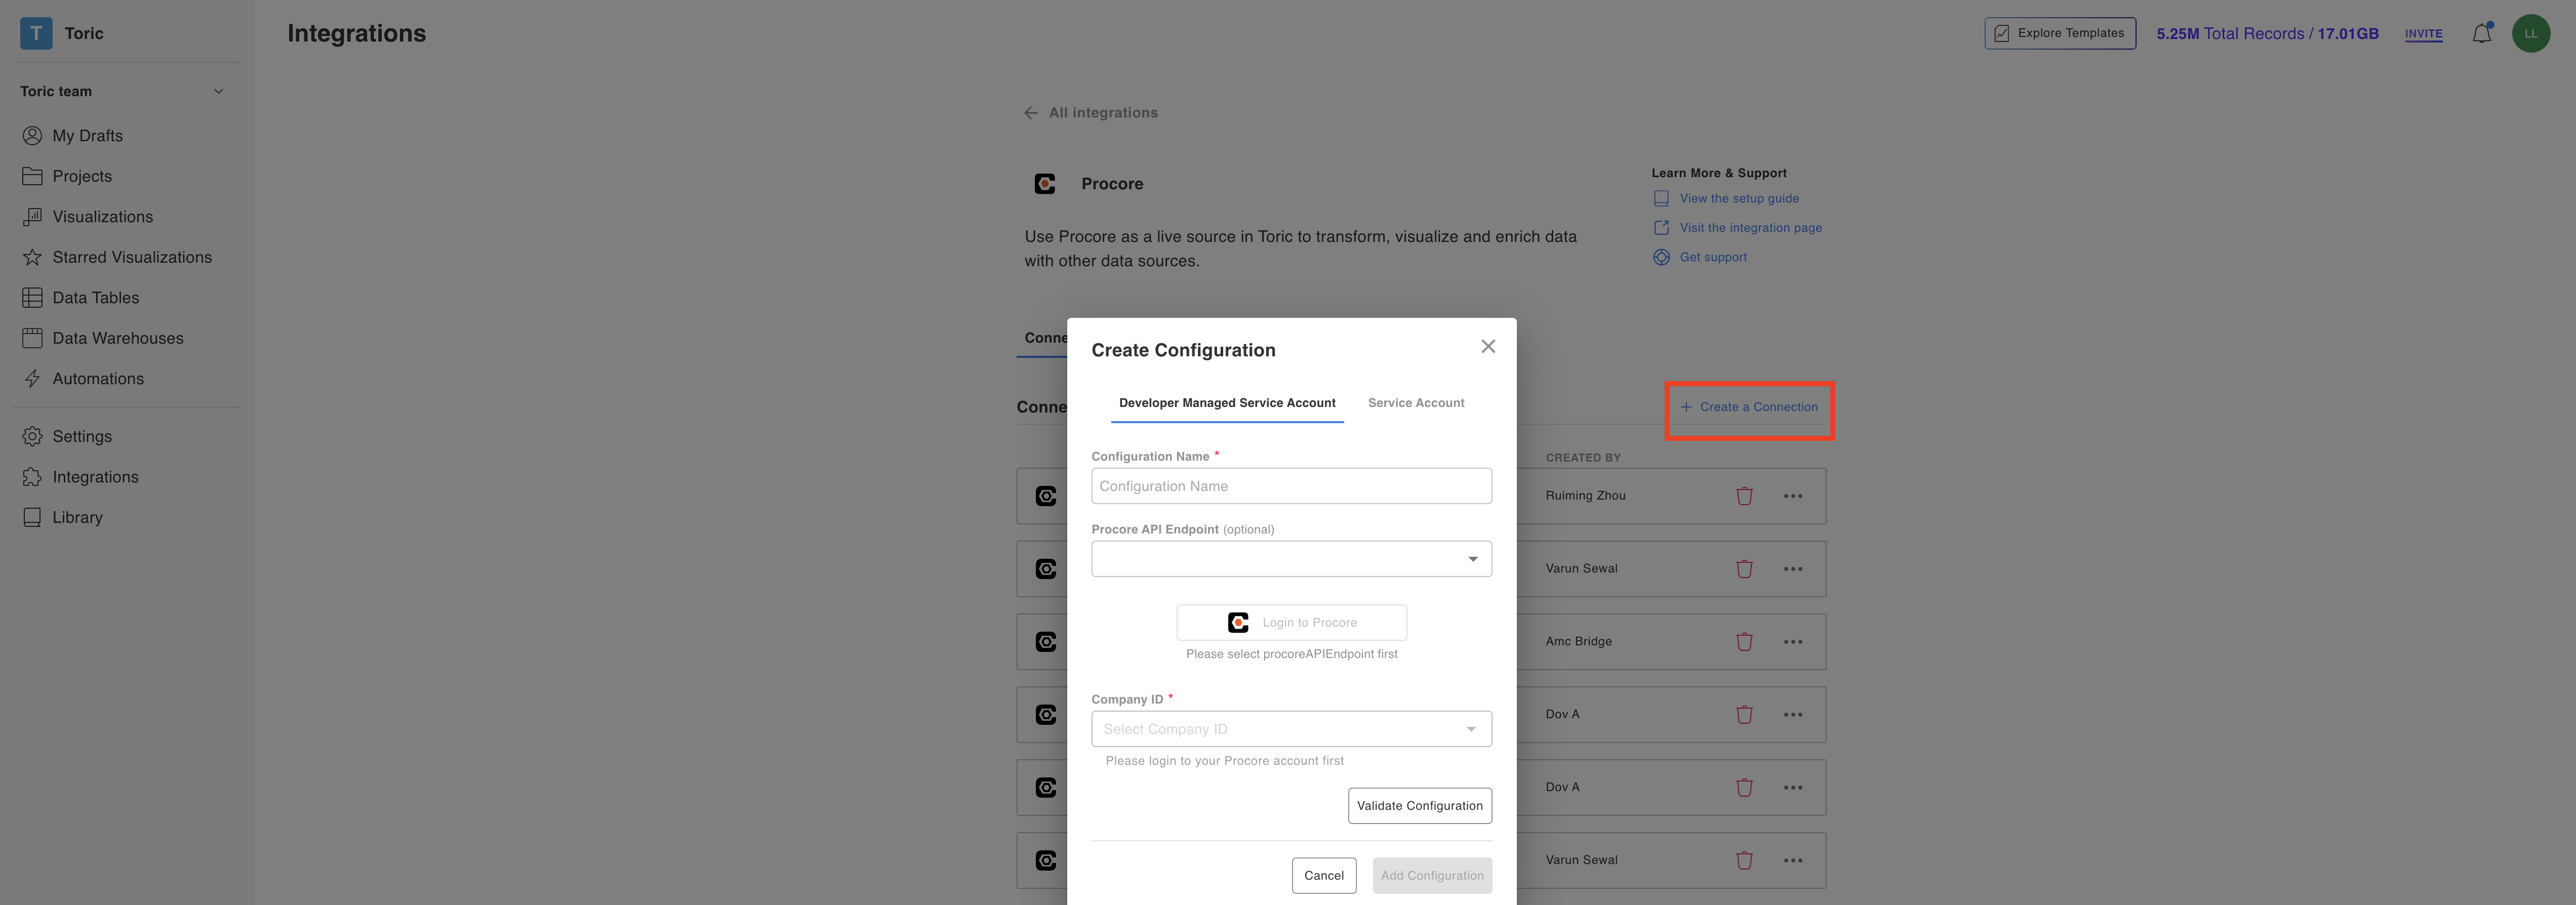
4. Enter a Configuration Name
Type a unique name for your Procore DMSA Connector.

5. Select a Procore API Endpoint
There are three options to choose from
- sandbox.procore.com
- api-monthly.procore.com
- api.procore.com
To test your new connector, you can use the sandbox URL. When you are ready to ingest actual company data, update the configuration and select api.procore.com.
6. Log in with Procore Credentials
This step is used to link the specific Procore company where the Toric application is installed. Make sure you're using the username and password of a Procore User. If you do not have such an account, please reach out to your team and have someone with the proper Procore account set up the Procore Configuration.
7. Select a Company ID
Use the dropdown to select a Company ID.
Note: If your administrator account has access to multiple companies each of them will appear in the list and you will have the ability to select all the populated Company IDs.
This ensures that you do not have to create a configuration for each company account but instead have one configuration in Toric for multiple company accounts. This also ensures that when you create ingestion or run dataflow automations, you can use one automation for all companies because they are all registered to the same configuration.

8. Click on Validate Configuration
Now that you have all Configuration details filled in, click on Validate Configuration
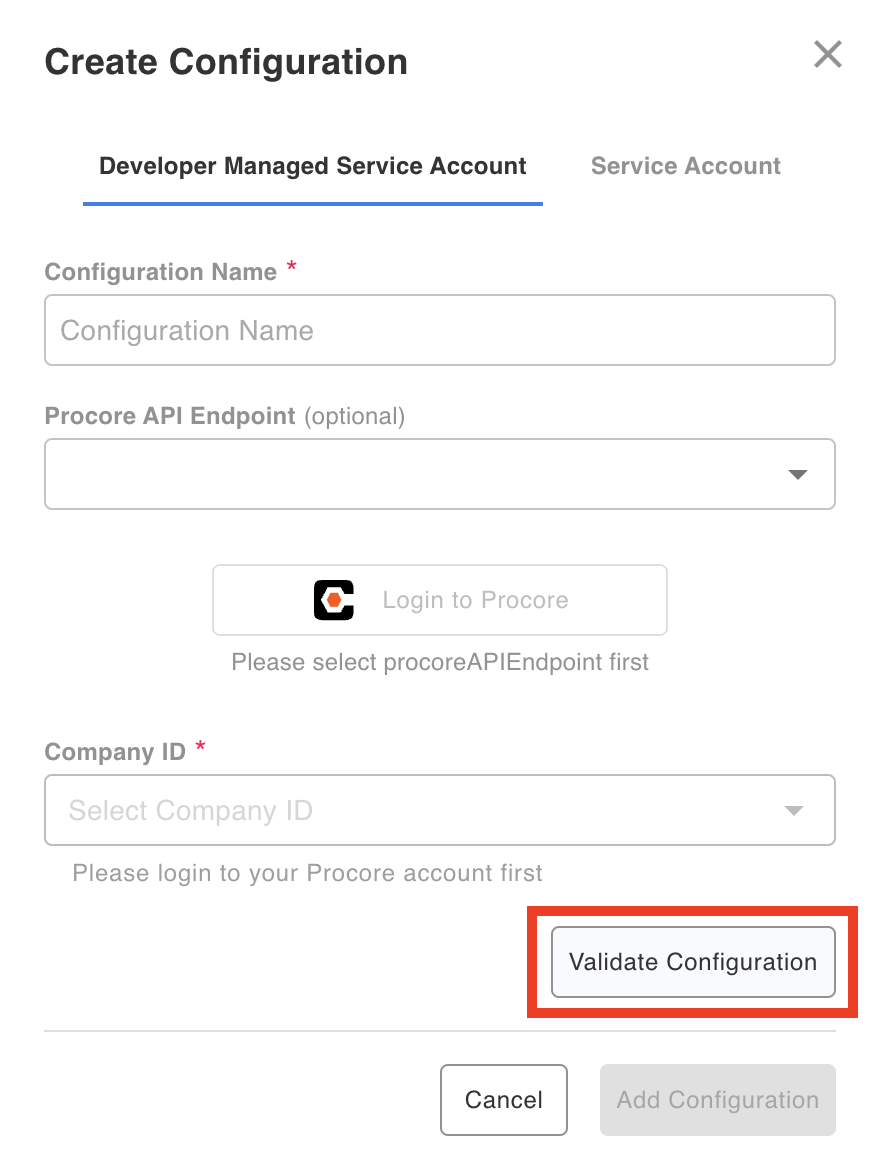
If the information entered is valid, a Validation Successful message will appear.
- Invalid fields will be highlighted in red and a successful validation will show in green.
9. Click “Add Configuration” to finalize your configuration
Rate Limiting
Usage of Procore’s API is subject to rate limits. Procore offers Rate Limiting documentation here. Please, refer to it for most updated
Procore Rate Limits
Procore API rate limits to 3,600 requests per hour. The rate limit resets every hour. There are three important response headers returned when making a request to the Procore API.
Toric gets 3 times the rate limit Procore shows, which ends up being around 10,800.
| Header | Explanation |
| X-Rate-Limit-Limit | The total number of requests per 60 minute window. |
| X-Rate-Limit-Remaining | The number of requests you are allowed to make in the current 60 minute window. |
| X-Rate-Limit-Reset | The Unix timestamp for when the next window begins. |
Example:
X-Rate-Limit-Limit: 3600
X-Rate-Limit-Remaining: 3599
X-Rate-Limit-Reset: 1466182244
Integration Capabilities Supported by the Connectors
Toric ingests data from Procore via APIs, and we currently support data access to 90+ endpoints from Construction Financials, Core Tools, Field Productivity, Project Management, Quality & Safety, and Utilities. Reference the Data Access table for a detailed list.
Embed Toric in Procore
Overview
Embedding Toric in Procore only requires a few steps to get you started.
1. Obtain Your Shared Viz ID
2. Install the Toric App in Procore
3. Configure Your Embedded App in Procore
4. View A Toric App in Procore
1. Obtain Your Toric Shared Viz ID
- Login to Toric and open your desired Dataflow. After opening your Dataflow, navigate to the top right of your screen and locate the Share button.

Toric - Share Button
- Enable Shared link and copy the ID (see below). You will need this in step 3 to configure your embedded app in Procore.
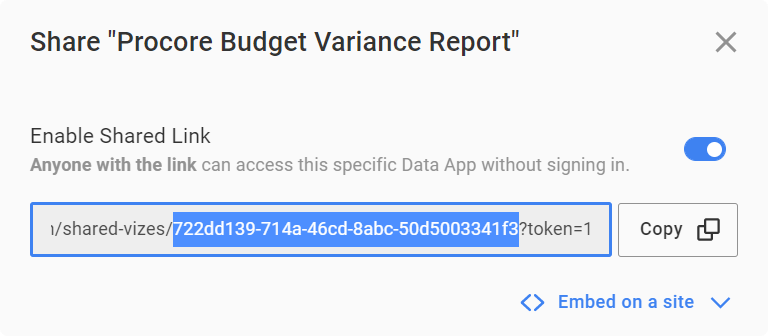
Toric - Shared Viz ID
2. Install the Toric App
• Login to Procore and Install the Toric app.
Procore - Install Toric App
3. Configure Your Embedded App In Procore
After installing the Toric app, Procore will show a dialog with Configuration Options.
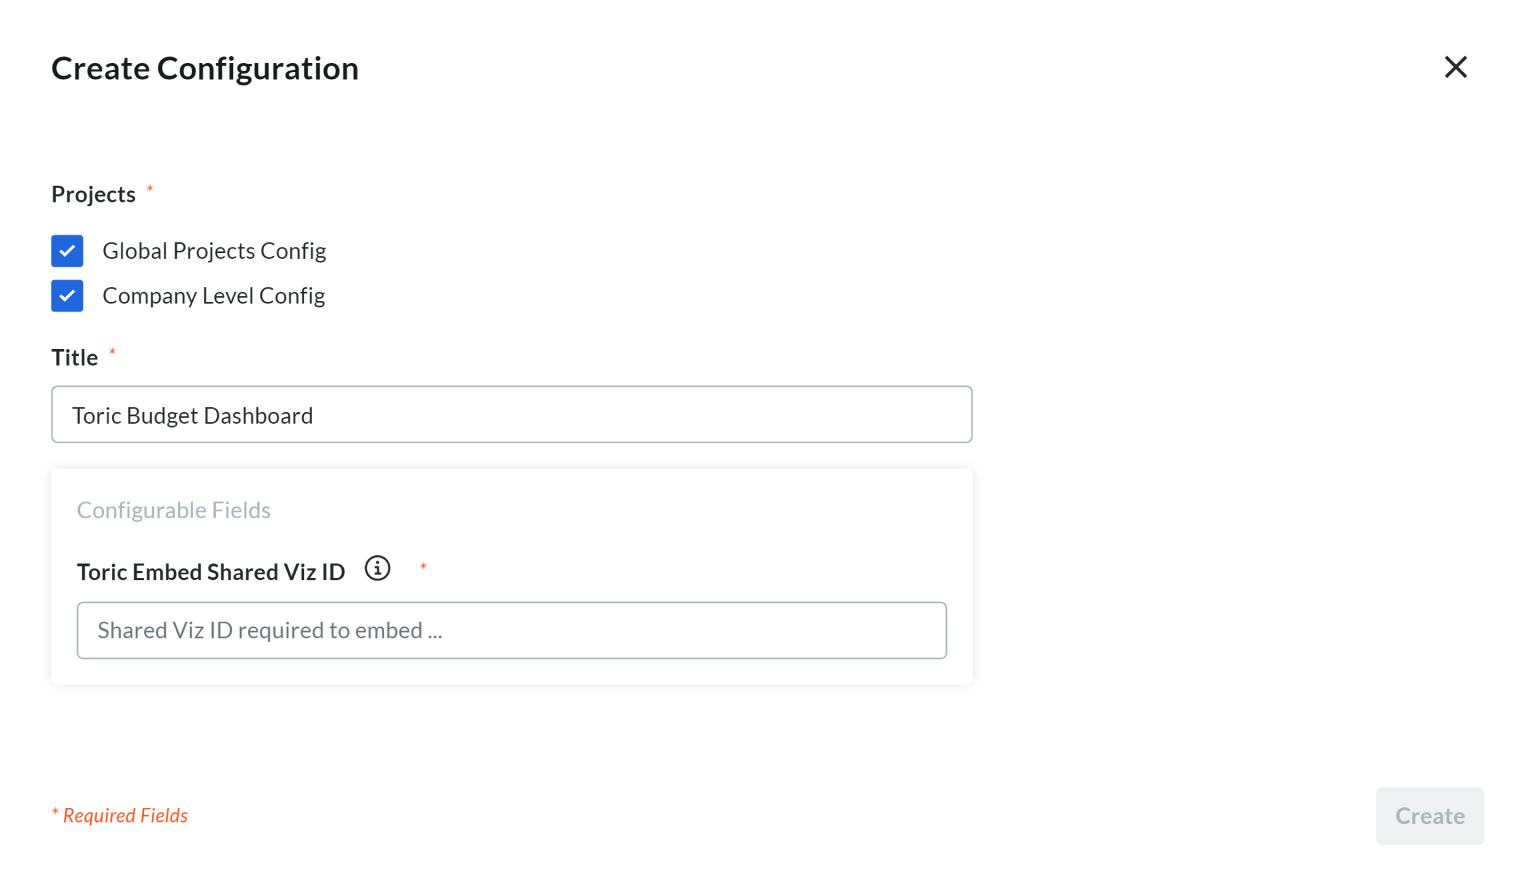
- Click on the Projects dropdown to select one, or multiple projects in the list. This will add your Toric Shared Viz to each of the selected projects.
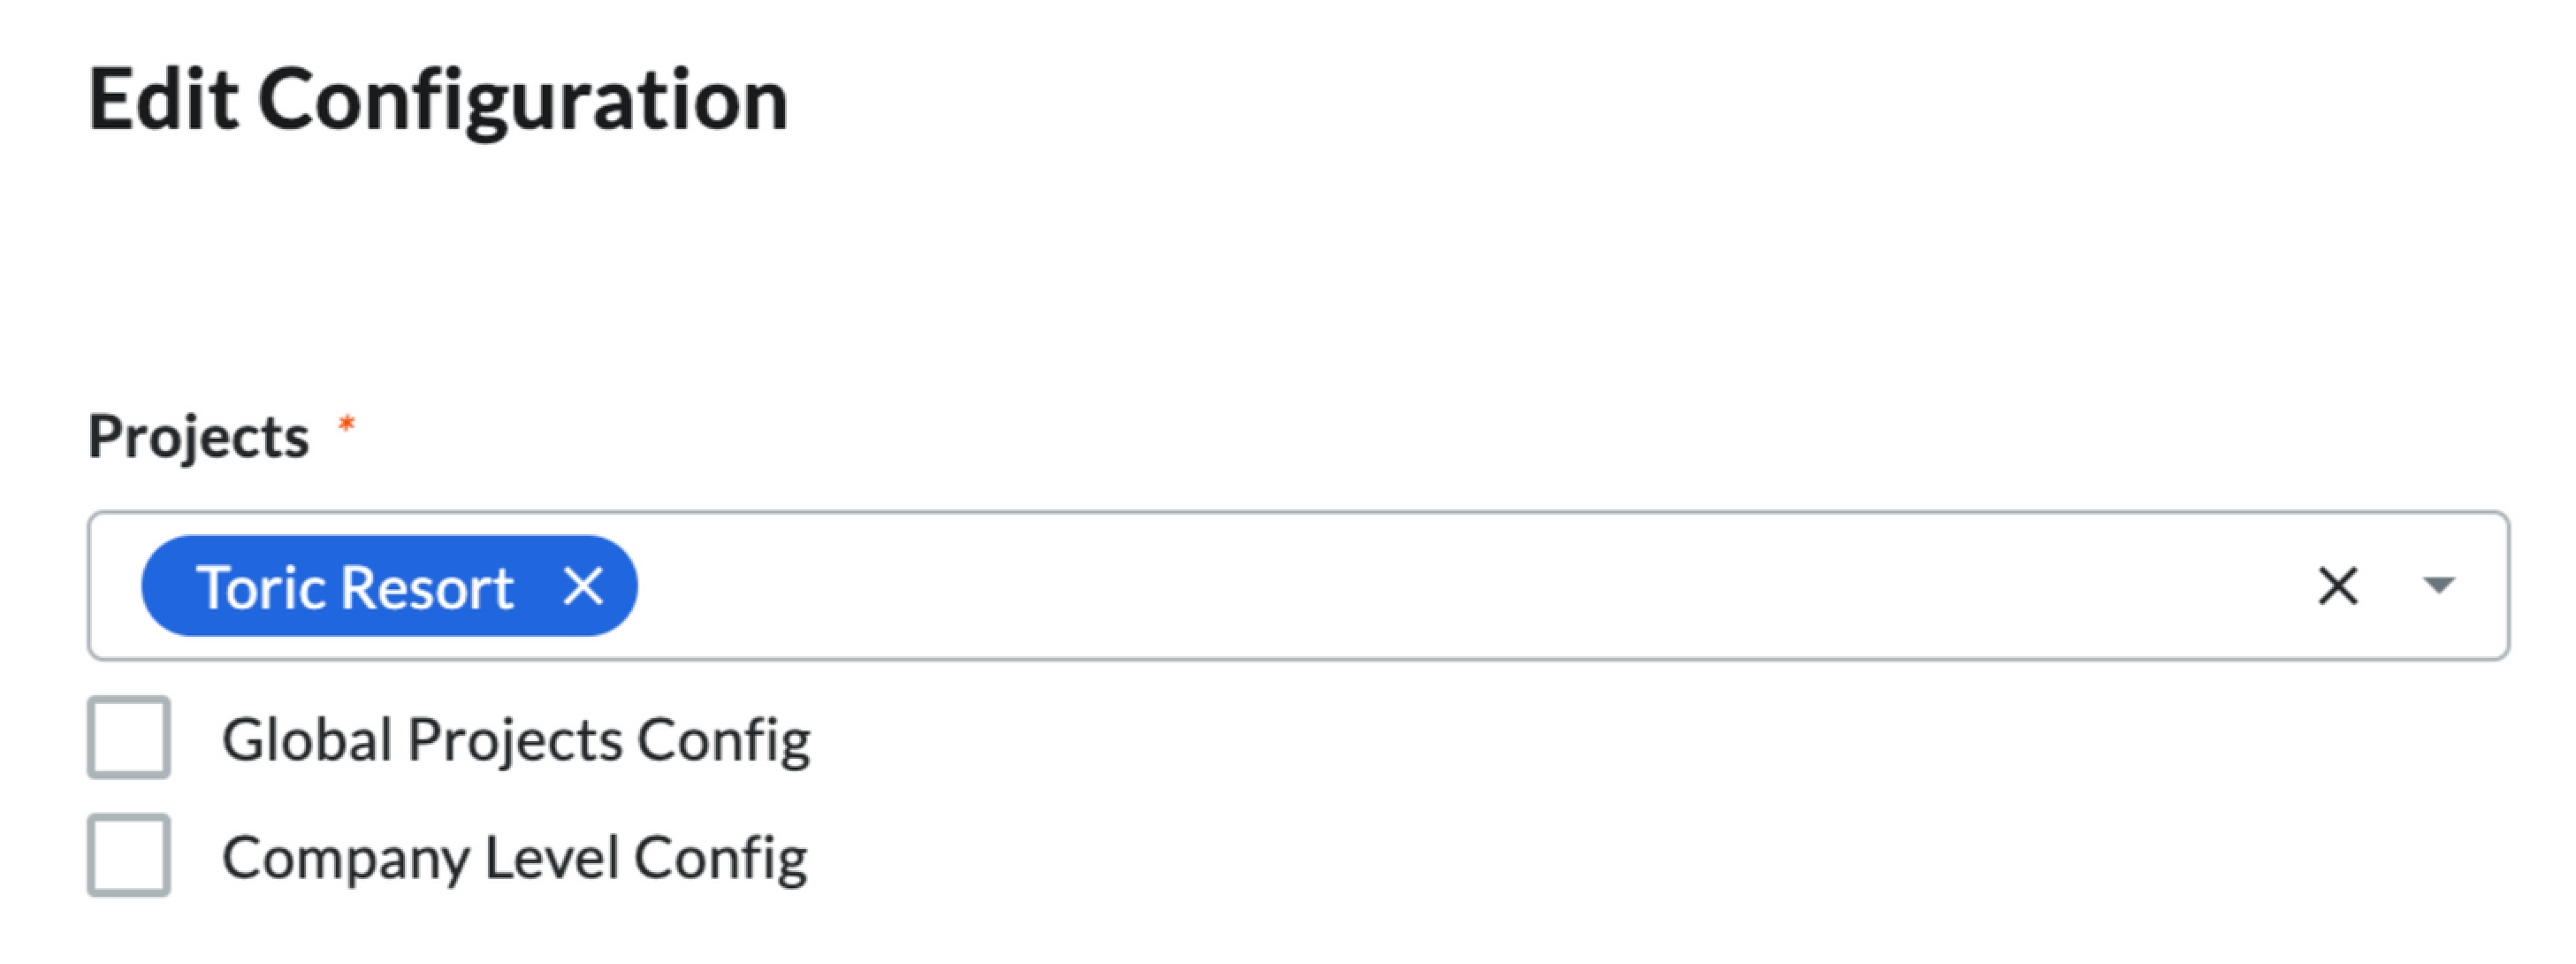
Procore - Embedded App Configuration
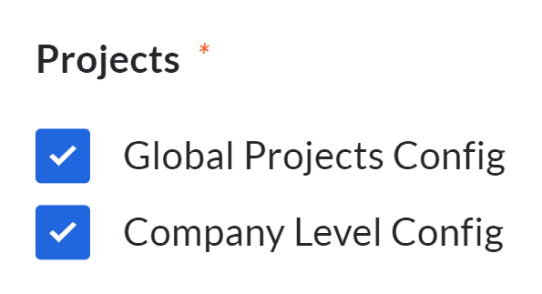
- Alternatively, you could select the Global Projects Config or Company Level Config options. The Global Projects option will display your embedded app on all active and new projects. The Company Level option will allow users to launch an App at the company level.
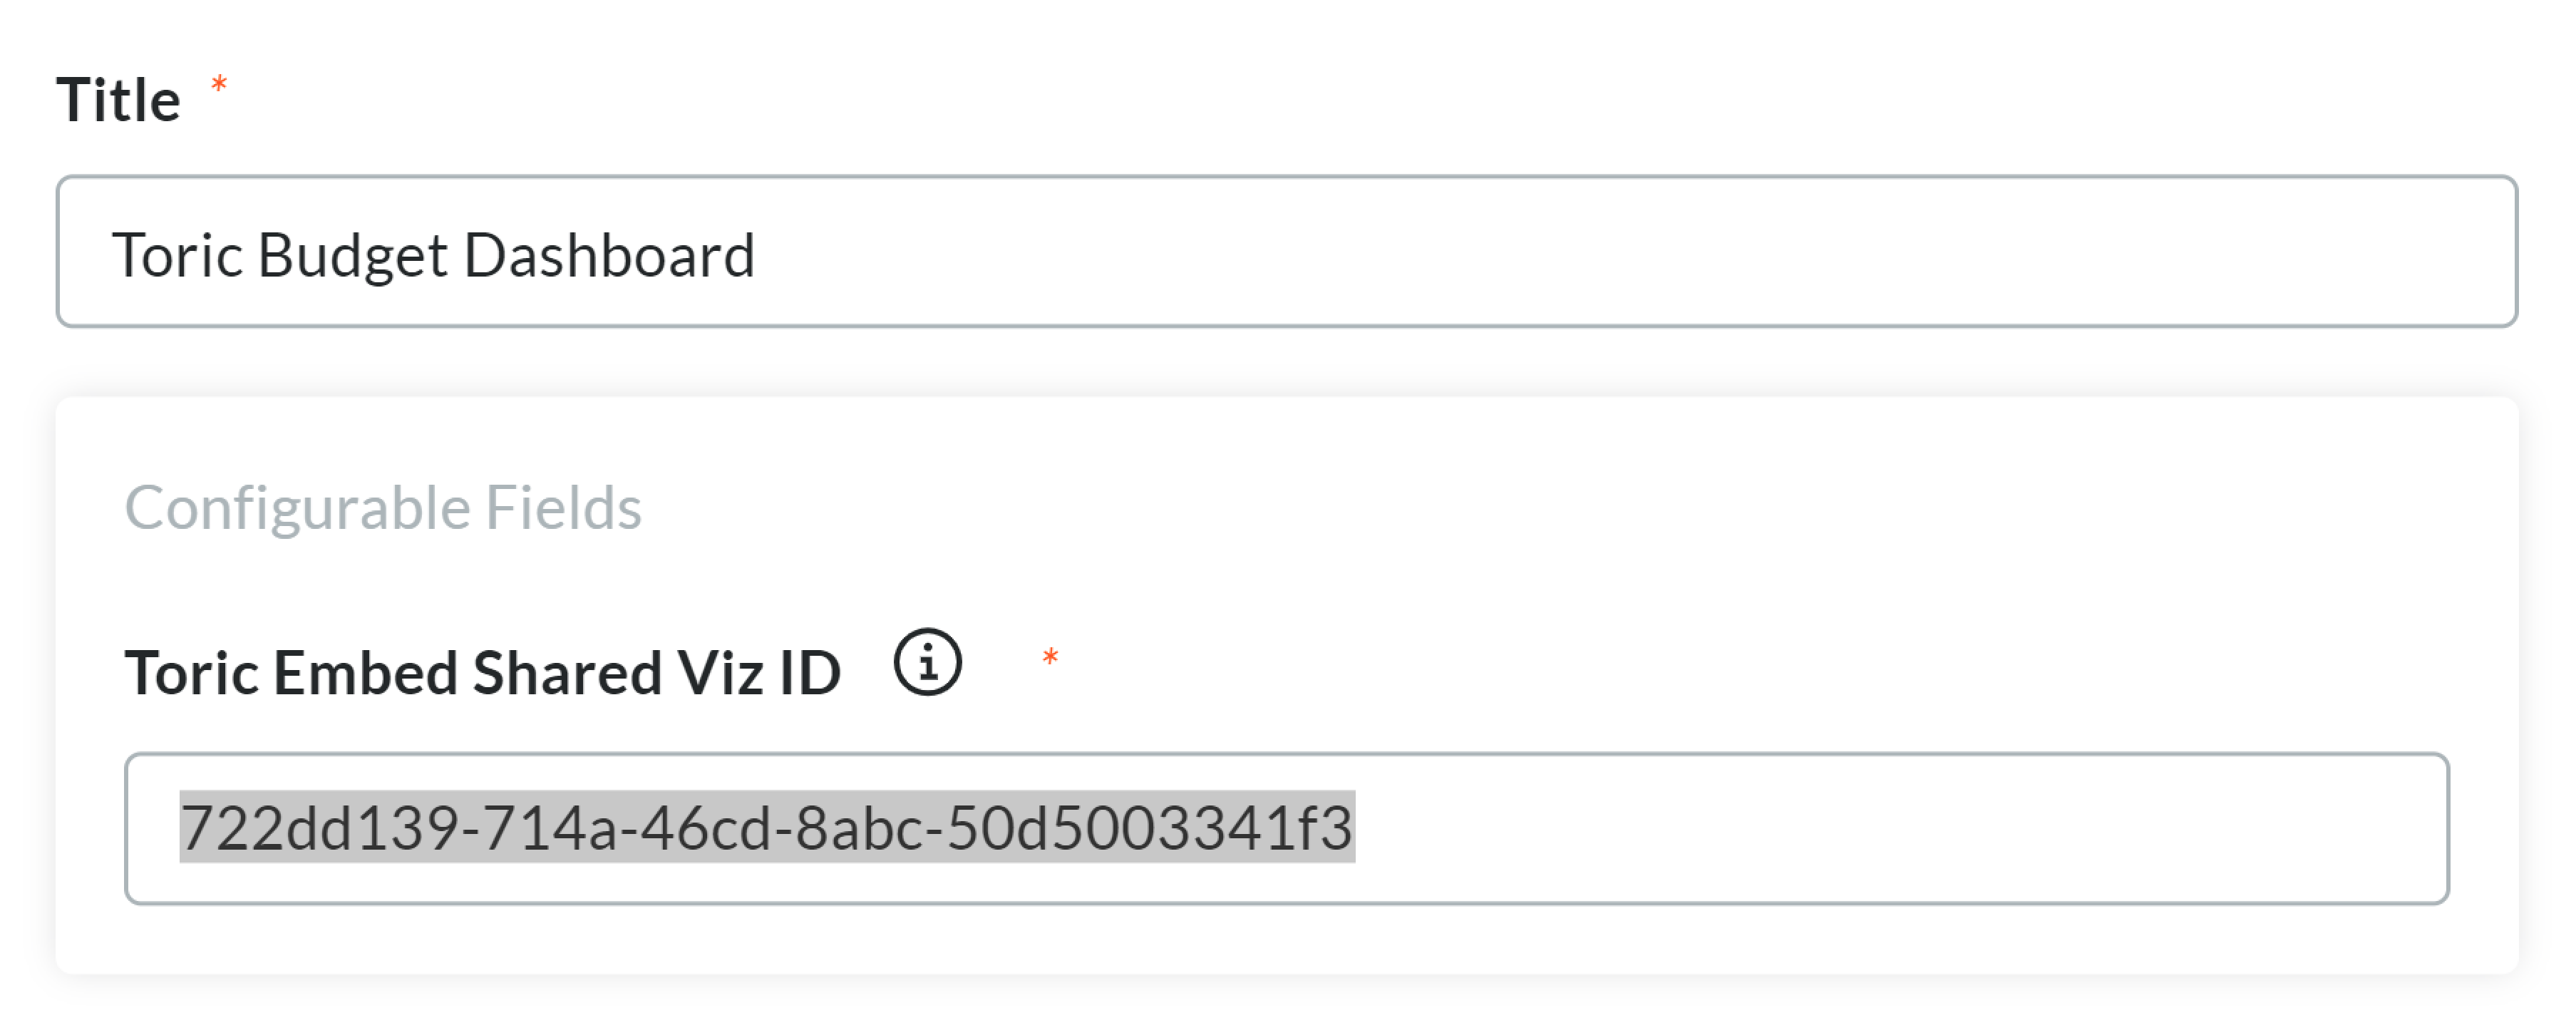
- Enter a Title and copy the ID of your Shared Viz (from step 1)
Procore - Embedded App Configuration
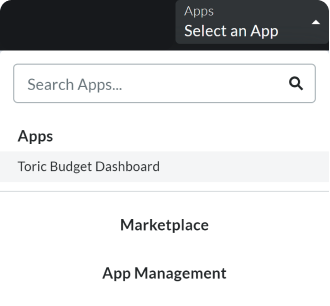
- If you need to remove or add more projects, you can access your App(s) configurations via the App Management page.
Procore - App Options
- In App Management, page click the Edit button to open an App configuration.

Procore - App Management
Procore - App Configuration
Configure Toric Webhooks for Procore
Getting your data is easy with Toric’s integrations. Read on for a step-by-step guide to configure your Toric Webhooks in your Procore account to access to your company and project data.
This article covers:
- What Are Webhooks?
- Generate Webhooks In Toric
- Configure Toric Webhooks in Procore
- Example Procore Webhook
- FAQ
What Are Webhooks?
A webhook is a a type of lightweight API that could receive data when and change event is triggered. For example, if RFIs are added in your Procore project, an existing Procore source will be updated in Toric with latest changes. This trigger must be configured before using it in an automation.
There's plenty more online to learn about APIs vs. Webhooks, or you could like to deep dive on Procore Webhooks.
Generate Webhooks in Toric
Go to the Procore Integration in Toric, then click the Webhooks tab.
Configure Toric Webhooks in Procore
In Procore, follow the following steps to setup Toric webhook:
- Select a Company
- Select a Project
- Select Webhooks
- Paste Notification Endpoint
- Paste Authorization Header
- Select Webhook Options
- Save Endpoints
- Options in Toric
Setup time: 1 min
1. Select a Company
Login to Procore and select your Company using the dropdown (top left).
2. Select a Project
Select a project using the Project selection dropdown (top left). If you do not select project, the Webhooks will fetch company level data.
3. Select Webhooks
Navigate to the Webhooks option in the right menu. Select this option to open Webhook Configuration.
4. Paste Notification Endpoint
Paste the Notification Endpoint URL generated in Toric.
5. Paste Authorization Header
Paste the Authorization Header id generated in Toric.
6. Select Webhook Options
Scroll down the list of Webhooks configurations. There are configurations for each module in Procore
These are the categories at the Company Level
- Project Management
- Construction Financials
- Core
- Quality & Safety
These are the categories at the Project Level
- Project Management
- Construction Financials
- Core
- Field Productivity
- Quality & Safety
7. Save Endpoints
Select a project using the Project selection dropdown (top left)
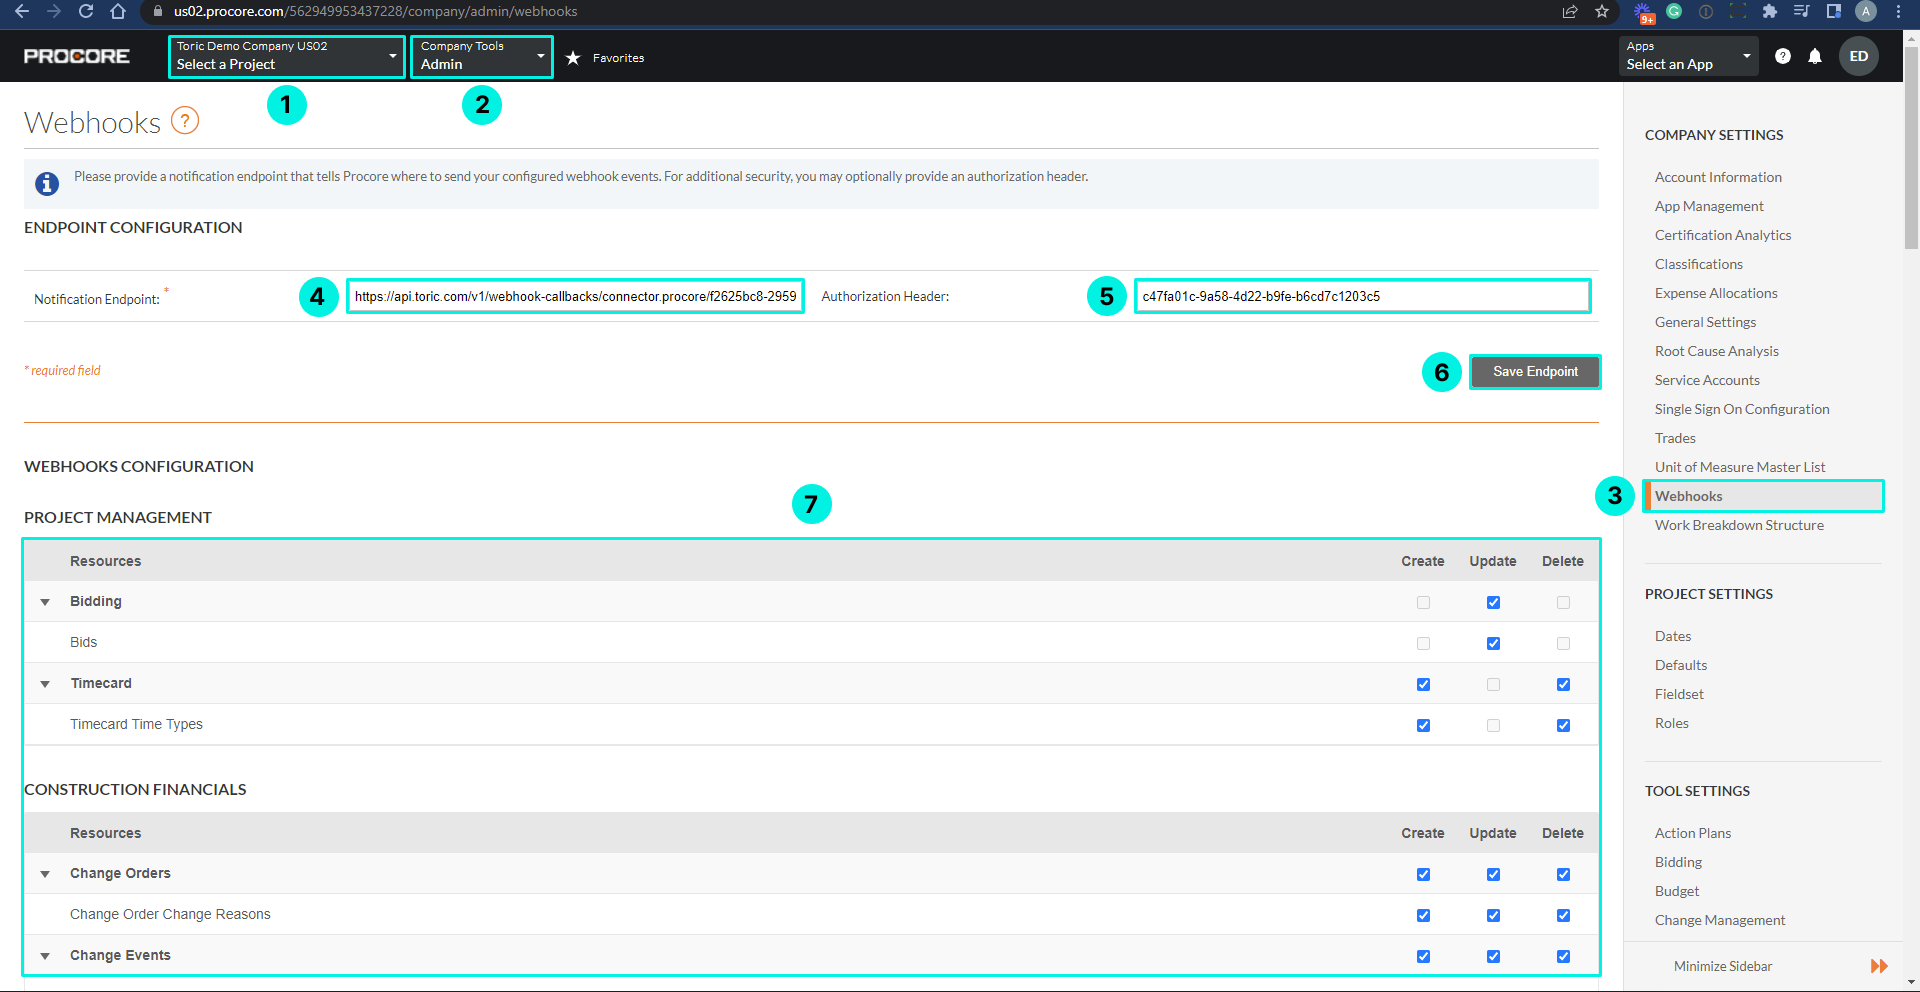
Procore Webhooks - Setup
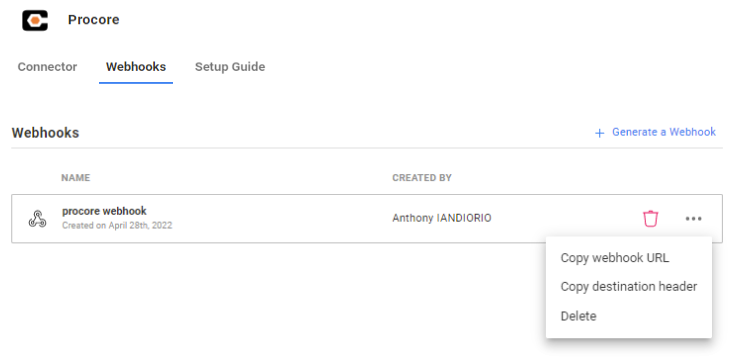
8. Options in Toric
Once a webhook is created, you have a few options. You can create a Webhook using the +Generate a Webhook button.
In addition, click the three dots to open the list of options:
- Copy webhook URL
- Copy destination folder
- Delete: This is will destroy the Webhook and you will not be able to restore it. You could also use the red trash can icon to delete a Webhook.
Procore Webhooks - Options
Example Webhooks Automation for Procore
Checkout this quick example of a Procore automation using Webhooks. Learn more about other types of actions in Automations for Integrations.
Questions?
Don't see the Endpoints you are looking for? Need more information about Incremental Ingestion as it relates to specific endpoints? We're always happy to make new endpoints available and provide our customers with more information. Please reach out to support@toric.com with your request and questions.


