Write to Destinations
Overview
In addition to data ingestion, Toric has the ability to write your data to various destinations, both internal and external to Toric.
Toric's data workflow supports the writing of structured and unstructured data to destinations such as Toric Data Tables (internal and external), data warehouses, data lakes, and data source systems.
Read on for a step-by-step guide to configure the "Write to" feature for specific destinations. We'll explore the general workflow and settings for "Write to."
- What is the "Write to" Feature?
- Where Can I Find the "Write to" Feature?
- How Do I Create a New "Write to" Workflow?
What is the Write to feature?
The Write To feature allows you to write (push) unstructured or structured data to different destinations. For instance, if Autodesk Construction Cloud (ACC) is your preferred project management tool, you can write RFIs back into it.
Where Can I Find the Write to Feature?
Once you have configured a destination to write to, you can do any of the following:
- To write to data tables (internal and external) and data warehouses such as Azure SQL or Google BigQuery, use the Write to Warehouse node in the dataflow. Continue reading for more detailed instructions on how to work with these types of destinations.
- To write to data lakes such as Azure Blob Storage or Amazon S3, use the Run Export Automation node in the dataflow. For specific instructions on these types of destinations, please refer to the documentation.

- To write to data source systems such as Autodesk Construction Cloud (ACC) and Procore, use the Write to Destination node in the dataflow. For specific instructions on how to use this node with these types of destinations, continue reading.
How Do I Create a New Write to workflow?
We have divided "How to Create a New Write to Workflow" into three parts based on the three types of destinations described above. In addition, we have provided written step-by-step instructions below the videos.
1. Setting up a Write to workflow for Data Tables (internal & external) & Data Warehouses
Step by Step:
- Based on the destination, if you are trying to write to:
- Internal Table - you need to set up the internal table in Toric. You can learn more about this here.
- External Table - you need to set up the external table to sources like Snowflake, Azure SQL & Google BigQuery in Toric. You can learn more about this here.
- Data Warehouse - you need to deploy a Toric warehouse and can learn more about it here.
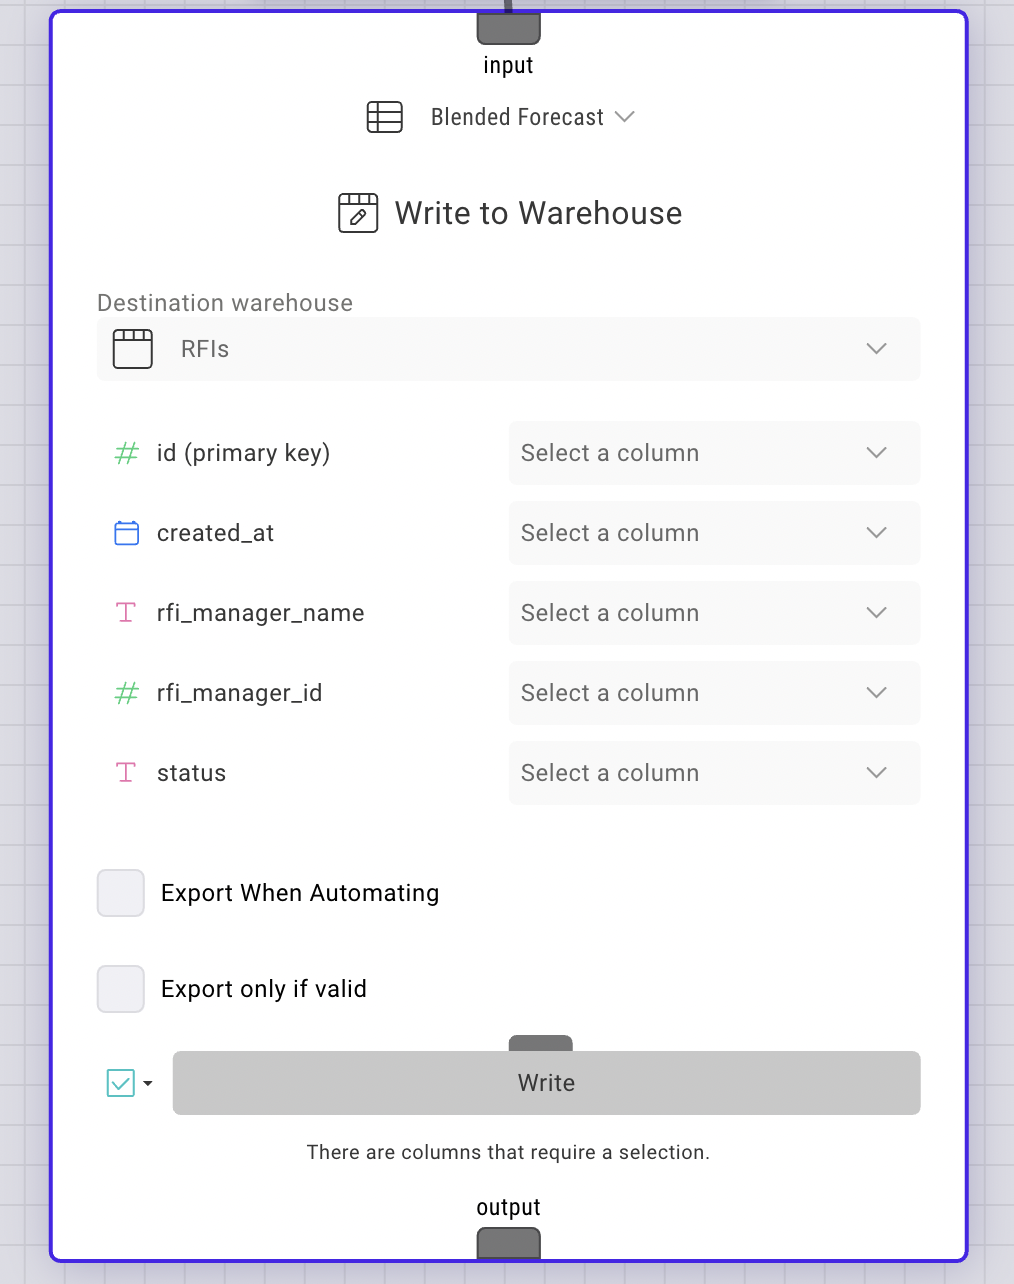
- Once you have your table set up, in your existing dataflow, add the “Write to Warehouse” Node and select the Warehouse (table) you set up in Step 1.
- Then map all the columns in your data to the schema of the table you created in Step 1.
- You can choose to “Export if Valid” if you need to have a necessary step for data validation before writing data to your table
- Click on “Write” to write the data.
- Note: Since the Write to is part of a dataflow it can be automated using a “Run Dataflow” type automation. Read here to learn more about the automation setup.
2. Setting up a Write to workflow for Data Lakes
Step by Step:
- Set up the specific Data Lake connector on the in-app connectors. Specific set up instructions for data lake connectors can be found here. in the video above, I had a configuration for Azure Blob Storage set up.
- Go to the Automations tab, and create a new automation:
- Provide a name for the automation. In the video above, I named the automation “Demo Test - Azure Blob”
- Provide a description for the automation.
- Jump to the “Action” section below and choose Action Type as “Export Data”.
- In the Application tab, choose the data lake you want to Write to. In the video above, I chose Azure Blob Storage.
- For the Connector, choose the connector config created in Step 1.
- In the existing dataflow (which contains the data you are trying to send), add a “Run Export Automation” node:
- Automation: Select the automation created in Step 2
- FileName: Either type a filename or create a filename in the dataflow using the source name and pass it as a parameter by linking the text input port to the filename you created in the dataflow.
- Format: Choose the format you want to write the data in for example, CSV,XLSX, JSON, etc.
- Compress: Will be selected by default in order to be efficient about the file size. But you can uncheck it too.
- Export When Automating: This is should be checked on if you want data to be written to the data lake when there is a “Run Dataflow” automation.
- Export if valid: Should be checked on if you want an added step of validation that the data and dataflow for a particular source are properly structured as expected by the Run Export Automation node.
- Click Export.
- Note: Since the Write to is part of a dataflow it can be automated using a “Run Dataflow” type automation. Read here to learn more about the automation setup.
3. Setting up a Write to workflow for Data Source Systems
- Note: For Write back to ACC [RFIs], you will need the containerID. You can read more here on how to extract the containerID
Step by Step:
- Set up the specific connector for the data source system you want to Write back to. Specific instructions can be found here.
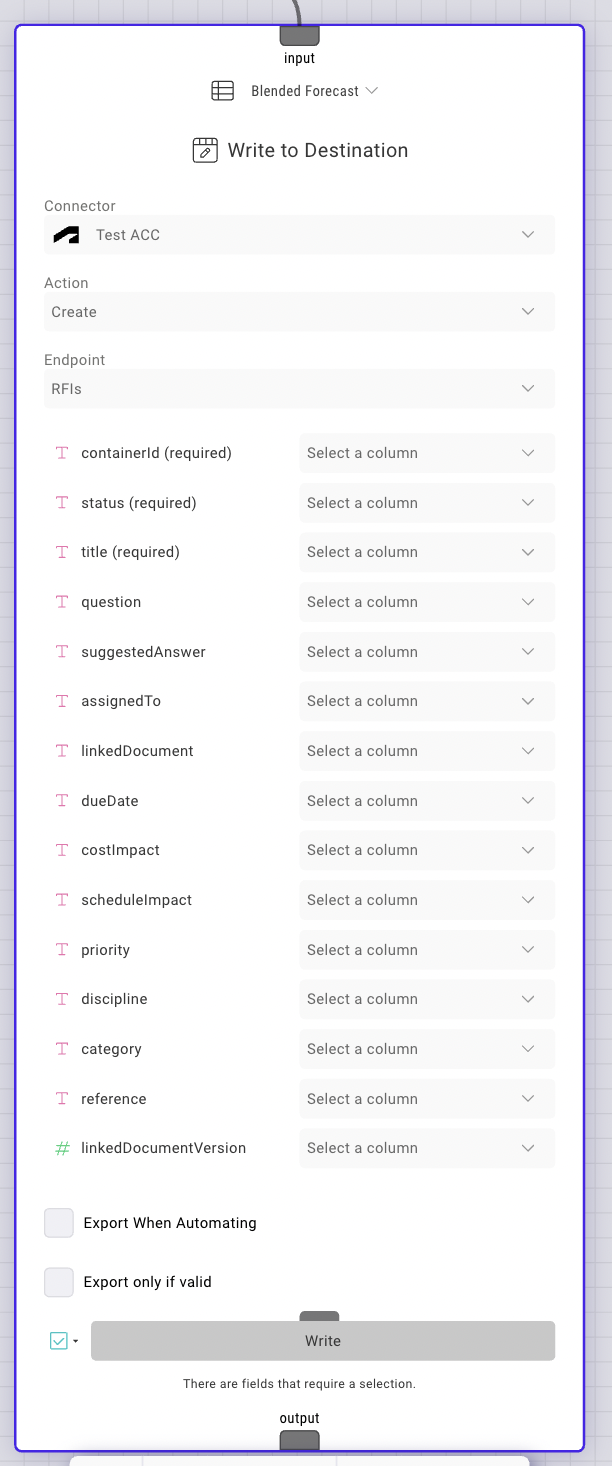
- In the dataflow which contains the data you are trying to write back into the data source system, add a “Write to Destination” node:
- Connector: Pick the connector you created in Step 1
- Action: You can choose to “Create” or “Update”. Create means that you are trying to create a new row(s) of data in the data source system that did not exist before. Update means you are trying to update an existing row(s) of data in the data source system that already existed. In the video above, we are using “Create” an example.
- Endpoint: Select the specific endpoint you want to write to in the data source system. IN the video above, we write back RFIs to the ACC RFIs endpoint.
- Map all the columns correctly from your data to the endpoint table schema
- Export When Automating: By default it is checked off, but if you have a Run Dataflow automation and want to write back data into the source system automatically, turn it on.
- Export only if valid: By default it is checked off, but if checked on it can serve as an added step of validation that if the set up is correct only then it will write back to the data source system
- Click Write
- Note: Since the Write to is part of a dataflow it can be automated using a “Run Dataflow” type automation. Read here to learn more about the automation setup.
References
Connectors Configuration Guide
Azure Blob Storage Configuration Guide


