Toric Managed Warehouses
Warehouse Overview
A warehouse is typically designed as a final storage location. In the context of Toric, a Data Warehouse is a physical instance of a database that is deployed and managed by the company. The purpose of a Data Warehouse is to store final, clean data that can be used for reporting or syncing.
Toric Data Warehouses offer users control over deployment region and backup region, including US, APAC, and EMEA regions. With Data Warehouses, users can create tables with custom schemas that support primary keys, dates, currencies, numbers, units of measure, lists, booleans, and even BIM models. Like data tables, Data Warehouses can be read and written from flows using the Write to Warehouse, Select, Distinct, and Summarize nodes.
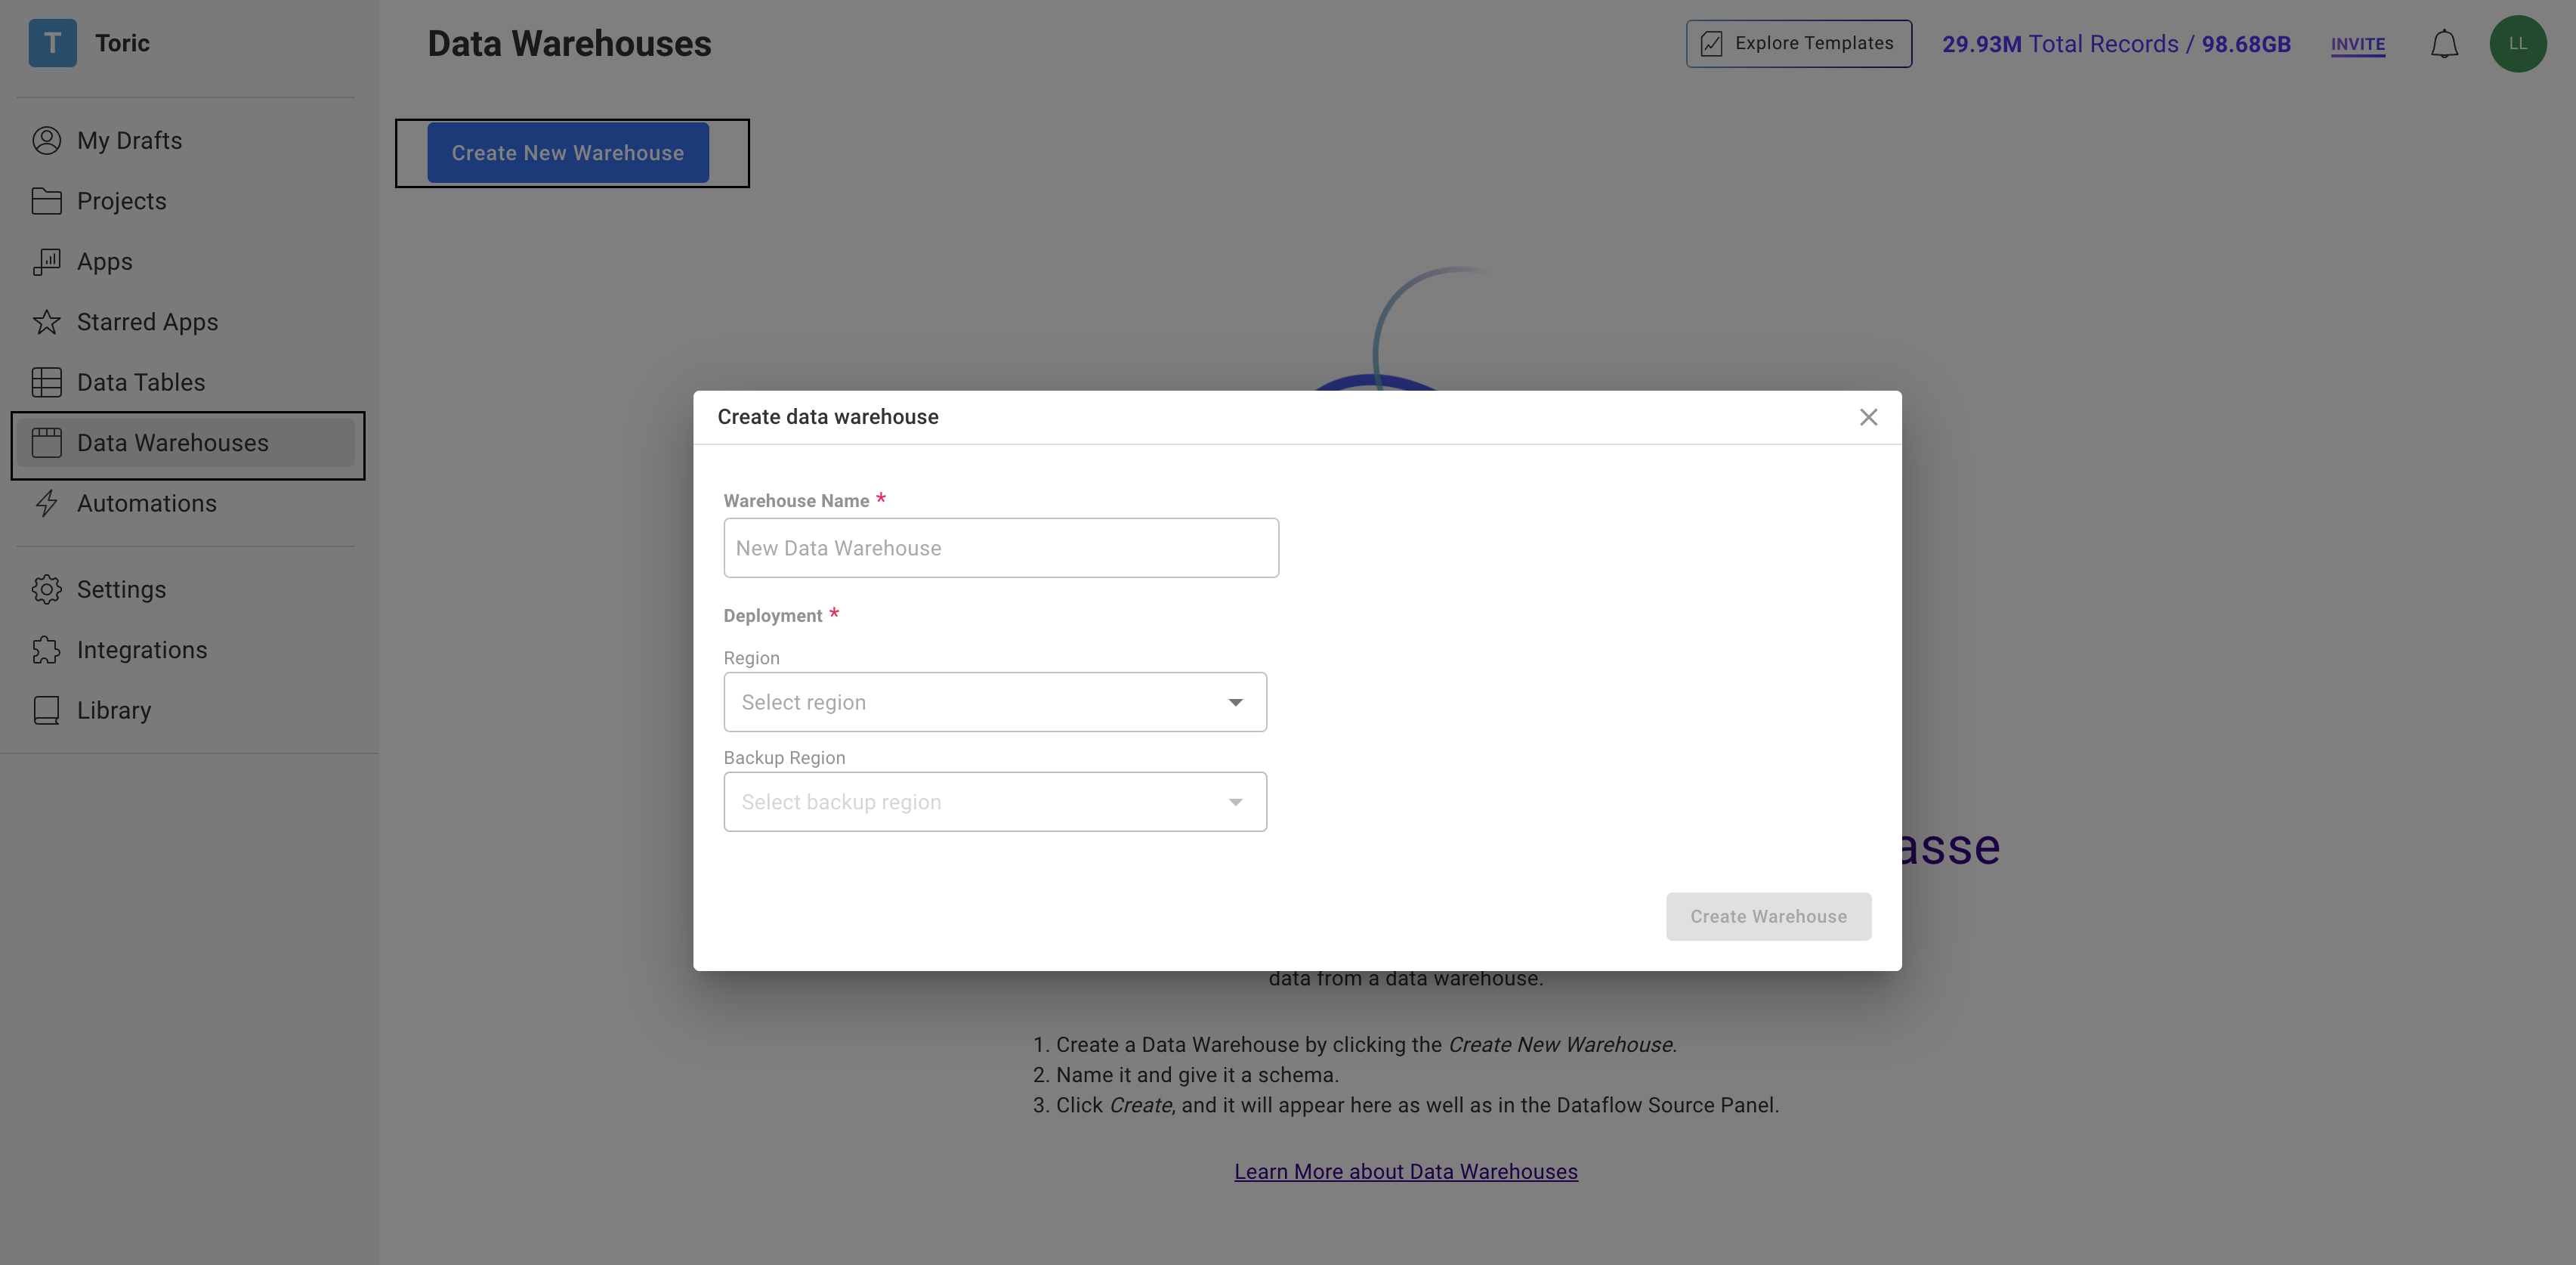
Steps to create a Warehouse:
- Log in to your Organization
- Click on “Data Warehouses” on the left side menu
- Click on Create New Warehouse
- Add a Warehouse Name
- Pick the region you want
- Pick your Backup Region
- Click on “Create Warehouse”
Data in warehouses is stored by creating tables. When creating a new warehouse, you have the option to create a data table by clicking on "Create Table."
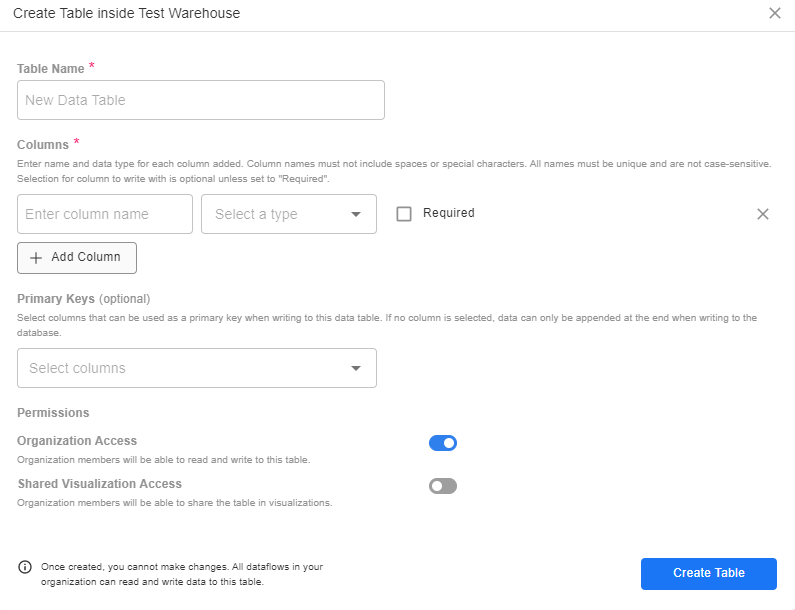
To create a table in the warehouse, follow these steps:
- Add a table name.
- Add the necessary columns.
- Select primary keys.
- Select desired permissions.
- Click on "Create Table."
Architecture
| Tables | Warehouse | External Warehouse | |
| DB | Multi-Tenant | Single-Tenant | Single-Tenant |
| Managed | Toric | Toric | Customer |
| Region | US-East | US/Asia/Europe | ??? |
Benefits of a Data Warehouse
Data Warehouses in Toric have two key benefits:
- Data Ownership - Data Warehouses set up in an organization are exclusive to that organization. The Warehouse is owned by the organization.
- Performance - Since Data Warehouses can be deployed in specific regions, and exclusively contain the organizations Data, accessing the Warehouse is more efficient.
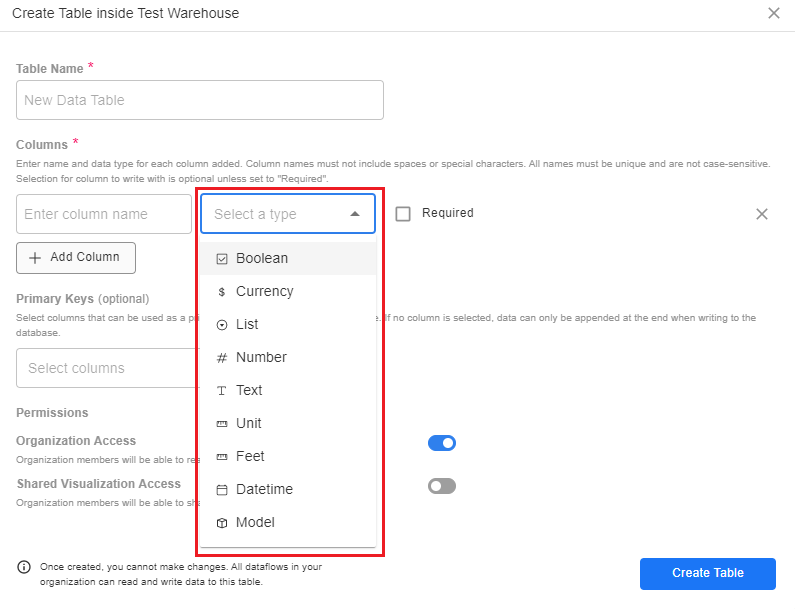
Data Types in Data Warehouses
Similar to Data Tables, all tables in a Toric Warehouse can have unique columns with individually assigned data types for each column. Here are some of the available data types:
| Data Type |
|---|
| Boolean |
| Currency |
| List |
| Number |
| Text |
| Unit |
| Feet |
| Datetime |
| Model |
Data Warehouse Structure
When setting up Data Tables in Warehouses, it is necessary to assign columns with their corresponding data types. Every column of data pushed into a Data Table must match a column with the correct data type.
It is possible to add columns to an existing Data Table in a Warehouse using the Data Table schema.
Finally, any column in the Data Table schema can be marked as required, meaning that every push to the warehouse must include a corresponding entry for that column.
Pushing Data into a Warehouse in Toric
Data can be inserted into any available Data Table in a Warehouse by using the Write to Warehouse node. This node prompts the user to select a Destination Data Table, after which the columns in the Data Table must be mapped to a column in the input table. Primary keys and required columns in the Data Table cannot be left unmapped.
Once columns are mapped, the data can be written to the Data Table. You can do this manually by selecting "Write Now," or automate the writing process by using the "Always Write" button. This allows the data to be written to the Data Table each time the flow is executed upstream, which can be triggered using automations.
To insert data into multiple Data Tables in a Warehouse, repeat the above process but change the Destination Data Table in the Write to Warehouse node.
Querying from a Data Warehouse in Toric
To query data that has been written to a Data Warehouse, use the "Select from Warehouse" node. This node requires the user to select the specific Source Data Table in the Warehouse from the dropdown menu. Once the table has been selected, the user can specify the number of rows to query, ranging from 100 to 1,000,000.
The user can also add conditions to the query in order to filter the table records based on selected fields, a conditional statement, and a value. One or multiple conditional statements can be used to filter the data, and "And" can be changed to "Or" to include or exclude data according to the given conditions.
After setting the limits and filters, click on "Run Query" to initiate the process of querying data from the Data Table.
To query data from multiple Data Tables in a Warehouse, repeat the above process by changing the selection of the Data Table in the "Select from Warehouse" node.
Data Warehouse Nodes
There are several nodes available in dataflow to perform operations on data warehouses.
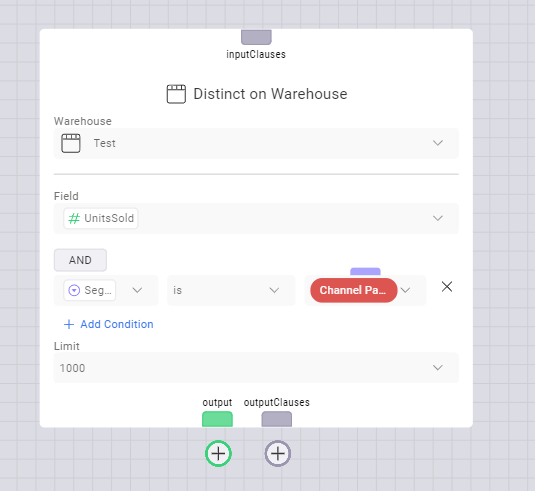
The "Distinct on Warehouse" node extracts unique values for a selected field from a data table in a warehouse. You can learn more about this node by clicking here.
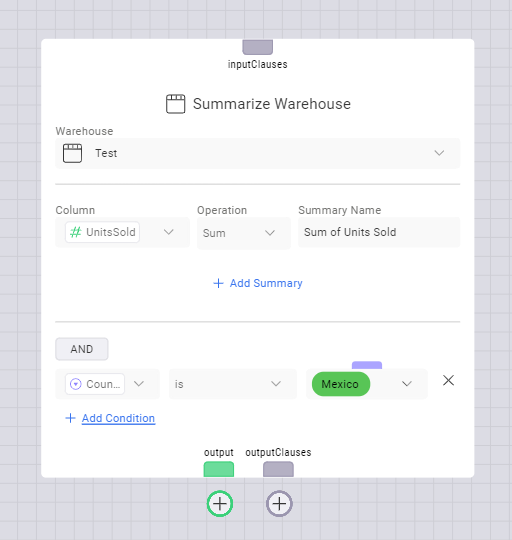
The Summarize Warehouse node extracts summarized values from a data table in a warehouse. For more information about the Summarize Warehouse node, click here.
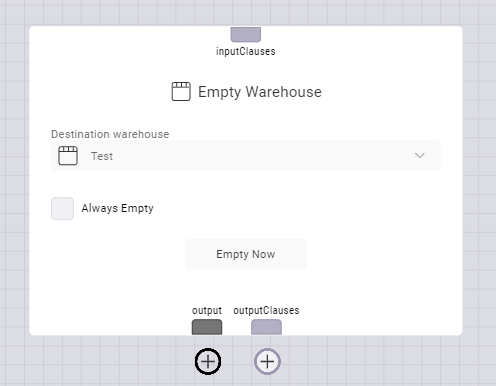
The Empty Warehouse node clears all data from a Data Table in a Warehouse. Learn more about the Empty Warehouse node here.
Connect your Toric Managed Warehouse with External Services
Before connecting your Toric Warehouse with External Services, you want to enable External Connection on your Toric Warehouse.
To enable External Connection, please follow these steps.
- From the left side menu in Toric, click on Data Warehouses
- Click on the Data Warehouse you want to connect
- Activate the Enable button for External Connection.
- You will see a window prompt asking you to confirm enabling the external warehouse. Click "Yes, enable now.”
Once you enable External Connection on your Toric Managed Warehouse, third-party applications can have read-only access to the warehouse.

The video below demonstrates how to connect Toric Warehouse to Power BI
Step-by-step instruction on how to connect Toric Warehouse to Power BI
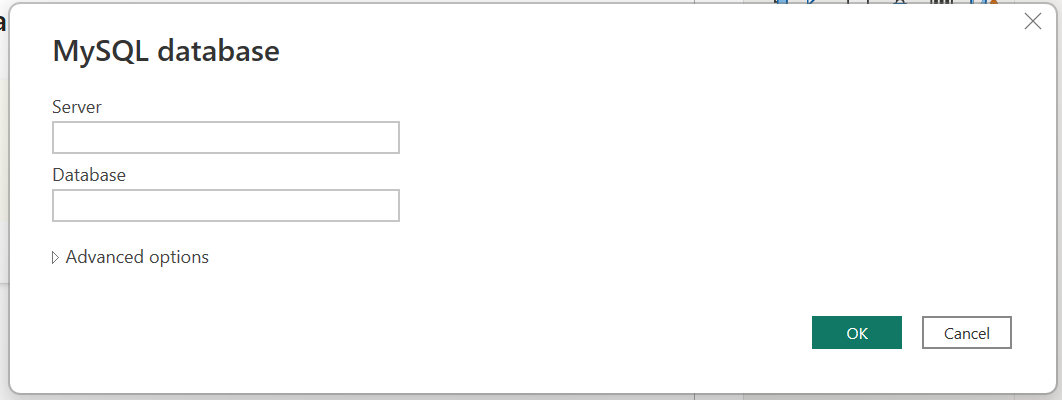
- In Power Bi, select MySQL database in the Get Data menu
- click Connect

- You will be prompted with a window where you can fill in your Server and Database information
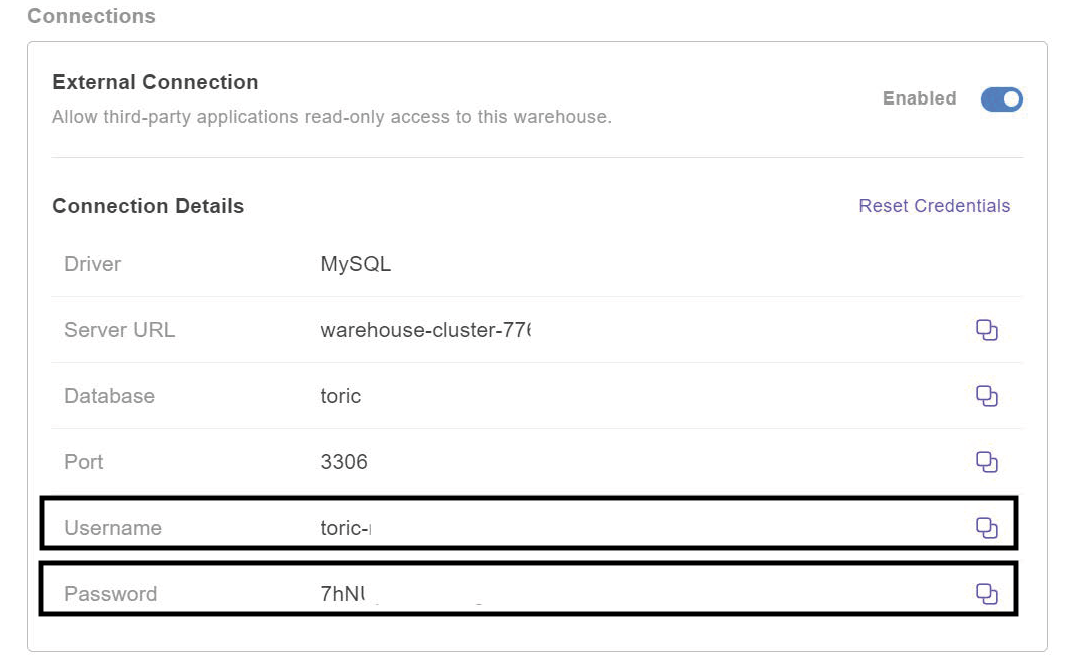
- Copy the Server URL and Database from your Toric Warehouse Connection Details
- Paste it into Power BI
- Click OK

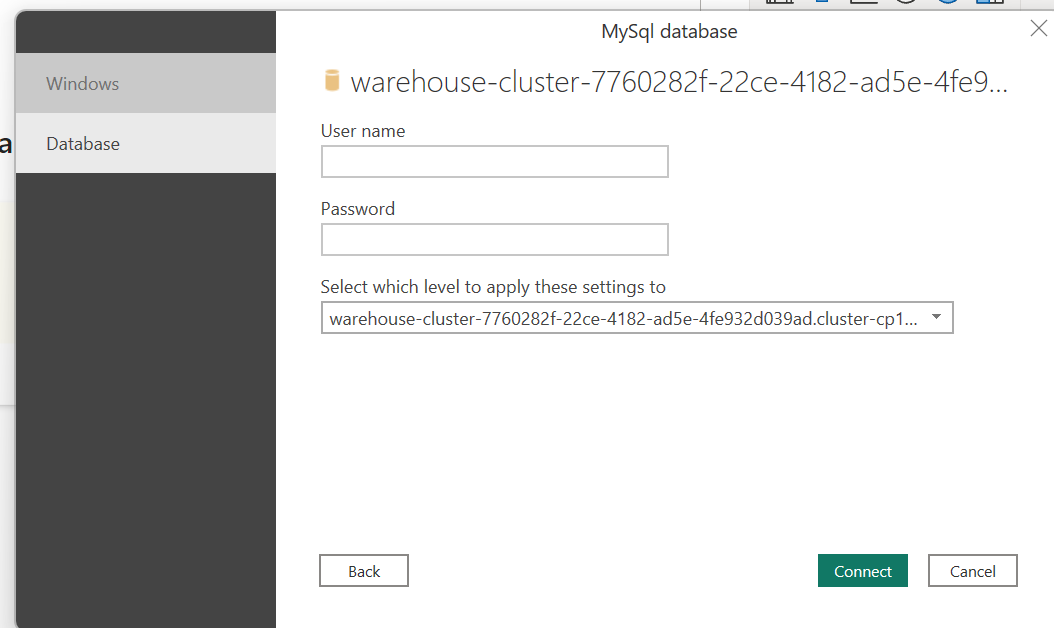
- Copy the Username and Password from Toric Warehouse Connection Details
- Paste it into your Power BI
- Click Connect
[Screenshot from Power BI]
- After successfully connecting to your Toric Warehouse, you can preview your tables and the data before loading them to Power BI.
Note: If you delete a Data Table in Toric Data Warehouse, you may still see the deleted Data Table in the Power BI connection.
Reasons to use
- Performance
- Security/Ownership


