Data Tables
What is a Data Table?
Data Tables are shared tables used to process data in-flight. For example, when building replication or reconciliation workflows, it is useful to write IDs on a table to cross-reference data and determine fields that need to be rewritten to our final destination. Data tables can be used within flows for read-write operations, select, distinct, and summarize nodes.
In summary, a Data Table is a database that users can utilize to aggregate data from different sources in Toric. Users can define the structure of individual tables, including column names, data types, and primary key definitions.
Creating a Data Table
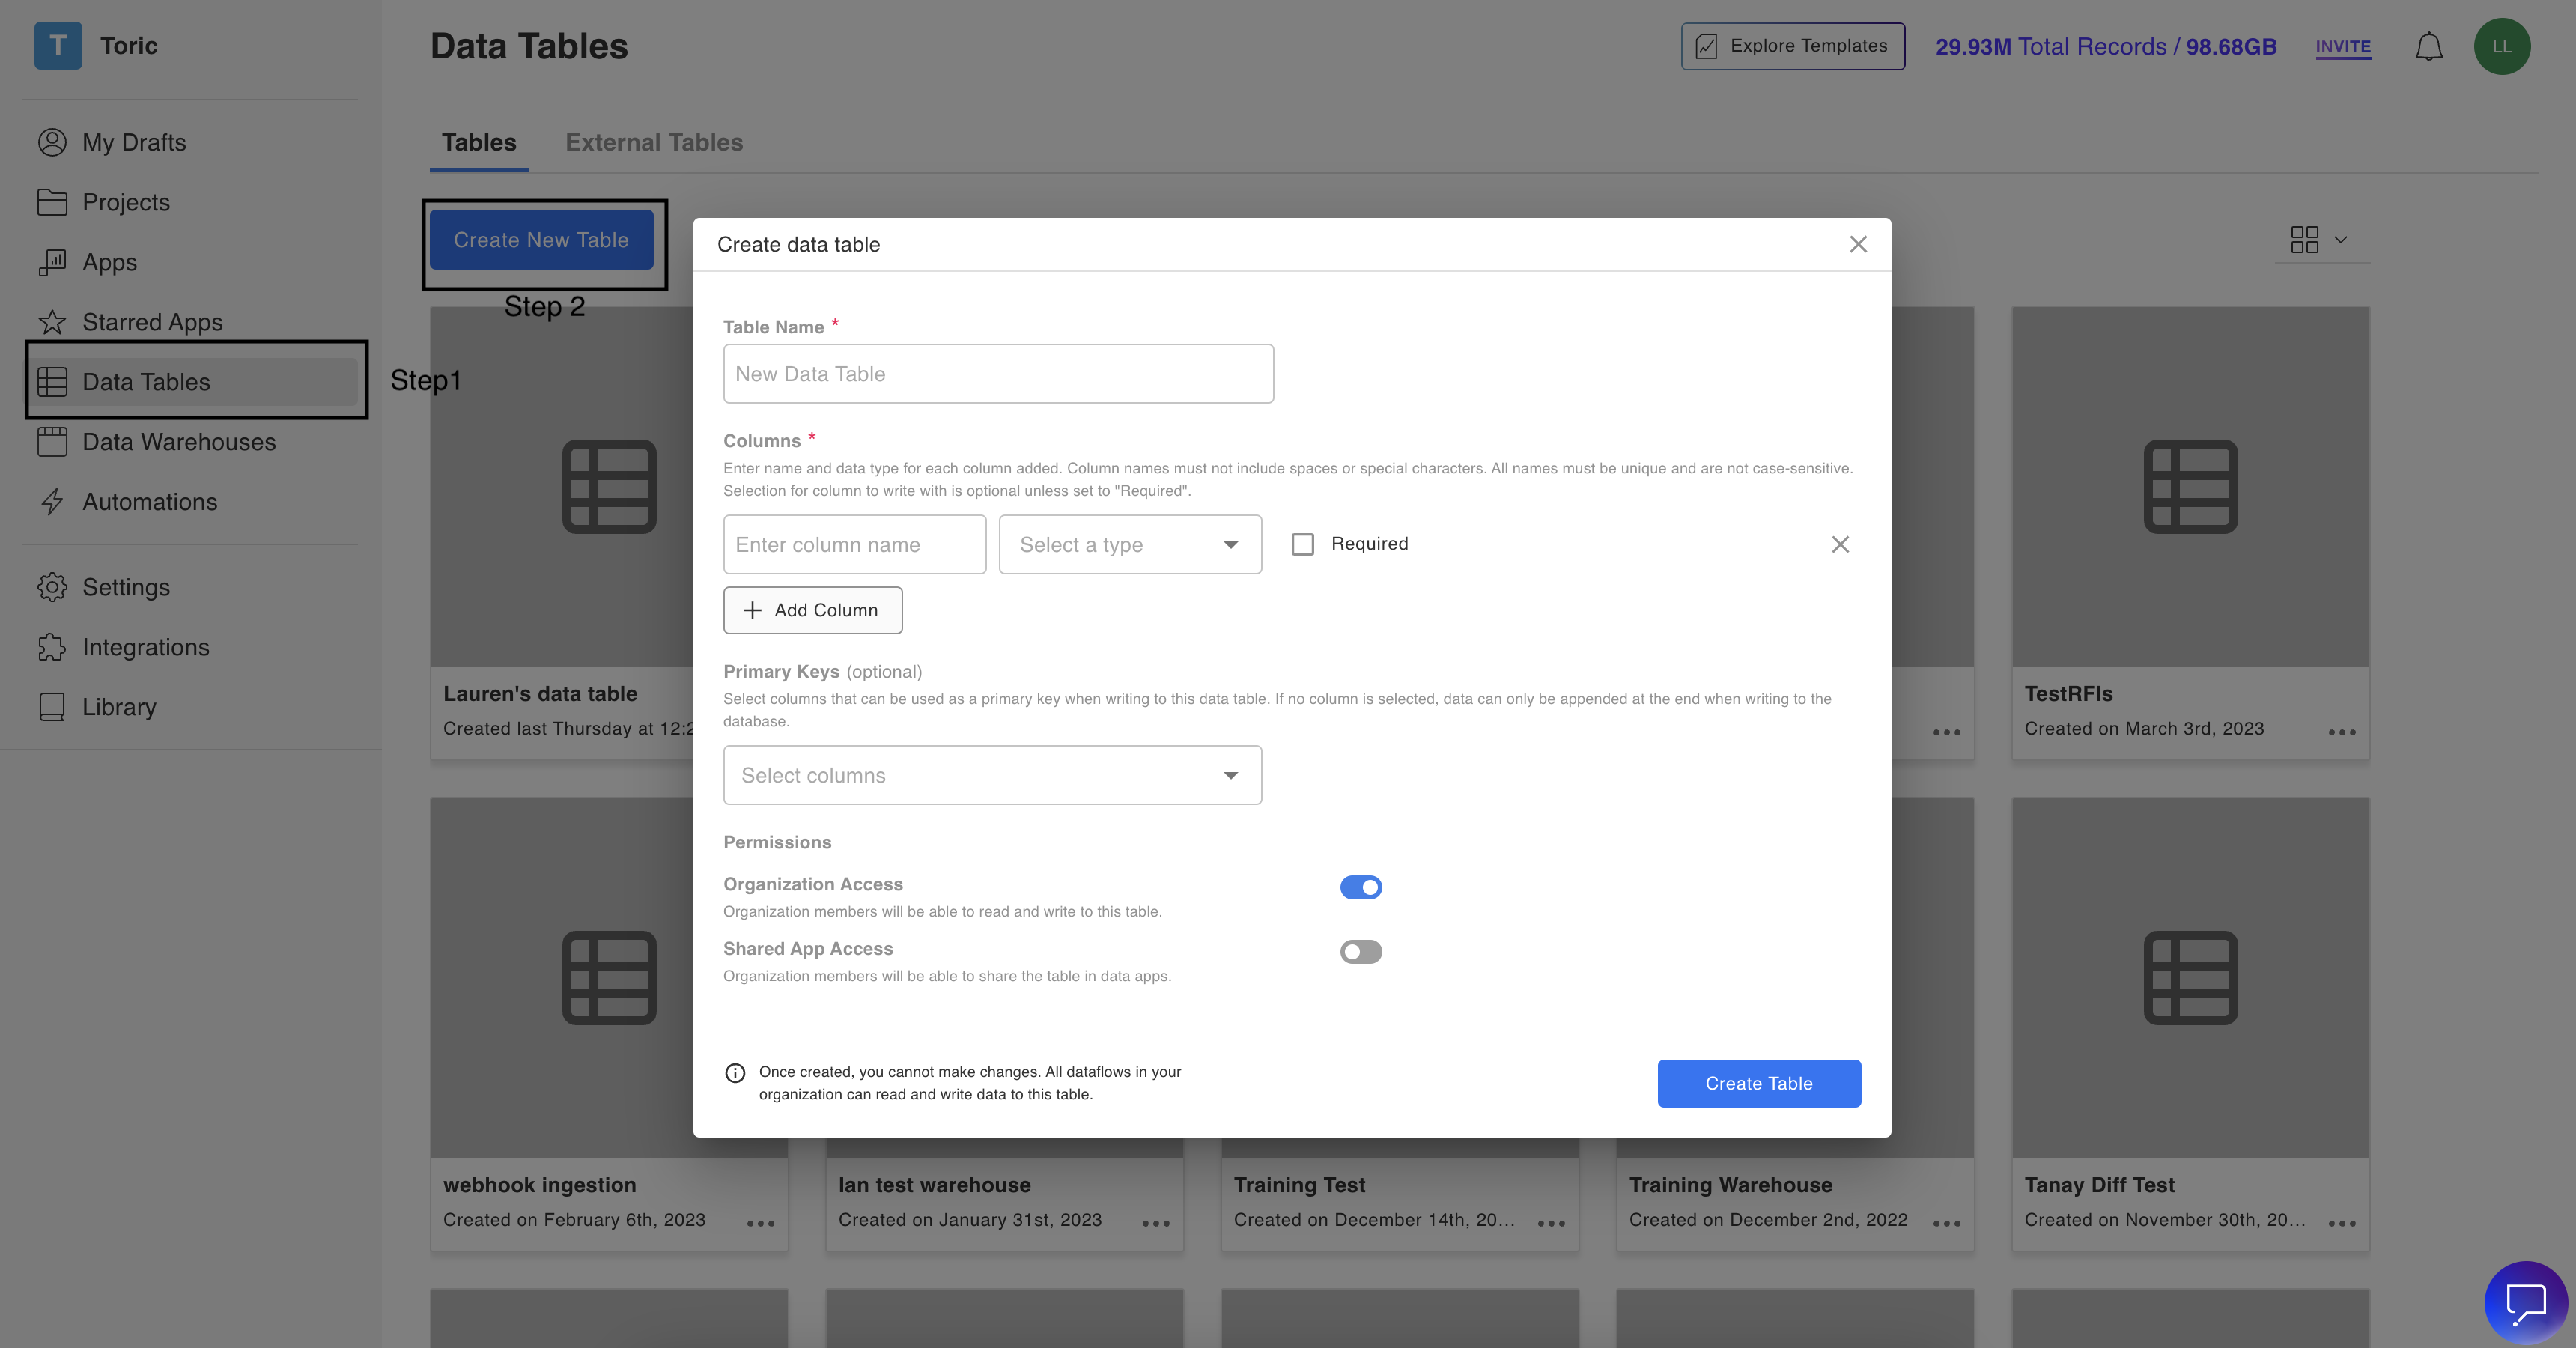
Steps to create a Data Table:
- Log in to your Organization
- Click on “Data Tables” on the left side menu
- Click on Create New Table
- Add a Table Name
- Add the columns you need
- Select Primary Keys
- Select the Permissions desired
- Click on “Create Table”
Why do we need Data Tables?
Data Tables help users combine information into one place, whether that may be from different Projects, different Versions of the same Project, or different type of sources.
Possible use-cases we encounter include:
- Combining metrics/ data across different projects into one space to compare projects against each other
- Combing metrics/data from different versions to trend projects historically
Architecture

Data Types in Data Tables
All Toric Data Tables can be configured to have unique columns with individually assigned data types for each column. These are some of the available data types:
| Data Type |
|---|
| Boolean |
| Currency |
| List |
| Number |
| Text |
| Unit |
| Feet |
| Datetime |
| Model |

Data Tables Structure
Columns
Data Tables must have columns with their corresponding data types assigned on set up. Every column of data that is pushed into a Toric Data Table must have a matching column with the correct data type.
Columns can always be added to any existing Data Table using the Data Table schema.
Finally, any column in the Data Table schema can be selected to be a Required column which means every push to the warehouse must have a corresponding entry for that column.

Primary Keys
Columns provided into the warehouse schema can also, optionally, be selected to be a Primary Key for the warehouse. A primary key helps track entries to the warehouse. Any row that already exists, ie. has a corresponding match on the primary key, will have its value in the warehouse updated. All other rows will be added in, with their own unique primary key.
There cannot be duplicate entries in a primary key column.

Pushing data into Data Tables
Data can be pushed into any available Data Table using the Write to Warehouse node. This node requires the user to select a Destination Data Table, following which columns in the Data Table must be mapped to a column in the input table. Primary keys and required columns in the Data Table cannot remain unmapped.
Once columns are mapped, the data can be written into the Data Table, either by manually selecting Write Now or using the Always Write button which gives the user the ability to automate the writing process. This allows the data to be written to the Data Table each time the flow is execute upstream, which can be triggered using automations.
Querying from Data Tables
Data that has been written to a Data Table can be queried using the Select from Warehouse node. This node requires the user to select the Source Data Table from the dropdown menu. Once the table has been selected, the user can specify the number of rows to query, ranging from 100 to 1,000,000.
The user also has the option to add conditions to the query. These conditions filter the table records based on selected fields, a conditional statement, and a value. The user can use one or multiple conditional statements to filter the data and change "And" to "Or" to include or exclude data according to the given conditions.
Once the limit and filters have been set, clicking on "Run Query" will initiate the process of querying data from the Data Table.
Data Table nodes
There are multiple nodes that can be used in the dataflow to perform operations on Data Tables.
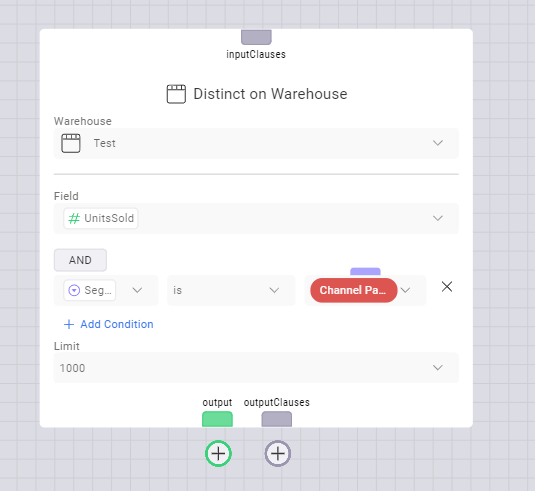
The Distinct on Warehouse node extracts unique values for the selected field from the Data Table. Read more about the Distinct on Warehouse node here.
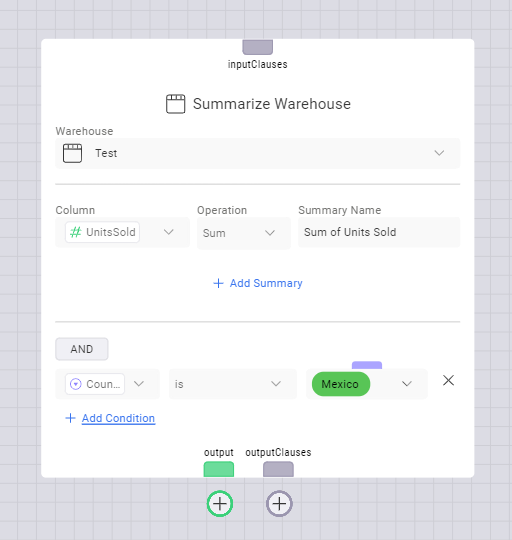
The Summarize Warehouse node extracts summarized values from a Data Table. Read more about the Summarize Warehouse node here.
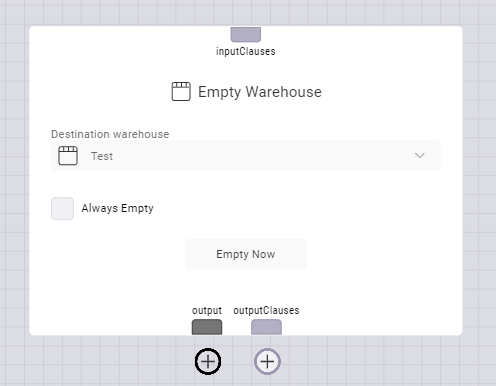
The Empty Warehouse node clears all the data from a Data Table. Read more about the Empty Warehouse node here.
Data Table Limitations
Toric supports a row size of up to 65,535 characters.
This implies a maximum of 52 columns if every cell in every column has a text size of 300 characters.
However, only a very small percentage of datasets ever hit this limit. This is because most datasets contain a variety of different datatypes. And unless every single column contains a large number of text characters, you likely will not be hitting the 65,535 character limit.
What is an External Data Table?
An External Data Table is a table that exists outside of Toric in a data source system such as Snowflake, Microsoft Azure SQL, or Google BigQuery. Just like regular data tables, external tables can be used within flows for read-write operations, as well as select, distinct, and summarize nodes.
Connecting to and Querying from an External Data Table
Step by Step:
- Configure the data source connector for the external table that you want to connect to. For information on configuring specific connectors, see here.
- If you have an existing table in the data source, such as an RFIs table in Snowflake as shown in the video, you can connect to it by clicking on the “Data Tables” tab in the left panel and then selecting “External Tables.”
- Click on “New Connected Table” and enter the following information for the parameters:
- Table Name: You can choose a custom name for the external table that you are connecting to. This table is managed by Toric internally, so you don't need to use the same name as the external connector.
- Application: Choose the connector you want to use. For example, Snowflake, Azure SQL, Google BigQuery, etc.
- Connector: For the “Application” selected in step 3b, choose the connector configuration that you created in Step 1.
- Table: Based on the “Application” and “Connector” selected in steps 3b and 3c, Toric will generate a list of tables available in the application. You can select the table you want to connect to. In the video, I connected to the “Austin_RFI” table from the Snowflake application.
- After connecting to the external table, you can either open an existing dataflow in a project or create a new dataflow in one of the projects to read from or ingest data from that external table.
- In the dataflow:
- Add the "Select from Warehouse" node. For the "Warehouse" parameter in the node, choose the external table you just connected to based on the "Table Name" you set in step 3a.
- For the "Limit" parameter, decide how many rows of data to query from the external table. Start by querying the first 1000 rows from the table. You can also set filtering conditions to query the data based on specific columns and their values.
- Click "Run Query" and the queried data from the external table will populate in the inspector on the right side. You can then perform transformations on the data.
Common Issues with External Tables:
- For external tables with large amounts of data, depending on your server or the external data source system’s server you might experience some delays (typically a few minutes) in being able to see queried data.
Common Issues with External Tables:
When dealing with external tables that contain large amounts of data, you may experience some delays, typically a few minutes, in being able to view queried data. This delay can be attributed to your server or the external data source system's server.


