Automations
Overview
Automations in Toric allow users to execute an action based on a trigger event.
Getting your data is easy with Toric’s Connectors. Read on for a step-by-step guide to configure an automation for Connectors. We’ll explore the general settings to create an automation.
- What are Automations?
- Where Do I Find Automations?
- How Do I Create a New Automation?
What Are Automations?
Automations are actions that are executed based on a trigger event. For example, you can import data when a webhook is triggered by a change.
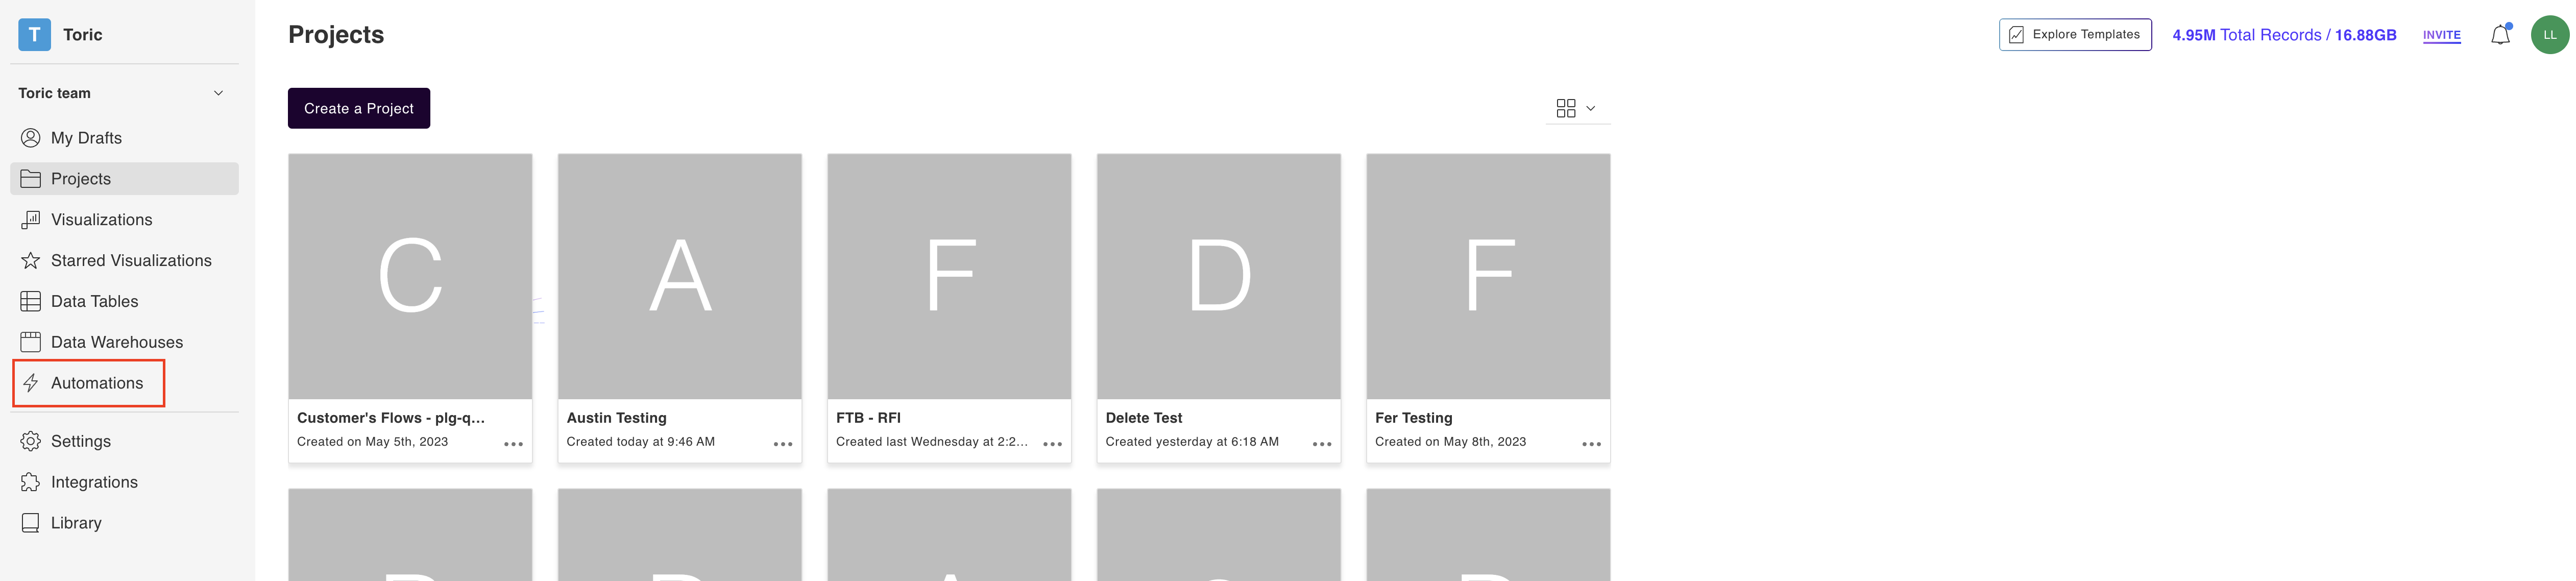
Where Can I Find Automations?
To access automations, click on Automations on the left-hand menu.
How Do I Create An Automation?
We have divided "How to Create an Automation" into two parts in the videos below. Additionally, we have provided written step-by-step instructions below the videos.
Setting up a Data Import Automation - Part I
Setting up a Data Import Automation - Part 2
Configure a Connector
To use Connectors as a source in Automations, you need to create a configuration first. Before moving on to the next step, make sure you have configured your Connector. For an introduction to Connectors, read here.
Create an Automation
Click the purple + Create an automation button to get started. You will be redirected to a new page.
Name and Describe an Automation
In the section, enter a Name and Description for your automation. We suggest giving a unique name that does not match existing automation to avoid confusion within your team.
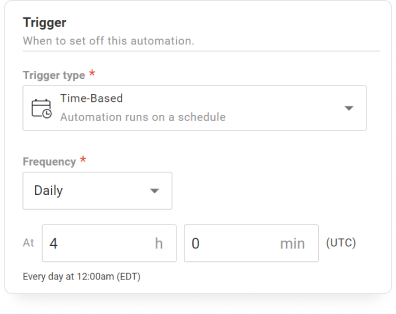
Select a Trigger
Next, you will need to select from one of four Triggers
- Source Update - These trigger is initiated by a source that is updated in a project
- Time-based - This trigger is set to run at a specific time. A time-base trigger can be set to run as frequently as every 15 minutes.
- Manual - This is a manual automation which is executed by clicking on the Run button
- Webhook - This trigger is activated when a webhook is updated.
Select an Action
Select Actions in four easy steps
- Action Type
- Application
- Configuration
- Destination Project
- Source Options
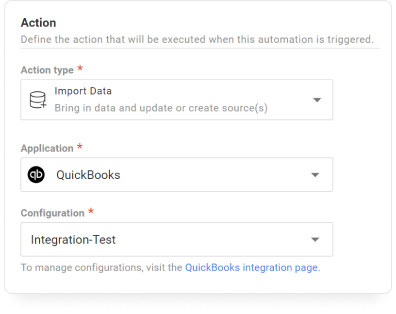
Action type
The options in the Action section will depend on the action selected. Select one of the following options:
- Run Dataflow - Execute a selected dataflow when a trigger is activated.
For Run Dataflow you will need to select a Project and which Dataflow you would like to execute.
- Import Data - Create a source or pull the latest data from a Connector.
For Import Data, you will need to configure a Connector first. Then select the application and the configuration. Next choose the destination project which is where the new data will be sent. Finally select which data you would like to pull from your Connector using the Source Options.
- Configure Webhook - Use an Automation to configure a Procore webhook.
- Export Data - Required for the Run Export Automation node.
Select application
Select the Connector you would like to ingest from.
Select configuration
Select configuration from step 1.
Select destination project
Where you want to execute the action.
Select source options
These options may vary depending on the Connector.
Select Incremental Import (or not)
For certain endpoints (such as Procore or P6 EPPM), you may see an option to toggle on “Incremental Import.”

If you toggle this feature ON, the automation will only import new or updated data every time the automation is run.
For example, if your automation runs every night, and this feature is on, it will only import data that is new or has been updated since the last time the automation ran (which would be the day before).
Using this feature, you can be more efficient and lower any data import costs.
However, certain connections, like Procore, have limitations with this feature. Please see the table below and note the limitations your connector may have:
| Connector | Limitation |
|---|---|
| Procore | Our incremental ingestion feature saves on data import costs by only looking at one key column for every endpoint, such as “updated_at” for endpoints that may be updated multiple times (such as RFIs), or “{endpoint}_id” for endpoints that are usually created once and never updated again (such as Meetings). However, Procore doesn’t always update the “updated_at” field for certain endpoints, even if some data you would pull for the endpoint has changed. For example, if you were to update the “Question” in the RFIs page in Procore, “updated_at” would not be updated, and therefore, the incremental importer would not detect any changes since it only checks for changes in the “updated_at” field. We find that these are unique edge cases, and they only apply to fields that Procore doesn’t deem important enough to even update their “updated_at” field. |
Due to the limitations of certain APIs, you may want to Reconcile your data in case the Incremental Importer missed any data (see Limitations table above).
We are building a Automatic Reconciliation at the moment. But while you wait, you can always manually reconcile your data for any data points the Increment Importer missed by following these steps:
- Manually turn the Incremental Importer OFF,
- Click Update Automation,
- Click Run Once,

- Manually turn the Incremental Importer back ON,
- Click Update Automation
Repeat the above steps once per month to reconcile your data on a monthly basis until our Automatic Reconciliation feature is live.
Or, if you’d prefer, you can simply wait until our Automatic Reconciliation feature is live, which will pick up on any data points the Incremental Importer missed.
Enable Your Automation
Make sure your automation is Disabled while you make changes. Once your changes are complete, click the toggle on the top right to Enable the automation again and let it work.
Run Your First Automation
You could use the Manual option to test an automation action pulls. Once you confirm that your Automation works you could change the type of Trigger to one of the four options in Step 4.
For all Automations other than the manual option, the Automation will run as soon as your toggle to Enable.
Automation History
Check Automation runs from the Automation History tab. Click on an automation, then click on the History tab. Scroll down to find each automation run.
References


