Nodes Overview
1. Nodes Definition and Purpose
In the context of data analytics workspaces, a node typically refers to a processing unit or a step in a data pipeline that performs a specific operation on the data. It takes inputs, and produces outputs.
Nodes can be thought of as building blocks that are used to create complex data analytics workflows. These workflows might involve tasks such as data cleaning, transformation, analysis, modeling, and visualization. Each of these tasks could be represented by one or more nodes in the workflow.
For example, in a data cleaning workflow, a node might be used to remove missing or invalid data, while in a data modeling workflow, a node might be used to train a machine learning model on the cleaned data.
Nodes can be connected together in a workflow to create a data pipeline. The output of one node is often used as the input to the next node in the pipeline. Nodes can be configured with specific parameters or settings, which determine how they process the data.
Overall, nodes are a fundamental component of data analytics workspaces, as they provide a modular and flexible approach to processing and analyzing large volumes of data. Toric's nodes are highly configurable, easily modified, and can be reused across multiple workflows. Toric offers over 100 operations nodes.
2. Add a New Node
2.1 Add Nodes in the Graph Flow Workspace
2.1.1 Adding from the Quick Add
- Access the Quick Add Panel: Locate the Quick Add panel on the left side of the Dataflow interface. It has a plus (+) icon to indicate the option for adding nodes
- Click the plus (+) icon in the Quick add
- Search for a node: A search box will appear, enabling you to explore all available nodes. You can enter keywords related to the functionality you require or the specific node you're looking for
- Add the node: click on it to add it to your workflow. The node will be placed within the canvas
- Configure the node

2.1.2 Adding from the Data Source
- From the Data Source node in the Get Data Import, you can pick between data or sourceMetadata (define the difference)
- Click plus (+) icon
- Search for a node: A search box will appear, enabling you to explore all available nodes. You can enter keywords related to the functionality you require or the specific node you're looking for
- Add the node: click on it to add it to your workflow. The node will be placed within the canvas
2.2 Add Nodes in the Overview Panel Workspace
If you chose the New Flow Workspace experience, follow these steps to add a new node:
- If you haven't created a flow yet, locate the Add Flow button on the right hand side side
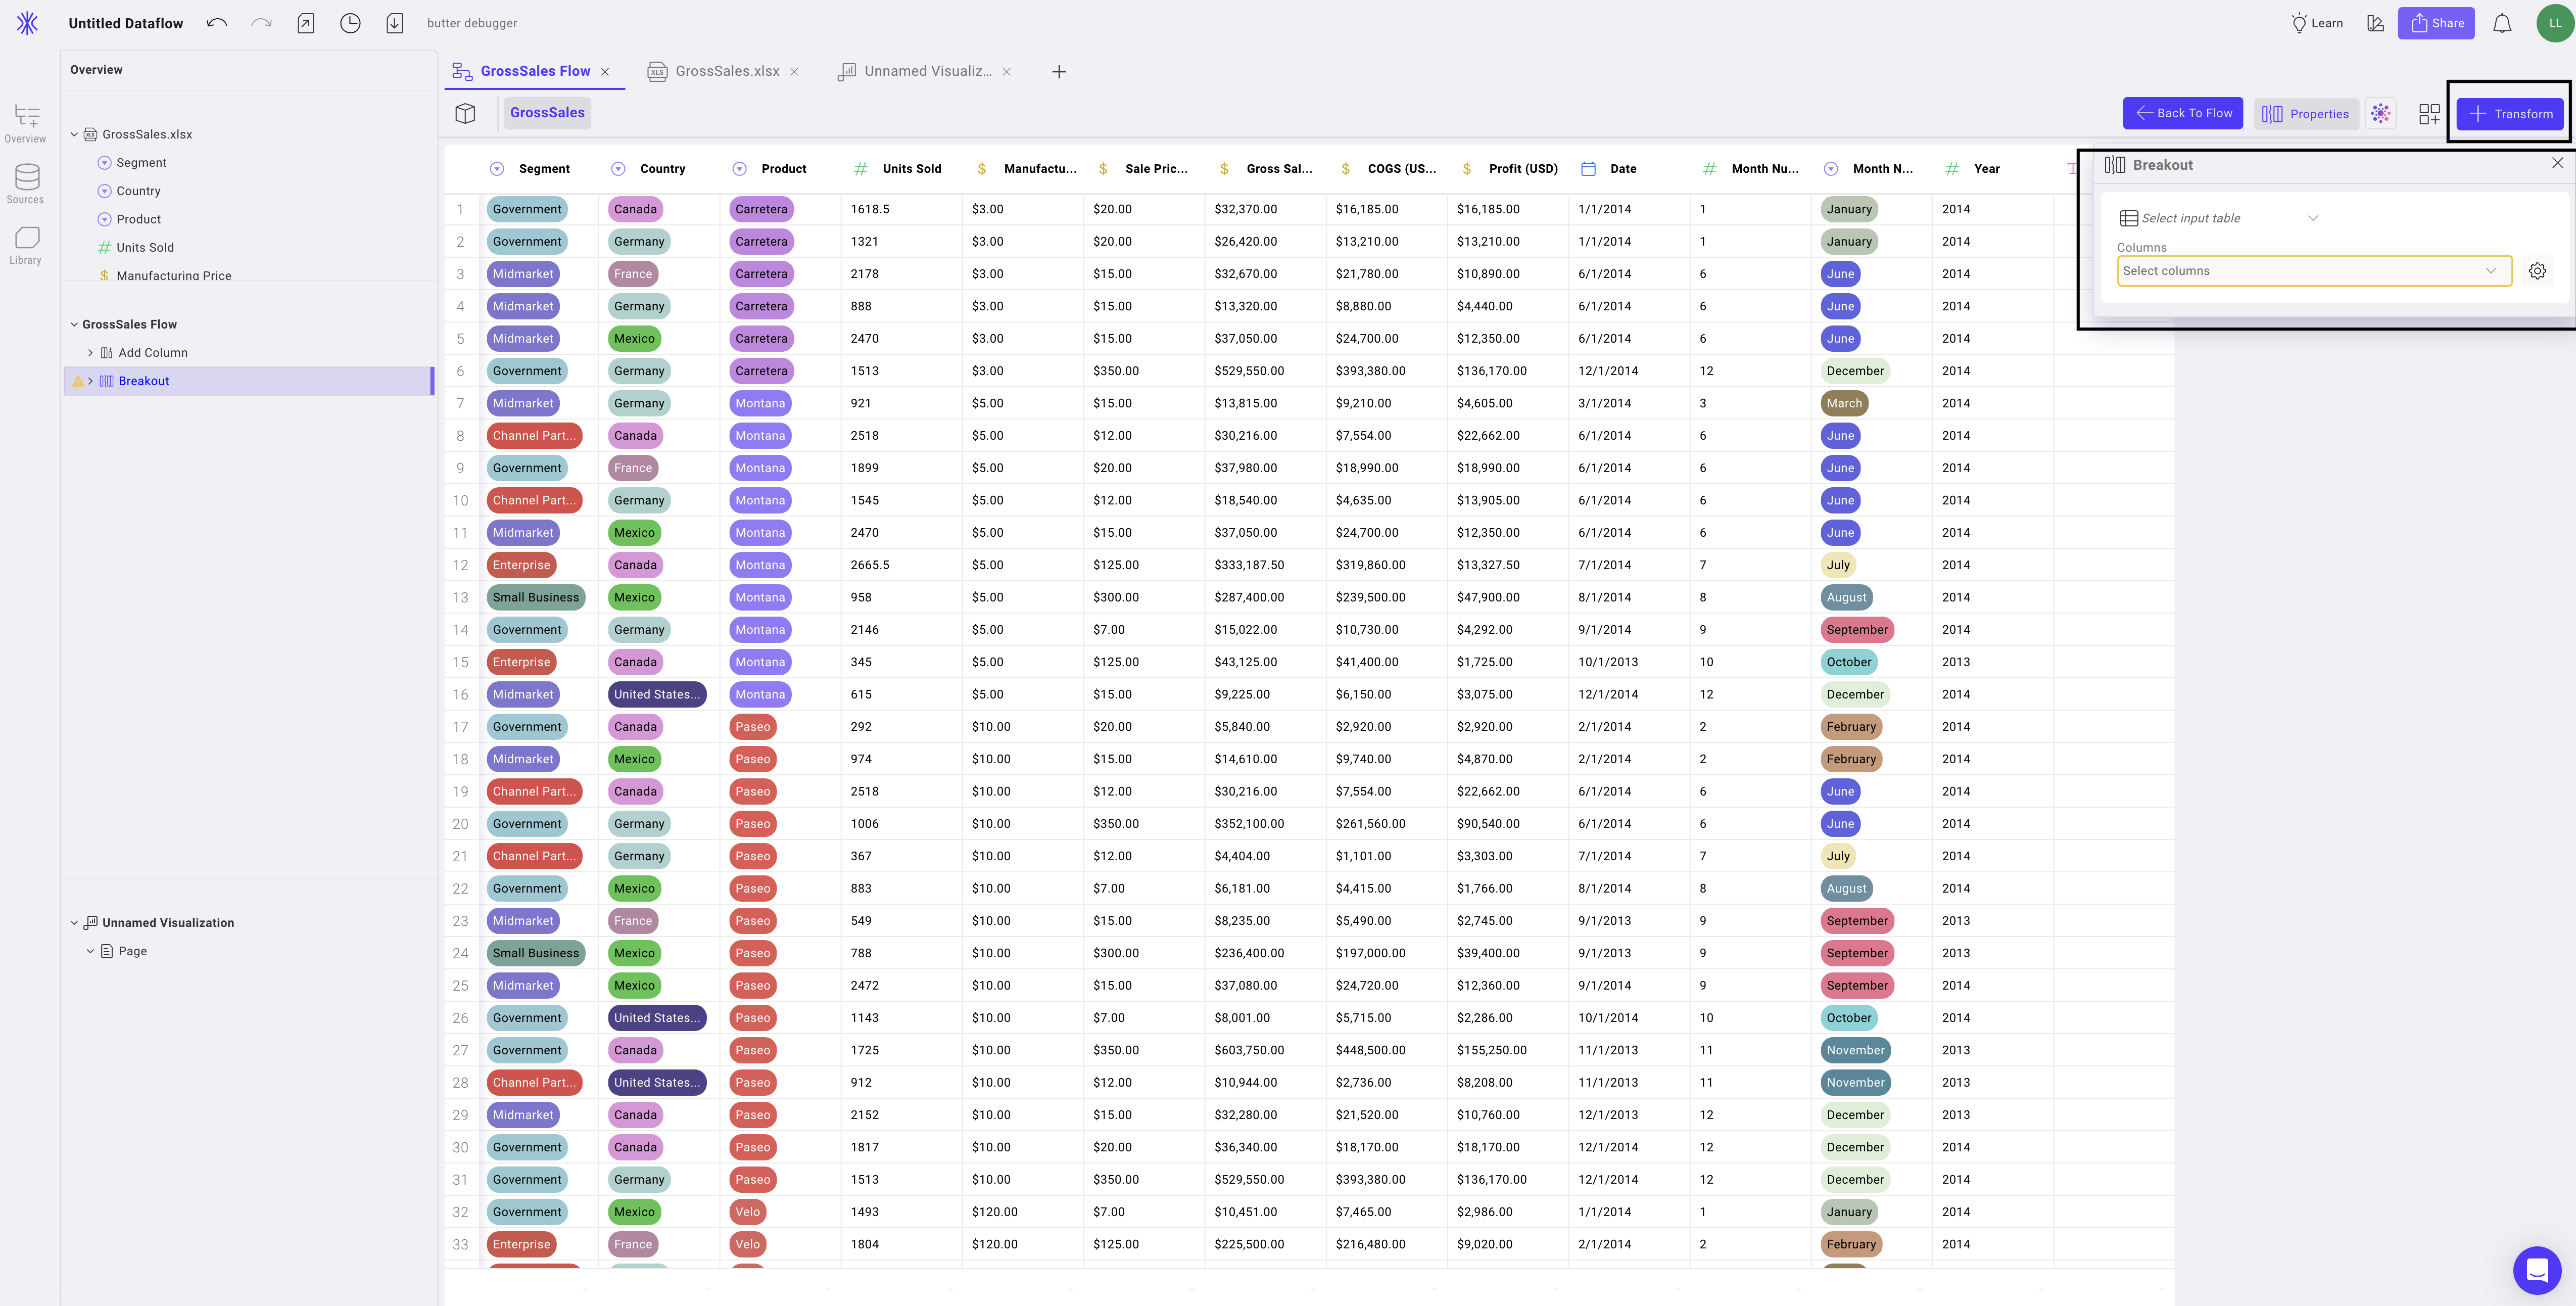
- Click + Transform
- Search for a node: A search box will appear, enabling you to explore all available nodes. You can enter keywords related to the functionality you require or the specific node you're looking for
- Add the node: click on it to add it to your workflow. The node will be placed within the canvas
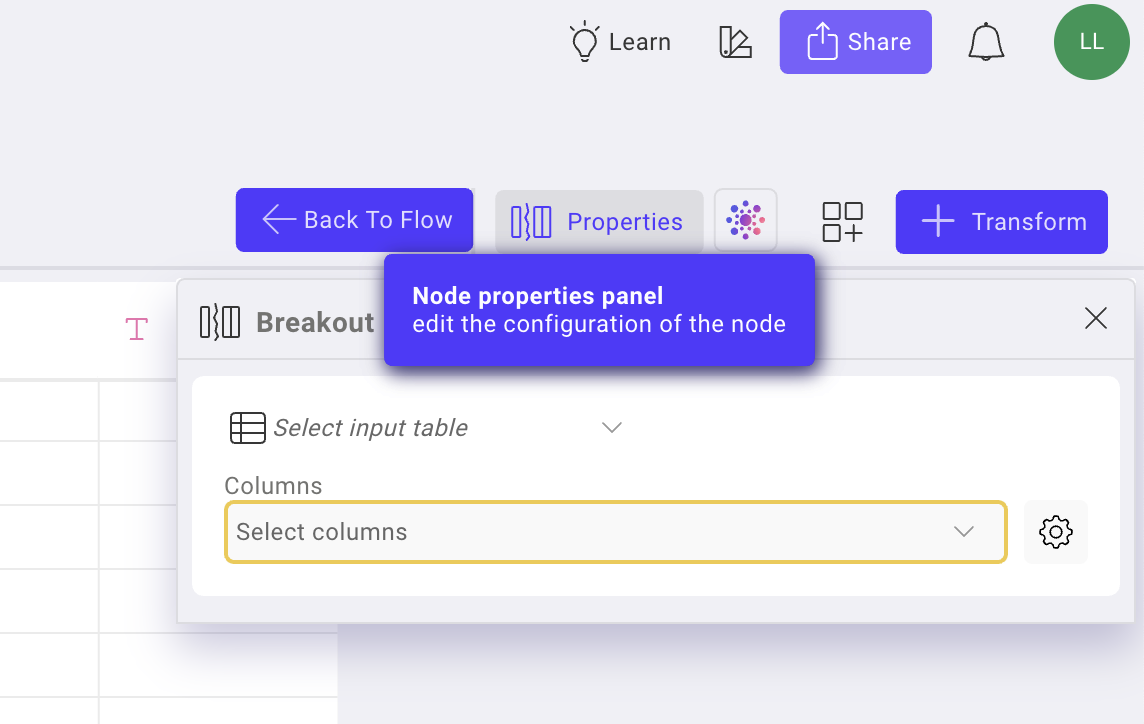
- Configure the node:The configuration panel for the node will appear automatically. Choose the appropriate configuration for your node and the changes will be reflected in the flow.
3. Connect Nodes
Once nodes are added they must be connected to the rest of the workflow.
3.1 Connect Nodes in the Previous Flow Workspace
- Click + from the output of the predecessor node or drag a line from the output of the predecessor to the input of the newly added node
- Search for a node: A search box will appear, enabling you to explore all available nodes. You can enter keywords related to the functionality you require or the specific node you're looking for
- Add the node: click on it to add it to your workflow. The node will be placed within the canvas
- Configure the node
3.2 Connect Nodes in the New Flow Workspace
When you add a new node to the Flow Workspace, it automatically connects to the previous node.
Under Flows in the Overview panel, you can:
- See a list of the nodes you have
- Move them up and down as needed by dragging them to reposition them
- Hover over the node and click on the three dots (…) for other options

4. Nodes Categories
We have organized our extensive collection of over 100 nodes into six distinct categories to enhance usability and efficiency:
- Prepare: These nodes focus on data preparation, including tasks such as data cleaning, formatting, and filtering.
- Transform: The transform category comprises nodes that enable data transformation, manipulation, and enrichment, allowing you to modify and reshape your data.
- Generate: In this category, you will find nodes that facilitate data generation, such as random value generators, synthetic data creators, and sample generators.
- Calculate: The calculate category consists of nodes designed to perform various calculations and mathematical operations on your data, including statistical analysis, aggregations, and mathematical transformations.
- Control Flow: Control flow nodes help in managing the flow of data and control the execution of workflows. They include loops, conditionals, and other constructs for branching and looping logic.
- Automate: These nodes enable automation of repetitive tasks and workflows, providing functionalities like triggering actions and writing to with external warehouses.
To explore the diverse range of nodes we offer and gain a comprehensive understanding of how they can assist you, simply navigate through the side-menu.
5. Important Notes on Nodes
- If you encounter a purple refresh icon at the top right of the source node in a dataflow, click it to update the source node and ensure proper functionality.


