PlanGrid
PlanGrid is a field-first tool that allows users to access plan sheets, documents, and models in a mobile or desktop environment. It includes the ability to perform task tracking and fillable forms for inspections and checklists from the field. PlanGrid users can access their project data including Tasks, RFIs, submittals, projects, and stay up to date with project tasks, deadlines, and the person responsible for such tasks in an easy-to-understand way.
With the PlanGrid connector, Toric users can:
- Process, filter, enrich, clean, and join PlanGrid data with other sources to efficiently track project and business progress
- Create automations to ingest PlanGrid data on a time or change basis, and achieve real-time data in dashboards and reports
- Group RFI’s by schedule, cost, and person, or filter data like tasks by deadlines to prioritize decisions accordingly
Data Access
| Channels | Incremental Ingestion | Read |
|---|---|---|
| Tasks | Available | Available |
| RFIs | Available | Available |
| Submittals | Available | Available |
| Sheets | Available | Available |
| Users | Available | Available |
Don't see the endpoints you are looking for? We're always happy to make new endpoints available. Request an endpoint here!
Configuration guide
Setup time: 30 Seconds
Requirements
- PlanGrid Subscription
- Web Browser (Safari, Chrome, Edge, Firefox)
1. Navigate to the PlanGrid Connector
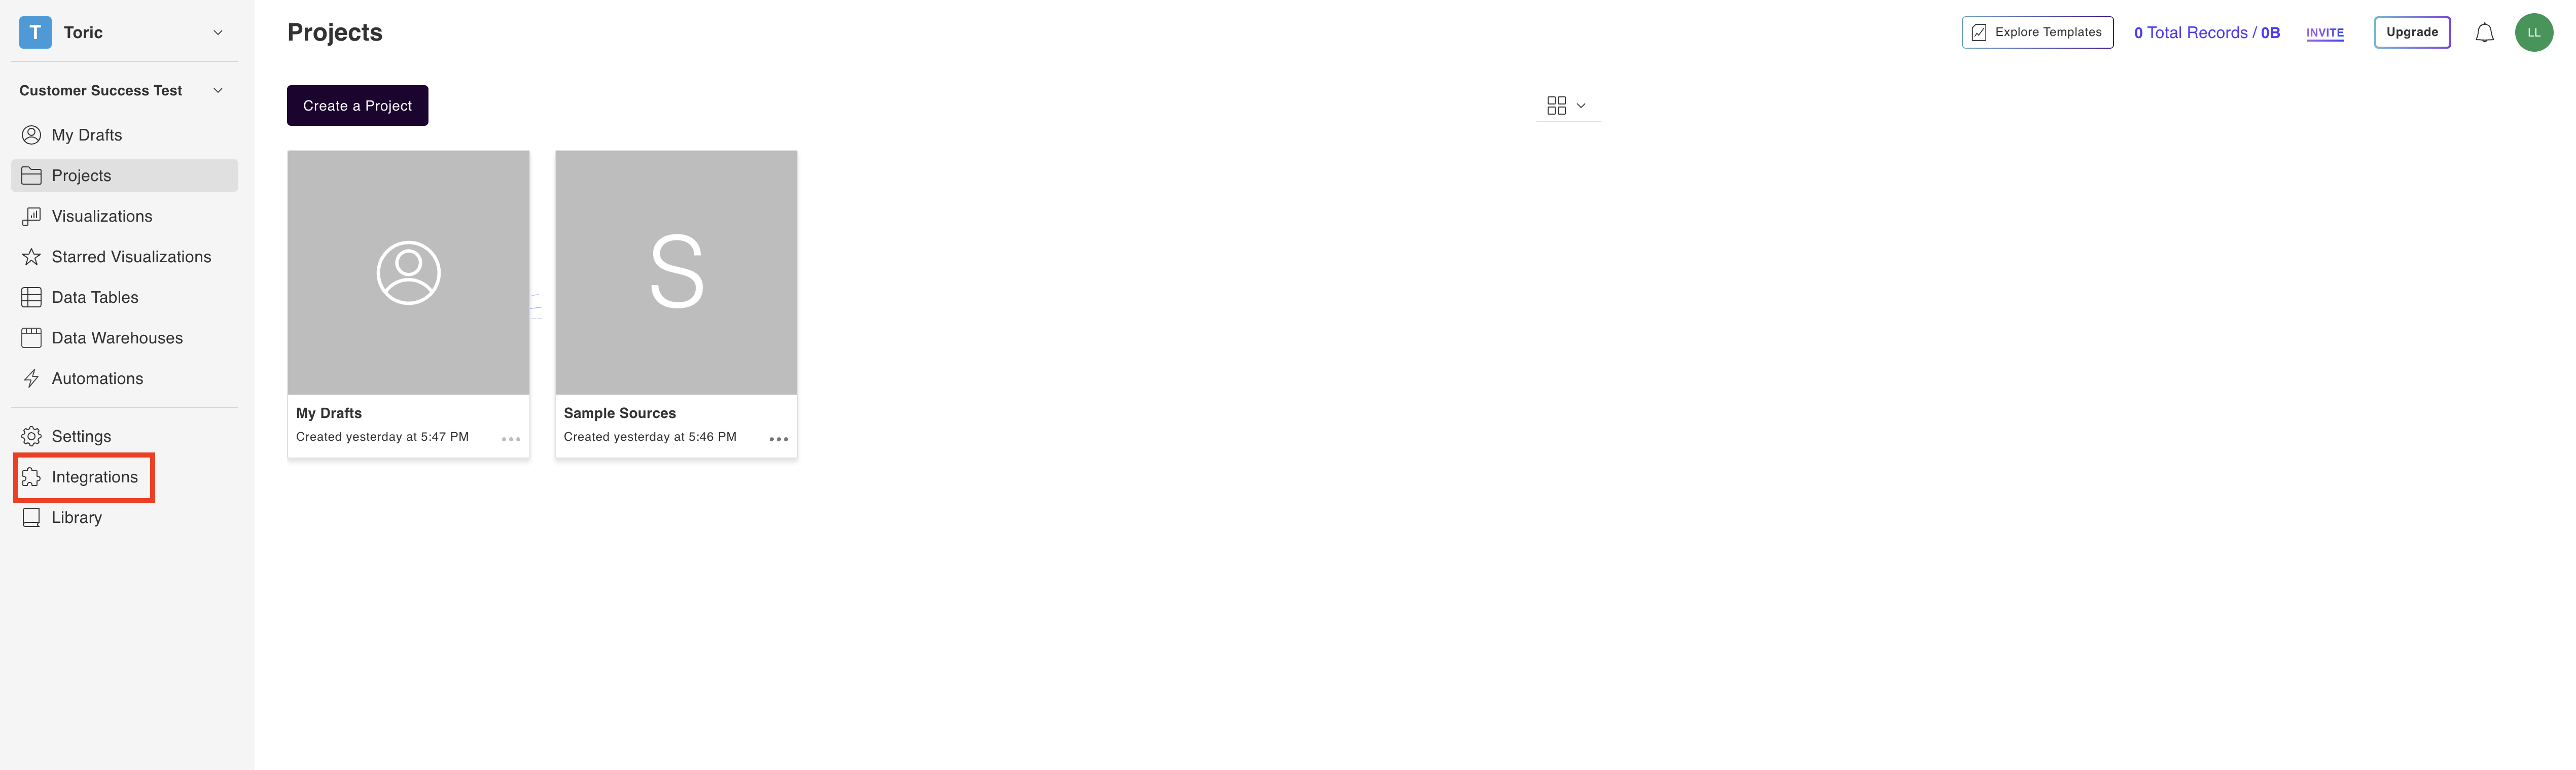
1.1 To find connectors in Toric, you must be signed in to your account. On the left side panel of your Workflow, click on "Integrations".
2. Select the PlanGrid Connector
Under the “Construction & BIM” header, navigate to the PlanGrid thumbnail and click on “Setup Integration”

3. Click on “Create a Connection”

4. Fill in the required information
Enter a Configuration Name and login to PlanGrid using your PlanGrid credentials.

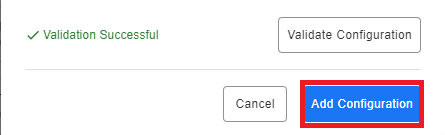
5. Click on Validate Configuration
Now that you have all Configuration details filled in, click on Validate Configuration.
If the information entered is valid, a Validation Successful message will appear.
- Invalid fields will be highlighted in red and a successful validation will show in green.

6. Click “Add Configuration” to finalize your configuration
Integration Capabilities Supported by the Connector
Toric ingests data from PlanGrid via APIs, and we currently support data access to 5 endpoints including Tasks, RFIs, and Submittals. Please reference the data access table above for a full list.
Related articles
https://www.toric.com/support/configure-plangrid-connector
https://www.toric.com/blog/autodesk-and-toric-integration-guide
Questions?
We're very happy to help answer any questions you may have. Contact support here or send us an email at support@toric.com.


