All About Run Export Automation Node

Overview
Run Export Automation lets you leverage automations to export data from a Dataflow.
1. Configure Your Destination
2. Add Run Export Automation in Your Dataflow
3. Run Export Automation Options
1. Configure Your Destination
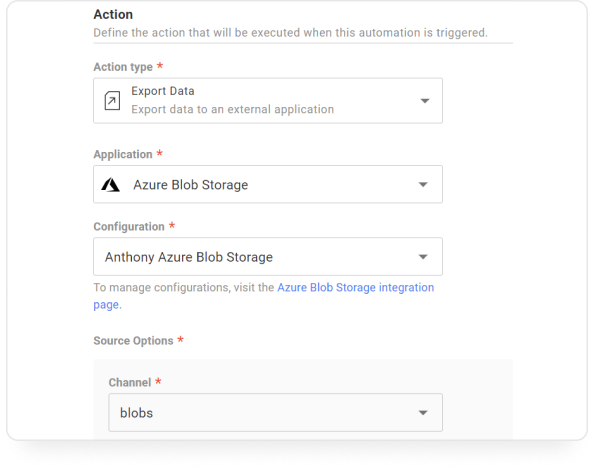
Before using this node in a Dataflow, you must configure an Export Data Automation. We currently support exporting data to Azure Blob Storage and Google Drive.
Note: This Automation must be created before using the Run Export Automation node in a Dataflow.
2. Add Run Export Automation in Your Dataflow
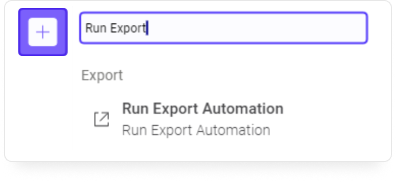
Add Run Export Automation to any node in your Dataflow. Select any node and use the Transform (+) button to open the list of options to select Run Export Automation. You could work with the node in the Dataflow tab or use the Properties panel.
3. Run Export Automation Options
The Run Export Automation node is broken up into four (4) main sections. Read along to see how easy it is to write new data files to your Azure or Google Drive account.
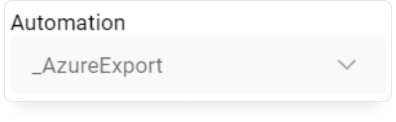
2.1 Select Automation
The first option lets you choose an Automation (step 1). In this case, we're choosing to export to Microsoft Azure.
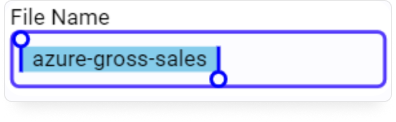
2.2 File Name
The second field is a text box that allows you to type a customer file name.
Note: This file name will appear in Azure after the export.
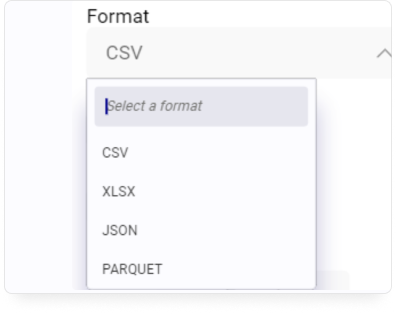
2.3 Select File Format
Select one of the following four (4) file formats.
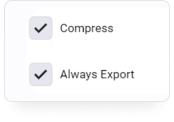
2.4 Additional Options
Check Compress to minimize the file size and Always Export if you want the data to export anytime the Automation is activated.
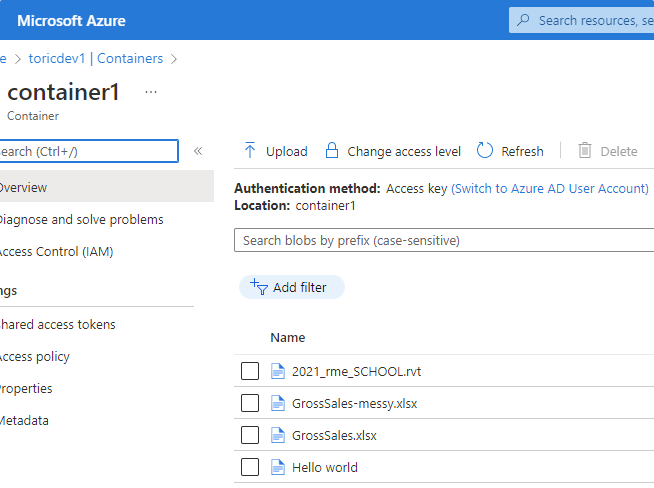
Here's what it looks like when Excel data is written to Microsoft Azure from Toric.
Related articles
Next Steps
Other Topics
- Configure Azure Blob Storage
- Configure Google Drive
- Automations for Integrations
- Intro To Integrations
- FAQ About Integrations


